
1Getting started: accounts and portals
Learning objectives
- Explain what the my portal, the organizer portal and the event portal are for, who uses each and why they are separate, and move from one to another.
- Use the user menu to find My Profile, My Account and My teams, and switch the interface to English. Explain where that choice applies (the my portal, the organizer portal and the signed-in event portal pages, on every device) and where it does not (the event's public page).
- Create your own organizer team, and explain what its first status, Requested, allows (creating events) and what it does not allow (selling) until run.events approves the team.
- Create a training event with the event creation wizard, and find its data afterwards on the event home and in Event setup.
- Check whether an event is ready for Go live, and explain why Go live alone does not let an event sell tickets.
- Show where attendees buy tickets (
/checkoutand the ticket widget) and manage them (/tickets) in the event portal, and name what an event needs before these pages sell. - Explain what Event Identity and Event Home Settings change on the event's public page, and that Event Identity saves every change at once.
Concepts
One person, one account
Every person has one run.events account. The account is identified by its notification email address: run.events sends all notifications and invitations to that address, and no two accounts share it.
Sign-in has no password. You sign in with a code sent to your notification email address, or with a social or Microsoft account. The email code finds your account by the notification address, so after you change that address, only the new address signs you in; the old address starts a new sign-up.
The account has one profile, and a new profile is private. Matchmaking suggestions, connection search and sponsor lead matching in later modules work only with public profiles. The profile also stores your preferred interface language.
Three portals, one application
run.events shows you three portals. They are parts of one application; the first part of the host name decides which portal opens.
| Portal | Address | What it is for | Who gets in |
|---|---|---|---|
| My portal | my.runevents.net |
You as a person: the dashboard with your role cards, your profile, your account and your team memberships | Anyone who is signed in; no role is needed |
| Organizer portal | o.runevents.net/{organizer} |
The work area of one organizer team and its events | Members of that organizer team; each area needs its own permission (module 2) |
| Event portal | e.runevents.net/{event} |
One event, as attendees, speakers and sponsors see it | The root page is public in every event status; /tickets, /invoices, /sponsor and /speakers need sign-in; /checkout works signed in and signed out |
The portals are separate because their audiences and access rules differ: personal, team membership with permissions, and public. The event portal also carries the event's own branding (colours, logo, browser tab icon and title), offers only the event's languages, and runs the event's own custom scripts on its signed-in pages.
The sponsor portal and the speaker portal are areas of the event portal: /{event}/sponsor and /{event}/speakers. They are taught in modules 6, 8, 9 and 23. Smart Hub and EIC are separate applications (Days 4 and 5).
The portals link to each other:
- On My Dashboard, the Organizer role card leads to the event in the organizer portal, the Attendee card to the event's
/ticketspage and the Sponsor card to its/sponsorpage. - A team card under My teams opens that organizer team in the organizer portal.
- The event portal's own user menu leads back to the my portal with My profile and My run.events dashboard.
The user menu and the interface language
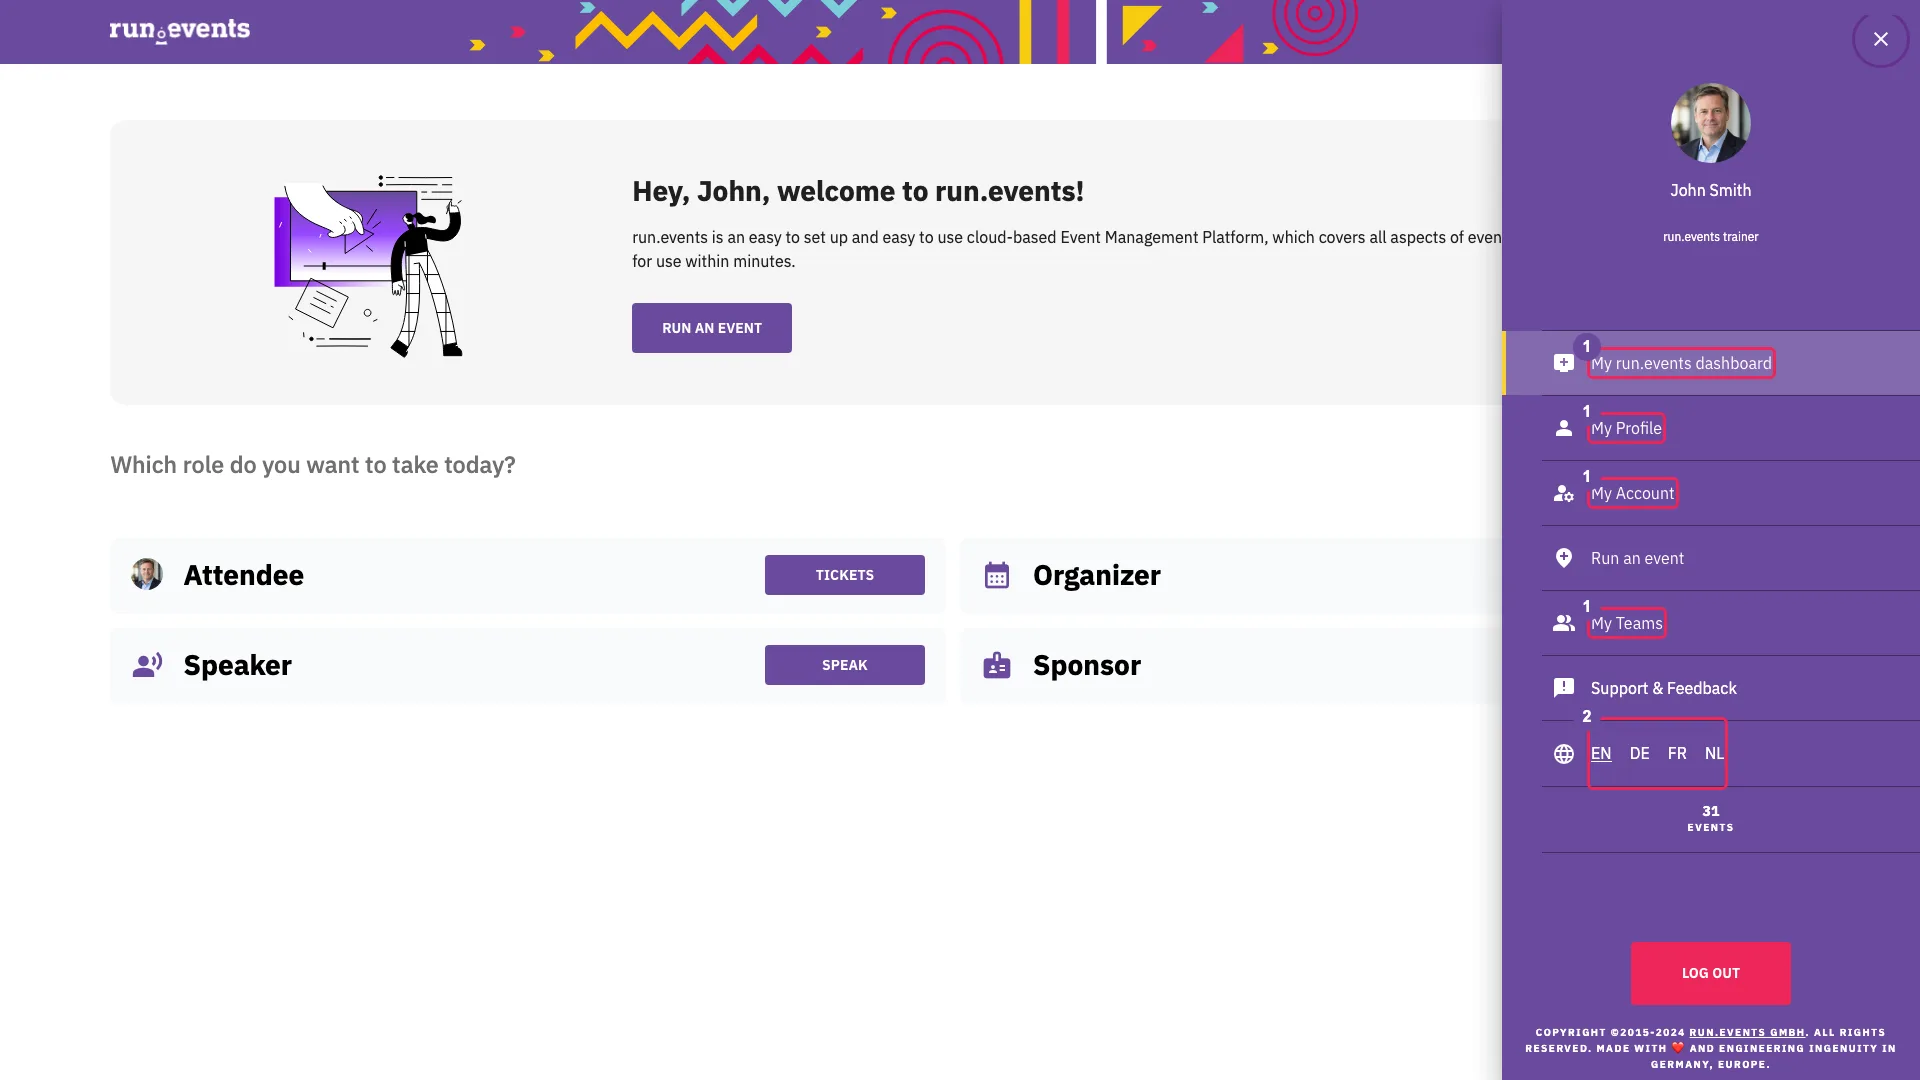
The my portal and the organizer portal share one side menu, the user menu. Its items, from top to bottom, are My Dashboard, My Profile, My Account, Organize an event, My teams, Give Feedback, the language switch with the language codes, the Events counter and Log out. Above the items the menu shows your profile photo, full name and tagline and, while your profile is private, PRIVATE PROFILE. Events counts the events in which you have any of the four roles (attendee, organizer, speaker, sponsor), including past events and drafts. In the organizer portal, the menu's links open the my portal. The event portal has its own user menu (walkthrough step 11), and EIC shows the same items in a flyout (Day 5).
Selecting a language code in the user menu switches the interface at once and saves the language to your profile as your preferred language. Where that choice applies:
| Where | Which language is shown |
|---|---|
My portal, organizer portal and the signed-in event portal pages (/tickets, /invoices, /sponsor, /speakers, and /checkout when signed in) |
Your profile language, on every browser and device, as soon as your profile has loaded |
| The event's public root page and its sections | The language set by the link, else the language last used in this browser for the event portal, else English. The profile language is not read. Signed in, the header language menu switches the page and also saves your profile language; it offers only languages that are both interface languages and languages of the event |
| The checkout, signed out | Its own header language menu, offered to everyone. It changes only this browser's language. If the current language is not one of the event's languages, the checkout switches to the event's default language |
When you signed up, the language you chose on the sign-in page became your profile language. Later sign-ins do not change it.
Organizer teams and their status
Access to the organizer portal comes from membership in an organizer team. There are two ways into a team: you create one (this module), or you accept an invitation to one (module 2). Invitations go to your notification email address, and Team invitations under My teams lists them while they are open.
My teams → Create a new organizer team opens a wizard of three steps and a confirmation:
- Registration details: the legal name, which also becomes the team's name and its address in the organizer portal (
o.runevents.net/{organizer}); the registered address with its country; and the team's default time zone. - Registration and tax details: EU VAT ID, registration authority, CEO or registered agent, tax number and registration number. All are optional in the wizard. They become the seller data on the team's documents (module 3).
- Last but not the least: an optional logo and the run.events legal documents for organizer teams, which you accept here.
- Request submitted: the confirmation.
Nothing is saved before Submit. Submit creates the team:
- you become its representative (marked with a star, module 2) and hold the Admin role;
- the address becomes the team's physical address, which the event's Contact us page shows;
- your acceptance of the legal documents is stored for this team, so no legal dialog opens when you first open the team;
- run.events receives a request to check the new team.
Creating a team needs no mobile phone number. The country cannot be changed later: it decides which payment providers the team can use (module 3).
The organizer's status decides whether it may create events and sell tickets:
| Status | Create events | Sell tickets |
|---|---|---|
| Requested | yes | no |
| Approved | yes | yes |
| Approved, Private | no | yes |
A new team starts as Requested, and only run.events changes the status. The wizard's confirmation says that run.events checks every new team and that events can be created from then on. In fact a Requested team can create events at once; only selling waits for the approval.
The organizer dashboard offers Run an event only to members who may create events (module 2), and only while the team's status allows creating events.
The event and how it is created
The event creation wizard saves nothing until its final button. Then it creates:
- a Draft event, not publicly listed;
- the event's slug, the
{event}part of every event address. It is derived from the title and cannot be changed anywhere; - the event's default tax, from the wizard's payment data;
- you as the event's Event Manager;
- the event's standard settings.
The time zone list holds time zone names such as "Europe/Berlin", not cities or countries. A value is accepted only when it is picked from the list.
The currency list shows the symbol and code of each currency, for example "EUR (EUR)"; the name appears only once an entry is picked. The whole list shows before you type. Typing filters the currency names in lower case by the text as typed, so only lower-case text finds entries: type "euro", not "EUR" or "Euro".
The organizer portal has no function to delete or duplicate an event. An event leaves the organizer dashboard after its end date.
The event languages chosen in the wizard decide which languages the event portal header and the checkout offer.
Event status and selling
An event has one of these statuses: Draft, Published, Finished, Cancelled, Publish requested, Forbidden, Appeal requested, Maintenance, Demo and Test.
An event can sell tickets only when all three of these hold:
- the event status is Published or Demo;
- the organizer status is Approved or Approved, Private;
- the event has a default tax.
When the event cannot sell, the ticket widget lists nothing, /checkout shows "THIS EVENT IS NOT SELLING TICKETS", the root page shows no Manage Tickets, and signed-out visitors see no Buy Tickets.
Go live is an organizer action on a Draft event. It only files a request to move the event to Publish requested, a status that cannot sell. run.events handles the request, and the status changes only when run.events sets it.
Every item of the Event actions menu is a request of the same kind, filed through the same dialog. The menu lists only what an organizer may start from the current status: Go live from Draft; Published go demo and Cancel event from Published; Published requested go demo from Publish requested; Back to draft from Demo. These texts are English in every interface language.
The Go live dialog checks these conditions:
- a venue, unless the event is marked online;
- an end date in the future;
- at least one ticket type or add-on with a future end date;
- for paid events, a tax rate and a payment method.
If any condition is not met, the dialog lists the reasons and offers only No.
The event portal pages
The root page shows a hero with the event's name, location and dates and Buy Tickets or Manage Tickets, a left navigation and the content.
- Event Home Settings chooses the sections. Info and Contact us show whenever they are selected there, even without content, and both are selected by default. FAQ, Speakers, Sessions, Agenda and Sponsors show only when they are selected and the event has such content.
- Contact us shows the organizer's name and address and the event's support address. It shows only when the organizer has a physical address; otherwise the page is blank.
- The branding comes from Event Identity.
/tickets is self-service for the ticket holder:
- assign a ticket, configure it for someone else, unassign it or withdraw an invitation;
- personalize a ticket, choose options, buy add-ons;
- print a page with a QR code (there is no PDF ticket), see invoices, pay and buy more tickets.
On the ticket card, an assigned ticket shows the assignee's name and, where allowed, Unassign ticket; an unassigned ticket shows Assign ticket. Cancel Ticket and Print ticket are items of the card's … menu. Cancel Ticket creates a request that the organizer decides. With print-at-home badges active, Print-At-Home takes the place of Print ticket, and a print icon appears on the card.
/checkout is a sequence of steps: ticket selection, buyer type, buyer details, email confirmation (signed-out buyers only) and payment method (paid carts only). A buyer whose email address is unknown gets a new run.events account through the six-digit email code, so every buyer can use /tickets later.
The ticket widget is an element, <runevents-tickets>, that the organizer embeds on their own website. Its checkout button opens the run.events checkout in a new tab, with the chosen tickets in the cart and any voucher and UTM parameters passed on.
What shapes the event's public page
Two cards of the event configuration area shape the public page: Event Identity and Event Home Settings.
Event Identity (page title Logo and Identity) holds:
- the logo: shown in the event portal header and in the menu panel of the root page, and used as the browser tab icon on the signed-in event pages and on the checkout;
- the event header: the background picture of the root page's hero;
- the splash picture: the background of the run.events sign-in page when a visitor signs in from the event's
/checkout,/ticketsor speaker pages; - Primary Color: the colour of the event portal header, the menu panel and the accents. The public root page uses it as its only colour; without it, the default purple applies;
- Secondary Color: used on the signed-in event portal pages, for example the sponsor dashboard;
- Default email address for the event: the sender address of the event's emails when no other sender is chosen; without one, the organizer's default sender applies. The list offers the organizer's sender addresses, which are set up under Integrations (module 2).
Every change on Event Identity is saved at once; the page has no Save button. While the event has no logo or no primary colour, the Event Identity card is red and the task list shows "Set your event logo and color".
Event Home Settings is a side panel with four groups:
- Menu: the sections the root page's left navigation offers;
- Home page: the blocks of the Event Home page, among them the short description, the call-for-speakers and dashboard buttons, the featured speakers and the agenda;
- Featured sponsors: one checkbox per sponsorship label of the event;
- Included FAQs: which questions the FAQ section shows, offered once the event has FAQs.
Until the first Save, every item is ticked. Changes apply only with Save. A ticked section still needs content: FAQ, Speakers, Sessions, Agenda and Sponsors show only when the event has such content, while Info and Contact us show whenever they are ticked. The item names are English in every interface language.
Guided walkthrough
The walkthrough follows the path of a new organizer: from the personal area to your own organizer team, to a new event, and to the pages the event's attendees see.
- 1Open the user menu
On any page of the my portal (
my.runevents.net), select your photo or the person icon at the top right. On small screens, select the menu icon.The menu lists My Dashboard, My Profile, My Account, Organize an event, My teams, Give Feedback, the language codes, the Events counter and Log out. While your profile is private, a PRIVATE PROFILE button appears above the items.
The menu is your personal area, and the organizer portal shows the same menu. Events is a counter, not a link: it counts your events in all roles, including drafts and past events. Give Feedback opens the run.events community site in a new tab.
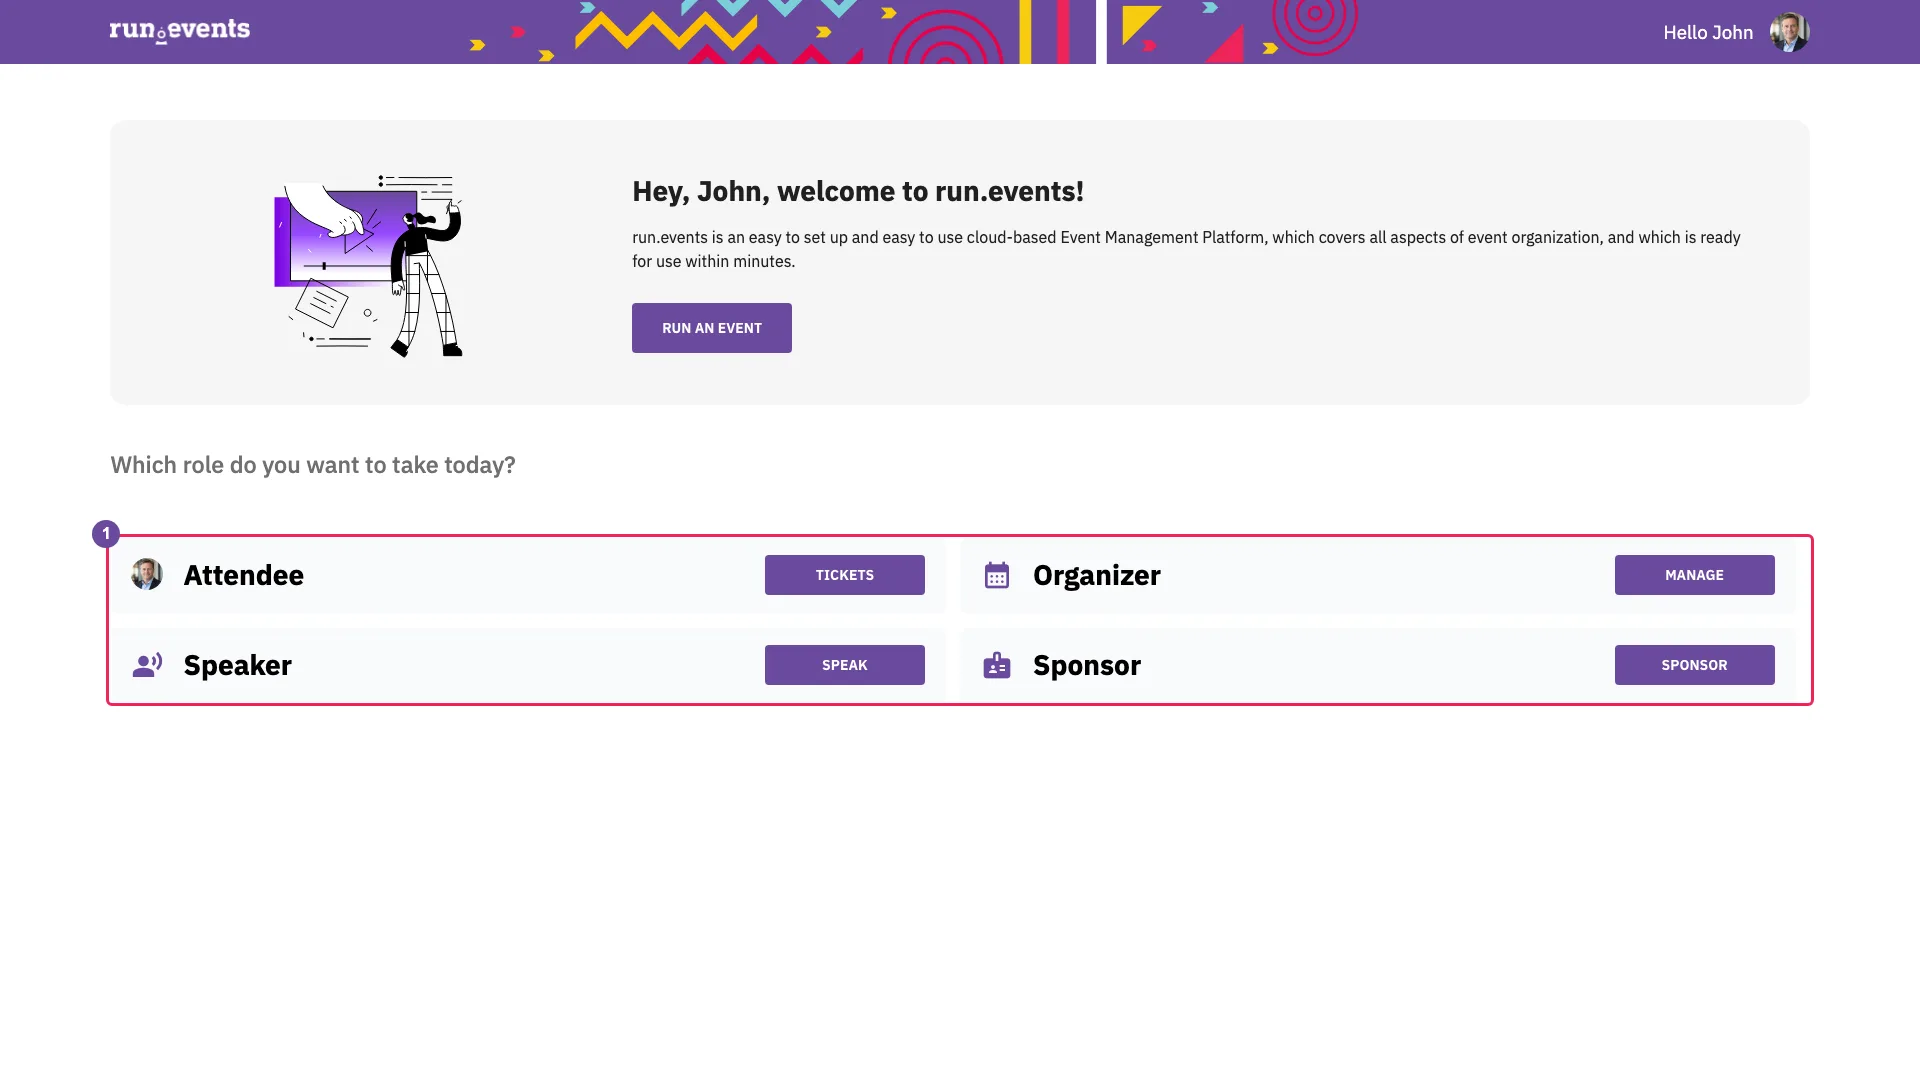
The user menu My Dashboard shows one role card for each role in which you have an event: Attendee (Tickets), Organizer (Manage), Speaker (Speak) and Sponsor. The role cards lead into the organizer portal and the event portal.
My Dashboard - 2Switch the interface to English
In the user menu, select EN. The labels change at once.
The choice is saved to your profile. The my portal, the organizer portal and the signed-in event portal pages (
/tickets,/invoices, the sponsor and speaker areas, and/checkoutwhen signed in) follow it on every browser and device.The event's public page does not follow your profile. It keeps the language last used in that browser, or the one set by a link. Change it with the language code and globe icon in its header, which are offered only when you are signed in and only with the languages the event uses; there, the choice also saves your profile language. The checkout has the same header menu for signed-out buyers too, but it changes only that browser's language.
Your profile language was set once, by the language you chose on the sign-in page when you signed up. This handbook and its screenshots use the English labels.
- 3My Profile and My Account
In the user menu, select My Profile (
my.runevents.net/edit-profile). Look at the badge Public profile or Private profile, and at the edit icons: each opens the same flyout, My profile. In the flyout, the checkbox My profile is public and visible for everyone is off by default. A public profile is the precondition for the matchmaking and connection features of later modules.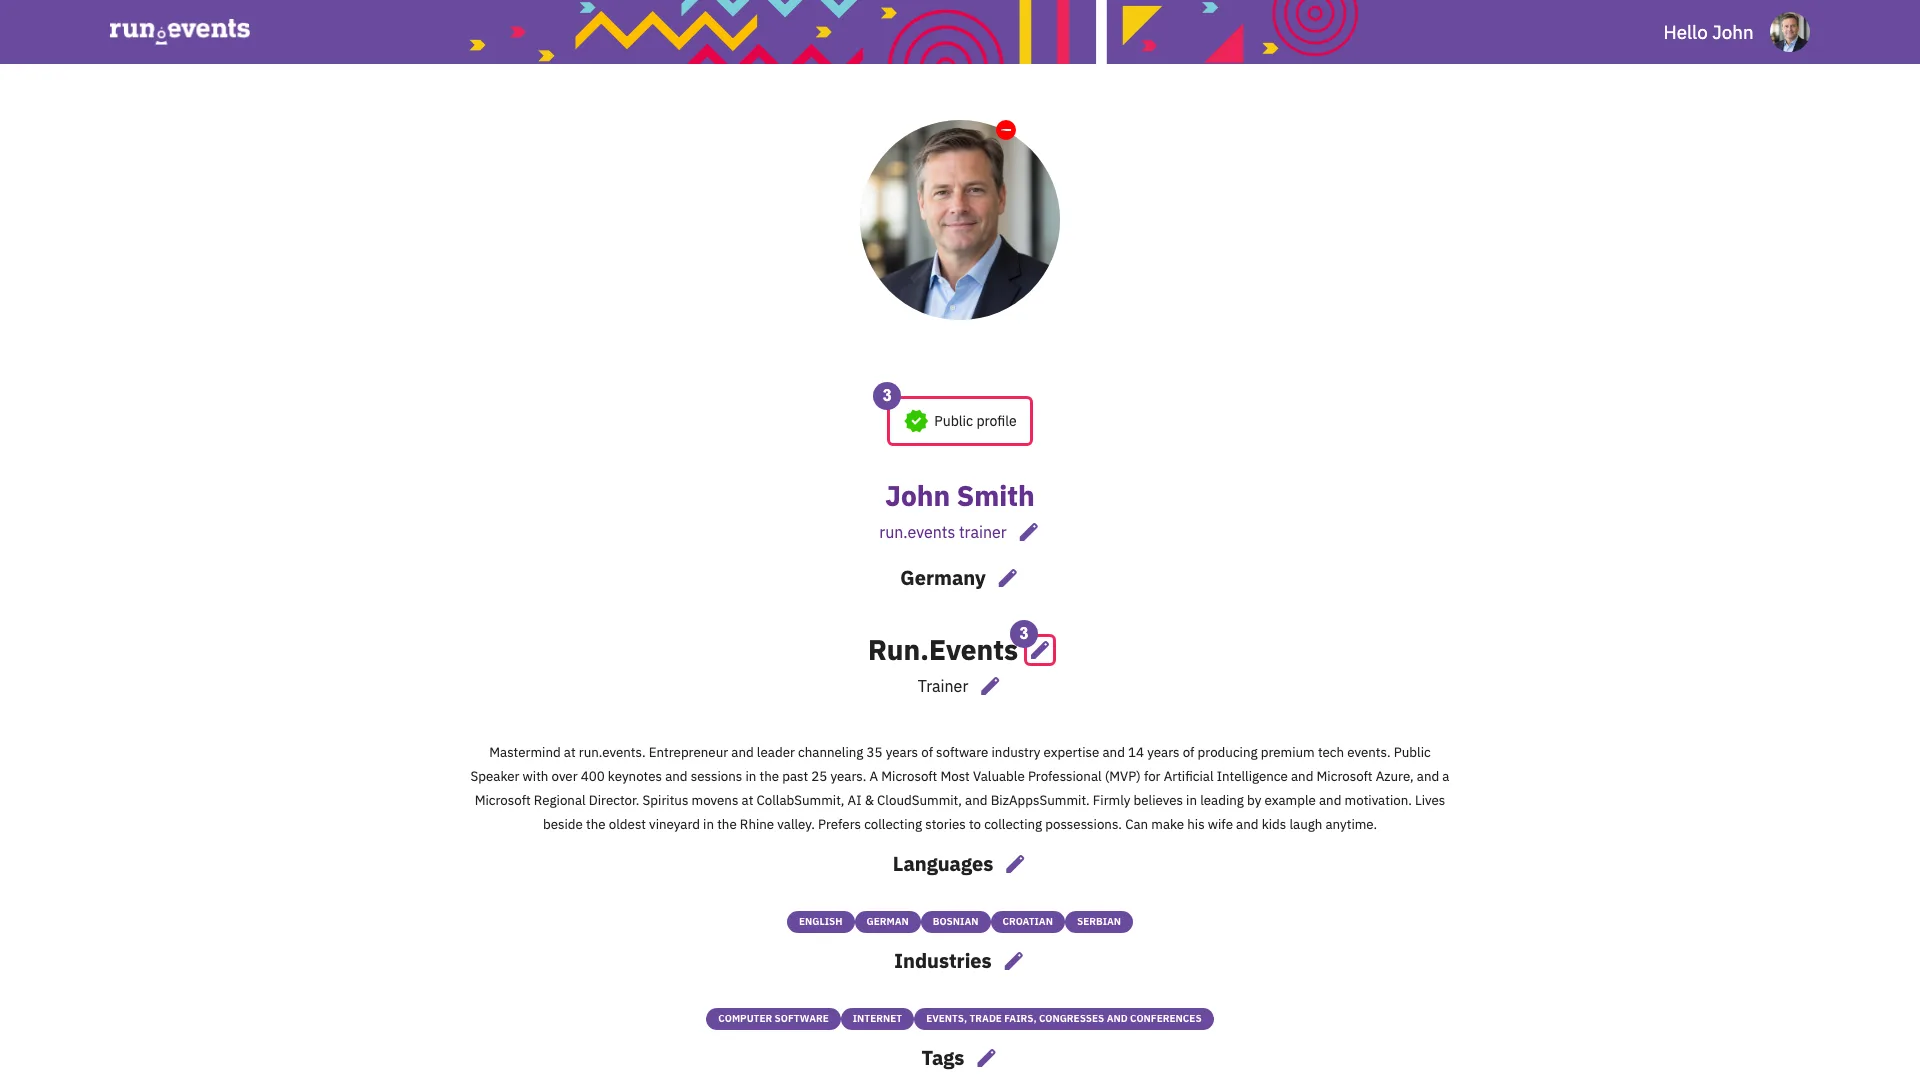
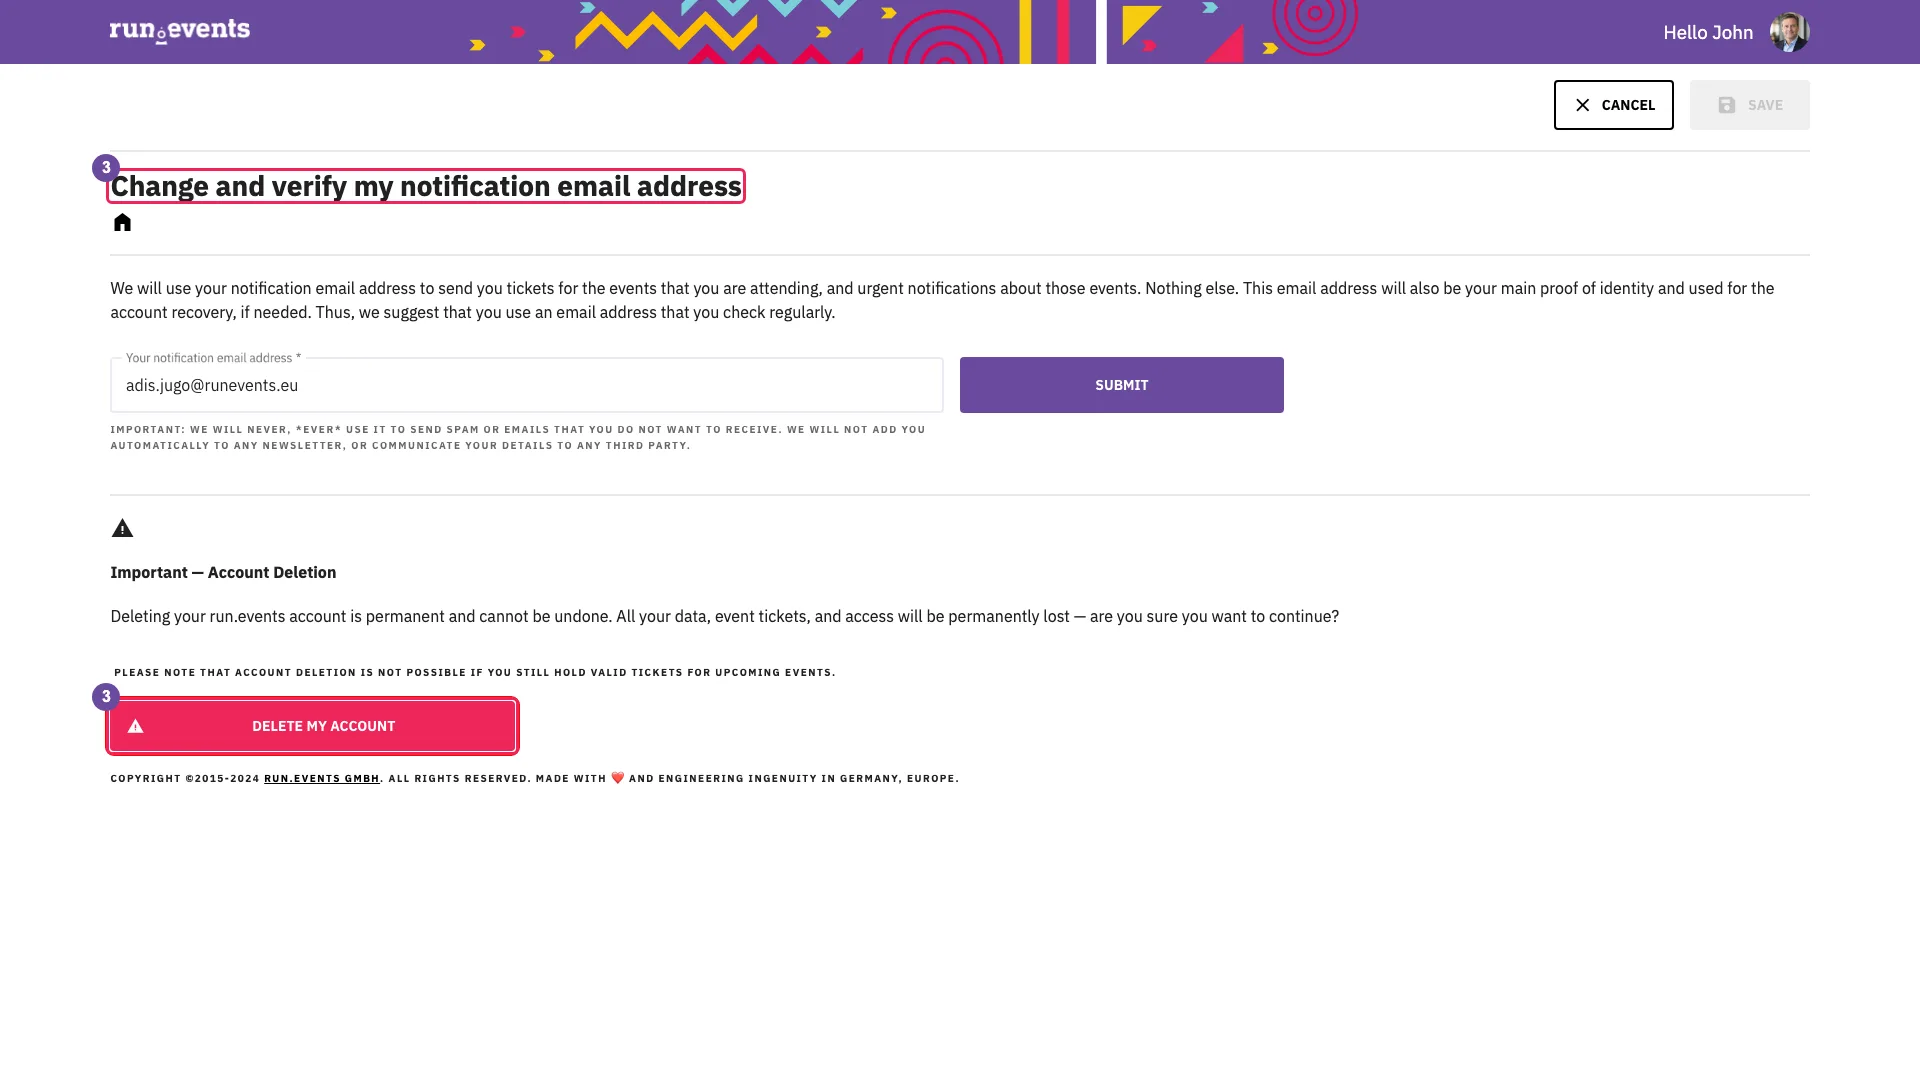
My Profile Then select My Account (
my.runevents.net/email). It holds Change and verify my notification email address, with the field Notification email address and Submit, and the block Important — Account Deletion with Delete my account.Changing the notification email address sends a six-digit code to the new address, and Save is enabled only after the code for exactly that address is confirmed. From then on, only the new address signs you in. Delete my account files a request that run.events processes; nothing is deleted at once. There is no password to change.
My Account - 4My teams: your organizer teams, and creating one
In the user menu, select My teams (
my.runevents.net/edit-profile/organizer-teams). Look at:- the heading My organizer teams, with one card per team you belong to, showing its name, town and country. A team card opens that organizer team in the organizer portal;
- Create a new organizer team, with the card "Create a completely new event organizer for organizing paid events.";
- Join an existing organizer team;
- Team invitations: the open invitations to your notification email address, each with Accept and Decline (module 2).
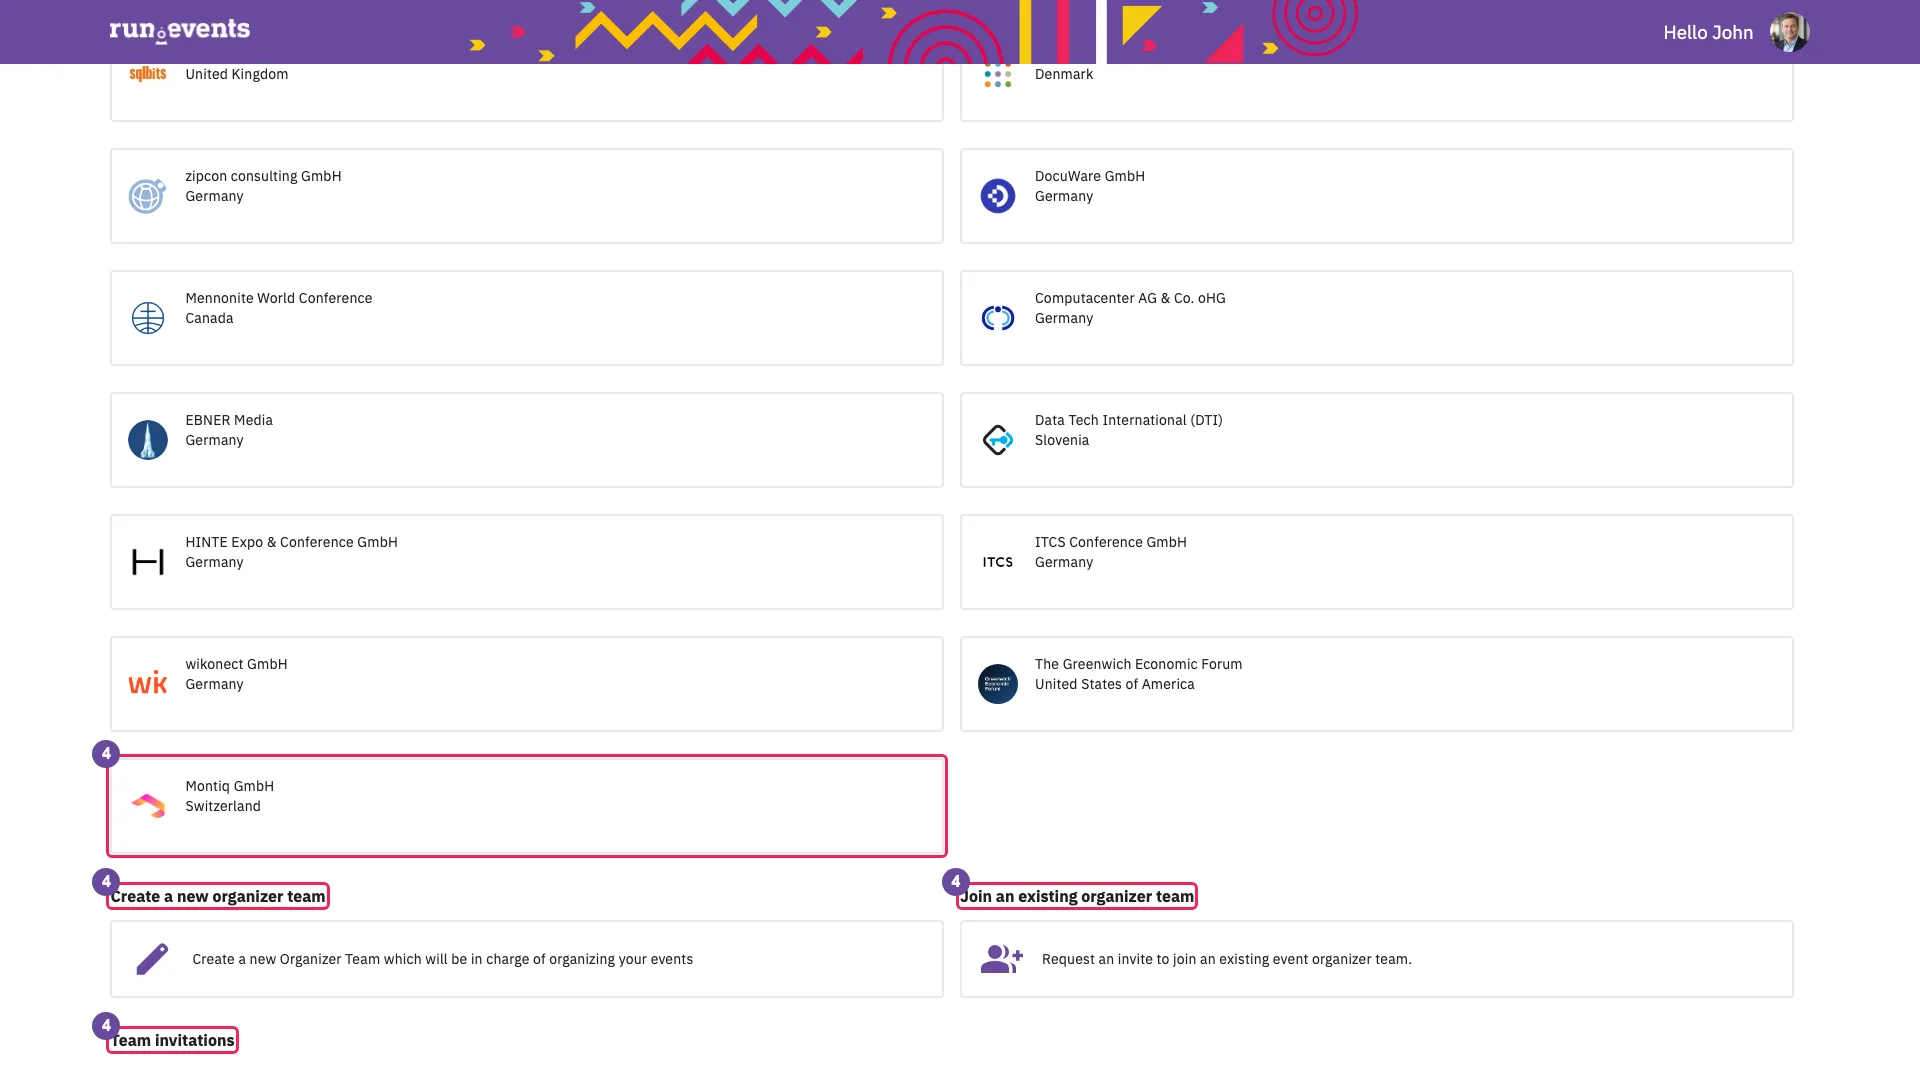
My teams Select the card under Create a new organizer team. The wizard Create an organizer team opens:
- Registration details: Legal name as registered with Check if already existing, Address line 1, Address line 2, Town, Postal Code, the province field, Country, and What is a default time zone for your event. Like the time zone field of the event wizard (step 6), it accepts only an entry picked from the list. Next stays disabled until the required fields are filled.
- Registration and tax details: the switch We have European Union VAT ID Number (off), Registration authority, CEO / Registered Agent, TAX Number and Registration number. Next is always enabled here.
- Last but not the least: an optional logo and, under Terms and Conditions, the run.events legal documents for organizer teams. Each title opens its document; mandatory documents carry an asterisk, and Submit stays disabled until every mandatory one is ticked.
- Request submitted, with Close, which opens the new team's organizer dashboard.
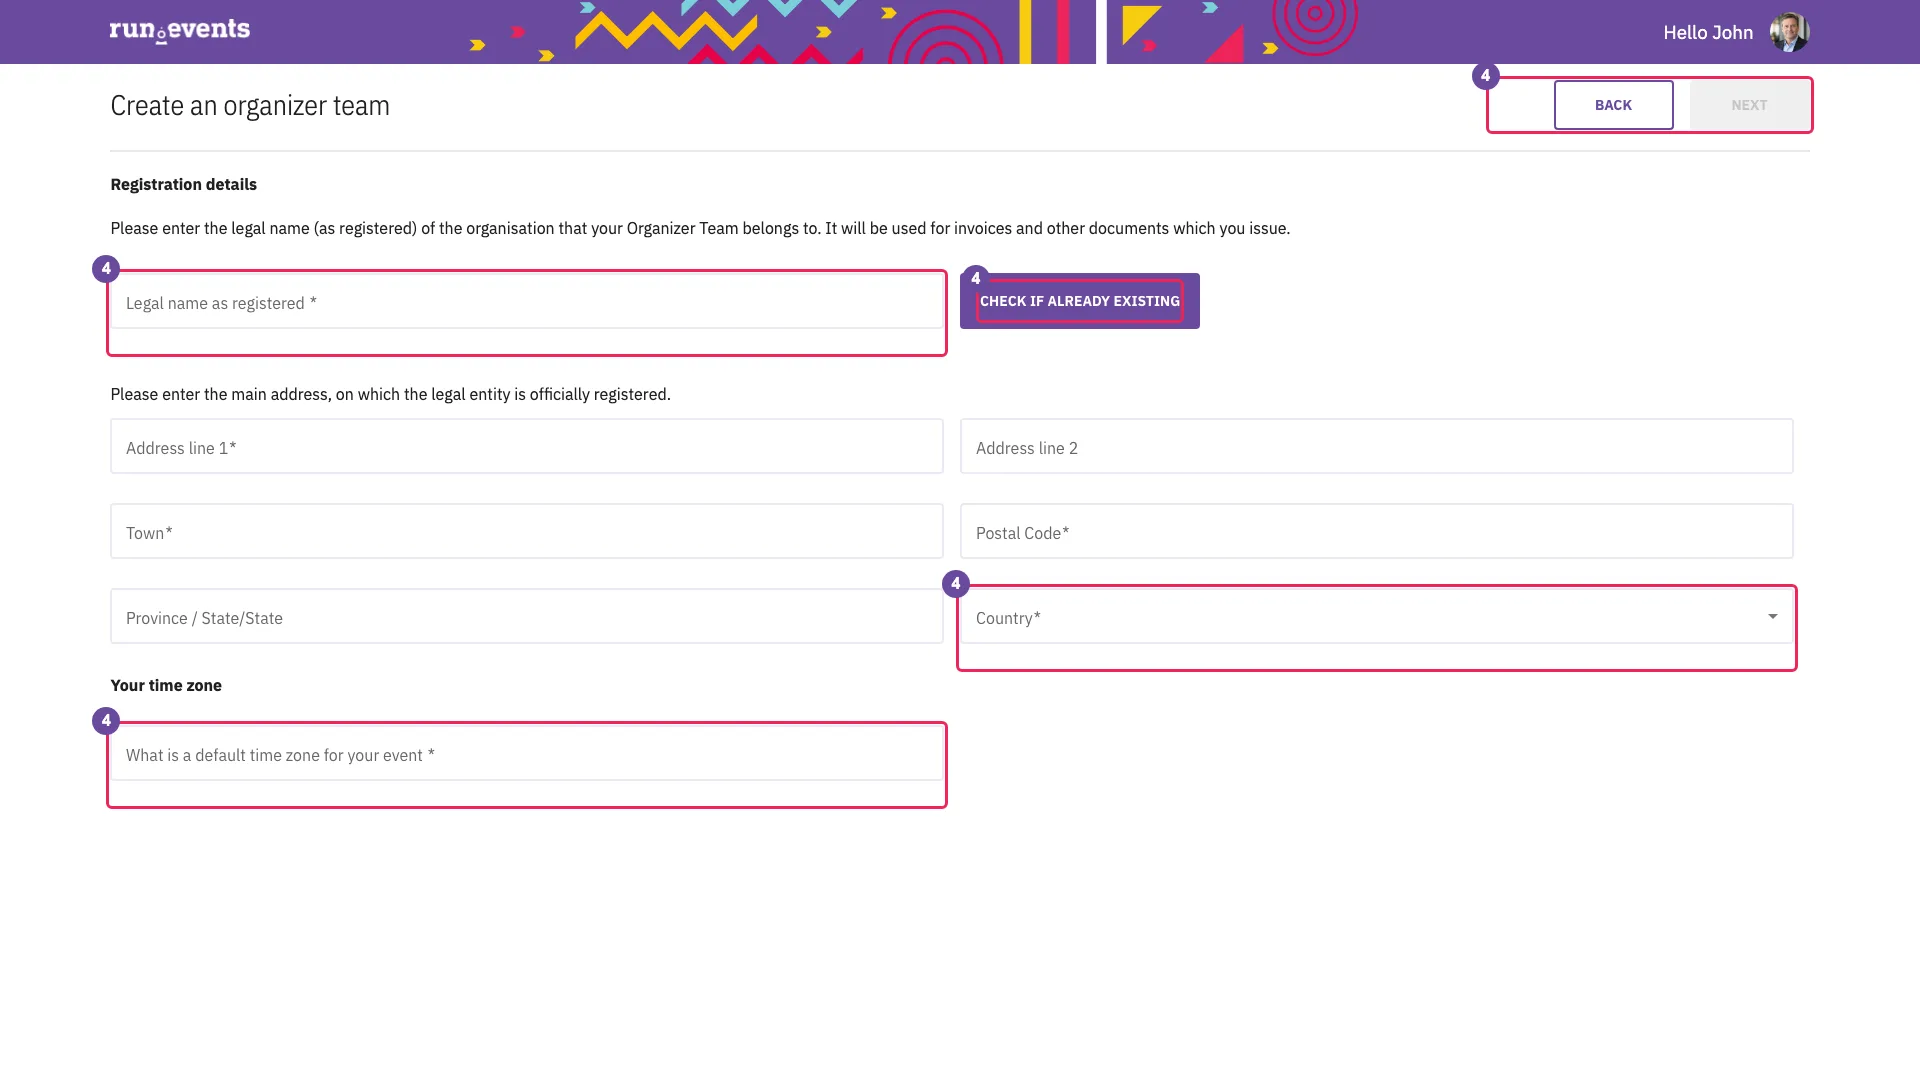
Create an organizer team: Registration details The legal name also becomes the team's name and its address in the organizer portal. Nothing is saved before Submit. Submit makes you the team's representative and Admin, stores its address and records that you accepted the legal documents for this team. The country cannot be changed afterwards, and it decides which payment providers the team can use (module 3). The registration and tax details become the seller data on the team's documents; they can be completed later in the organizer profile (module 3).
A new team starts as Requested: it can create events at once, but it cannot sell until run.events approves it. My teams has no way to leave a team; an admin removes members (module 2). The user menu's Organize an event page offers Run an event for every team in which you hold the Admin role.
- 5The organizer dashboard
Open
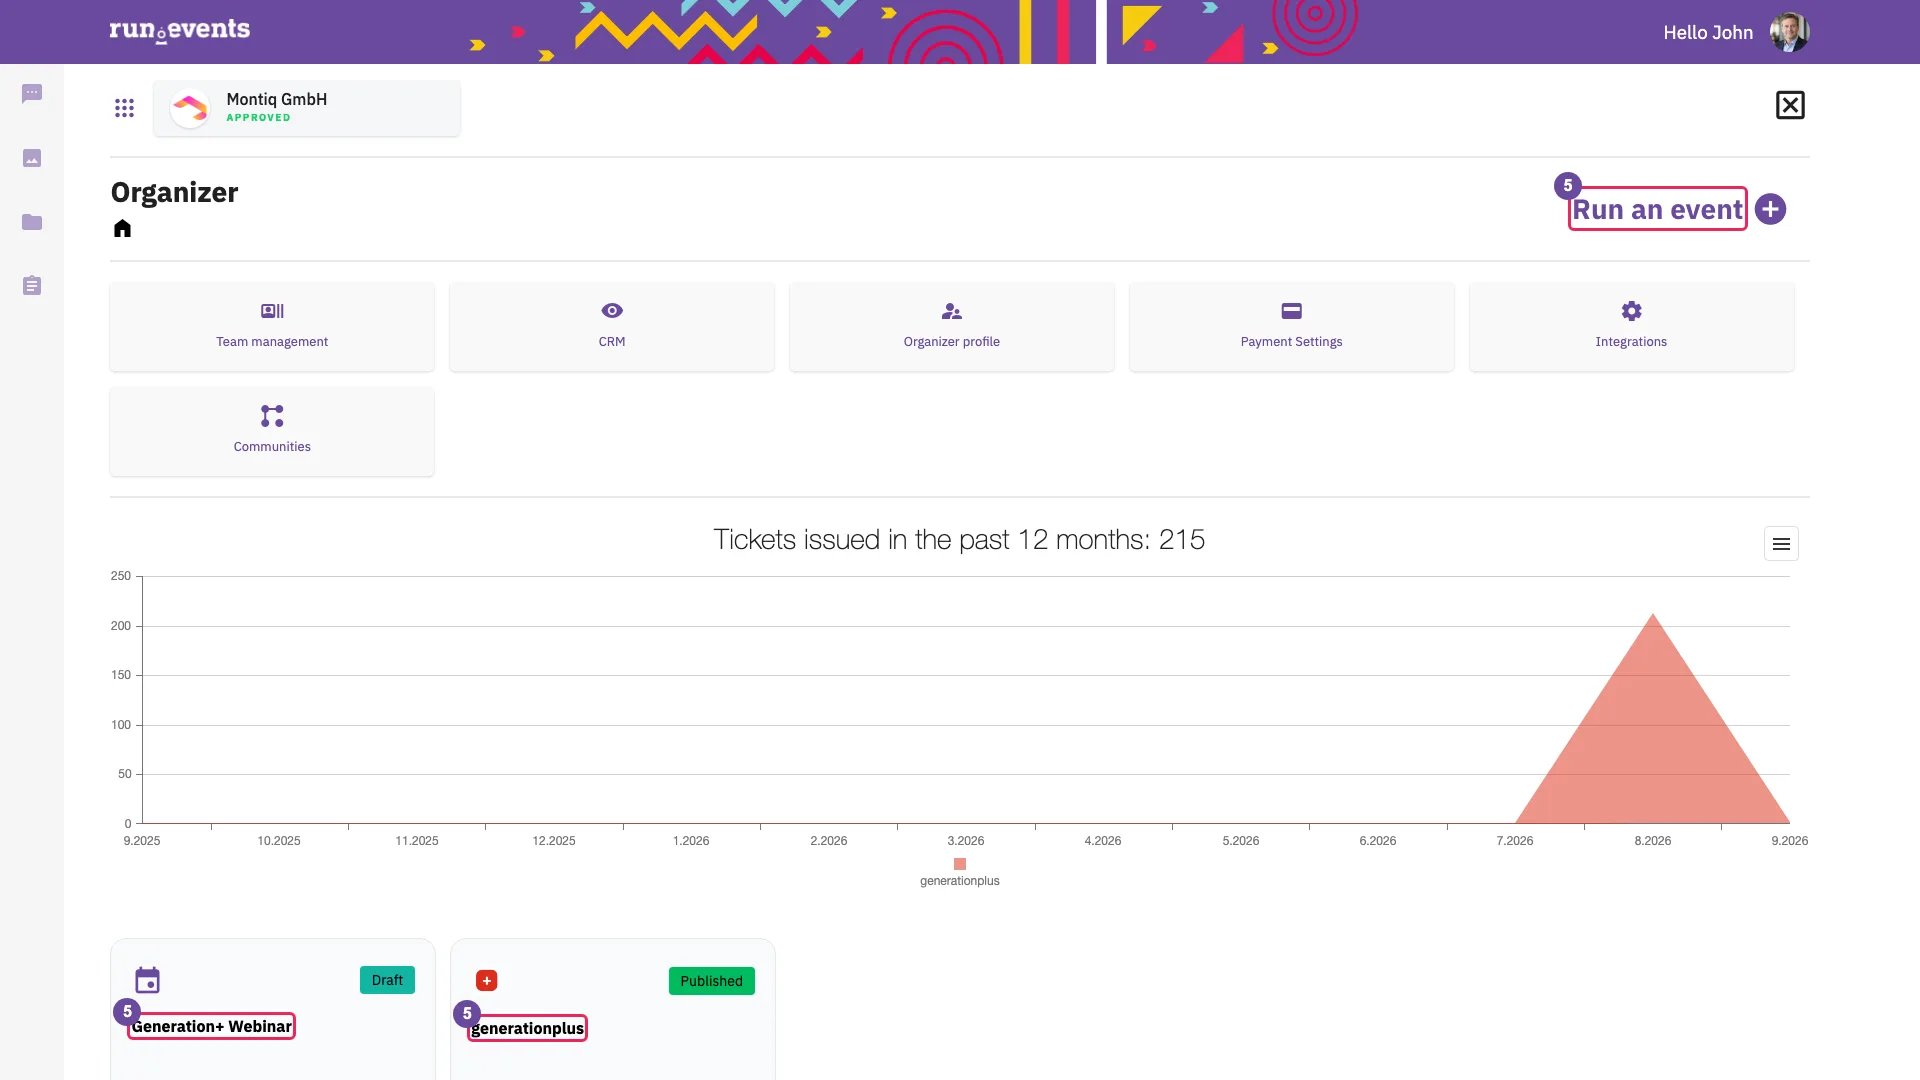
o.runevents.net/{organizer}: select a team card in My teams, or Close at the end of the organizer team wizard. Look at the title Organizer with the button Run an event, the dashboard cards, the event cards with their status badge and Ticket sold, and the banner Welcome to run.events with Start.The organizer portal works at the level of the organizer team; events are one area inside it. The event list shows only events whose end date has not passed, and only those you have rights for. A new team's dashboard offers Run an event at once, because the status Requested allows creating events.
The organizer dashboard - 6The event creation wizard
On the organizer dashboard, select Run an event (or Start). The wizard opens at
o.runevents.net/{organizer}/event-createwith six steps: Basic event data, Payment data, Event type and category, Event location, Industries, tags and languages, and a final step that creates the event.The first step holds Event title, Short description, The event starts on, The event ends on, In which time zone are times above?, Event monetization type with Charging for tickets and Not charging for tickets, This is a charity, non-profit, or community event and Support Email. The wizard also offers Next and Cancel.
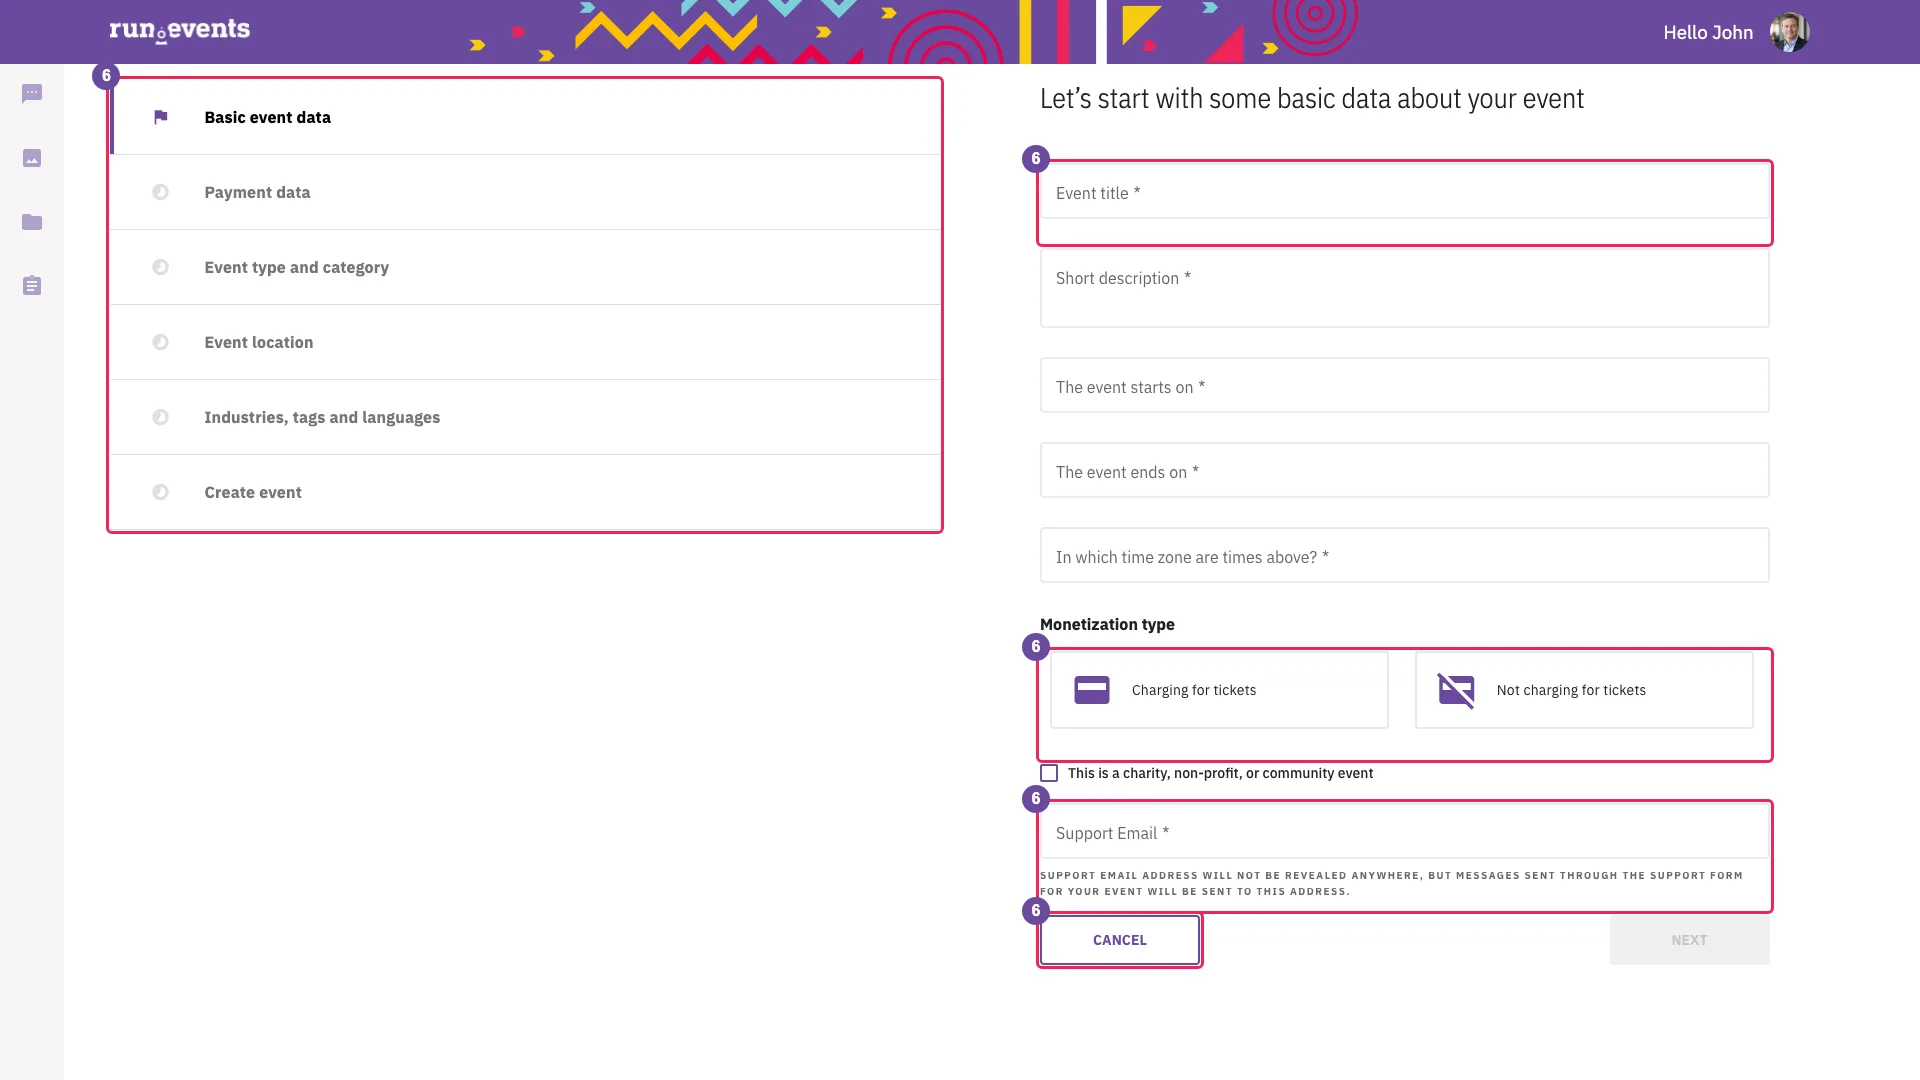
The event creation wizard The time zone list holds time zone names such as "Europe/Berlin", not every city: type the city that names your zone and pick the entry. In Payment data, the field Which curency will be used for ticket prices? (spelt so on screen) lists each currency by symbol and code, for example "EUR (EUR)". Search by the currency name in lower case, or scroll the list.
Nothing is saved until the final button, and Cancel discards everything. Next stays disabled while a step is invalid, mostly without a message. Four choices stay with the event:
- the title becomes the event's address and cannot be changed later;
- charging for tickets or not decides which Go live conditions apply;
- Payment data (currency, Tax name, Tax Scheme, Tax Category, Tax percentage) is required even for free events and creates the event's default tax;
- the languages decide which languages the event portal offers.
Event URL, in the Event location step, is the event's own external website; the event portal's menu item Home links to it. Support Email receives the event portal's support messages.
Support Email is also shown on the event's Contact us page, although the field's hint says it will not be revealed. Use a shared support mailbox.
- 7The event home and the event configuration area
Select an event card. The event home opens at
o.runevents.net/{organizer}/event/{event}. It shows the event name and the area cards; while the event is a Draft, it also shows the status name and the Go live button, which do not appear in other statuses.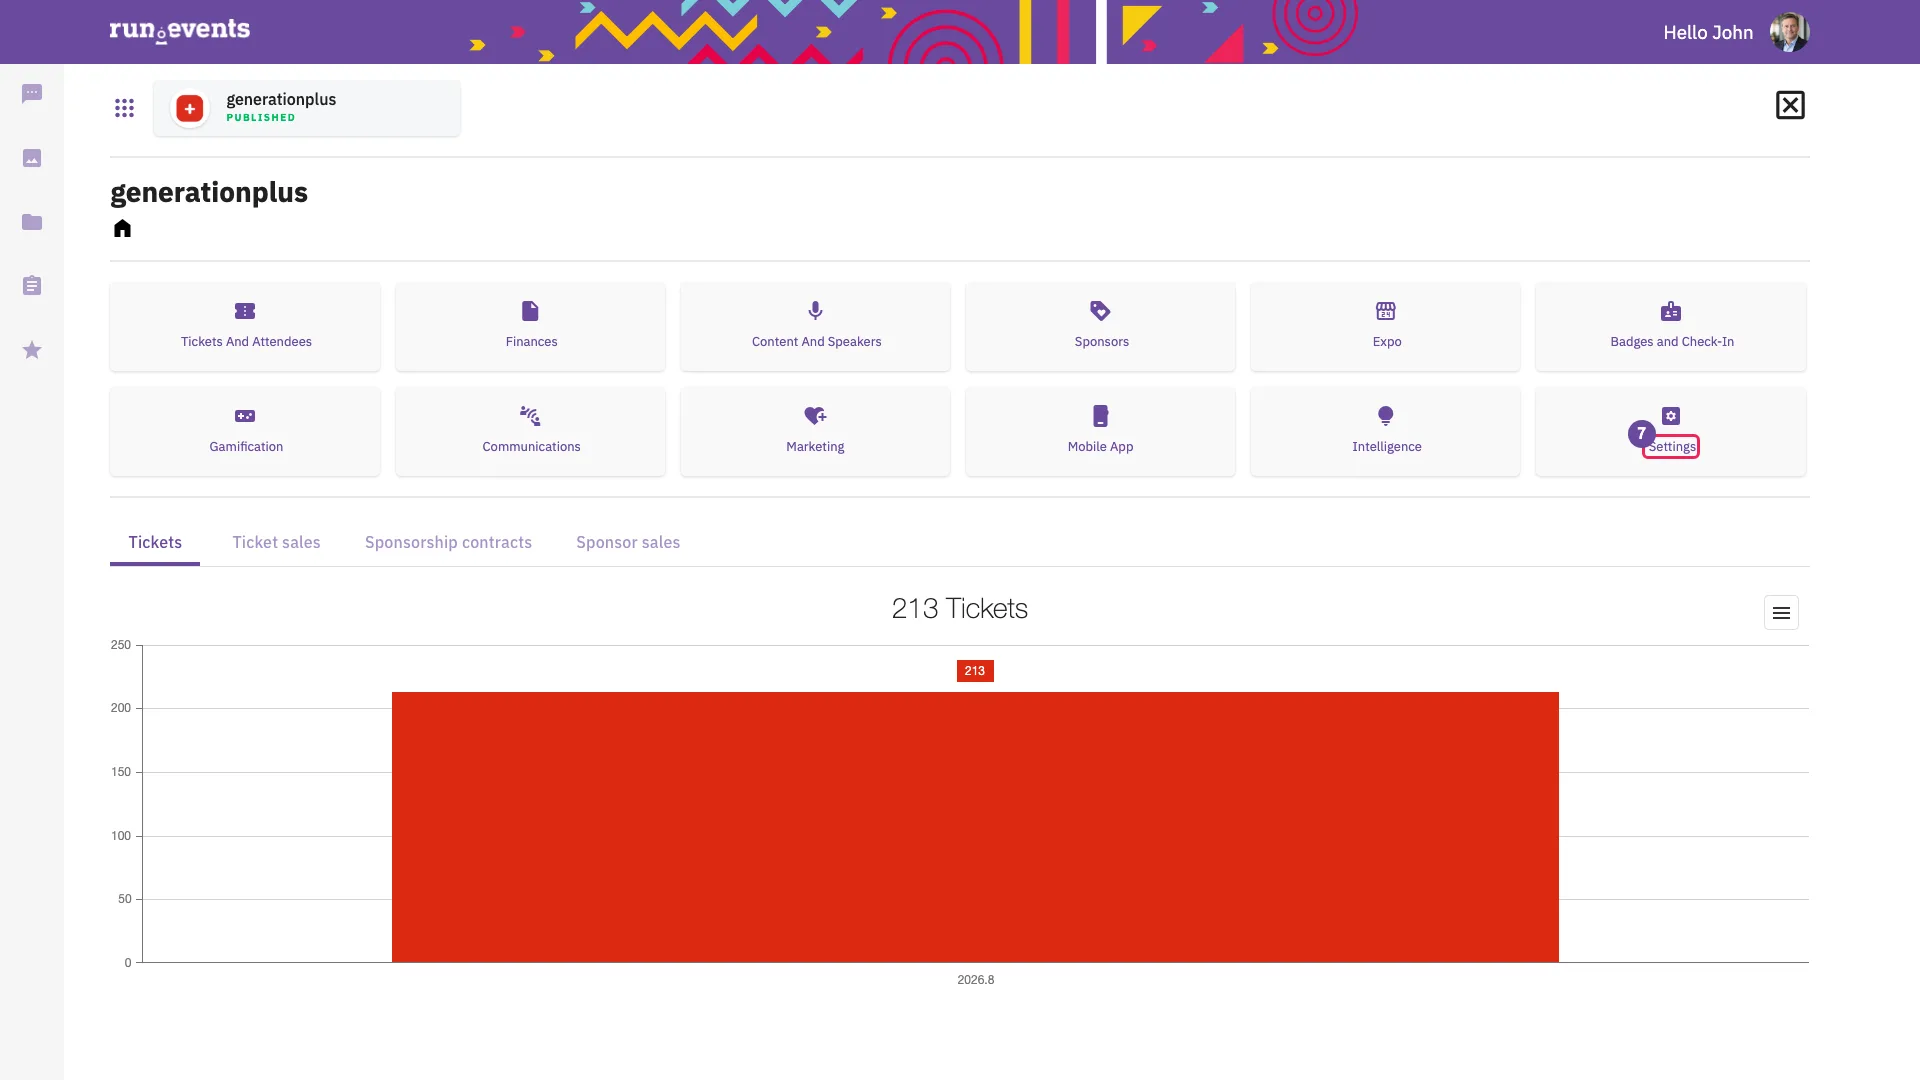
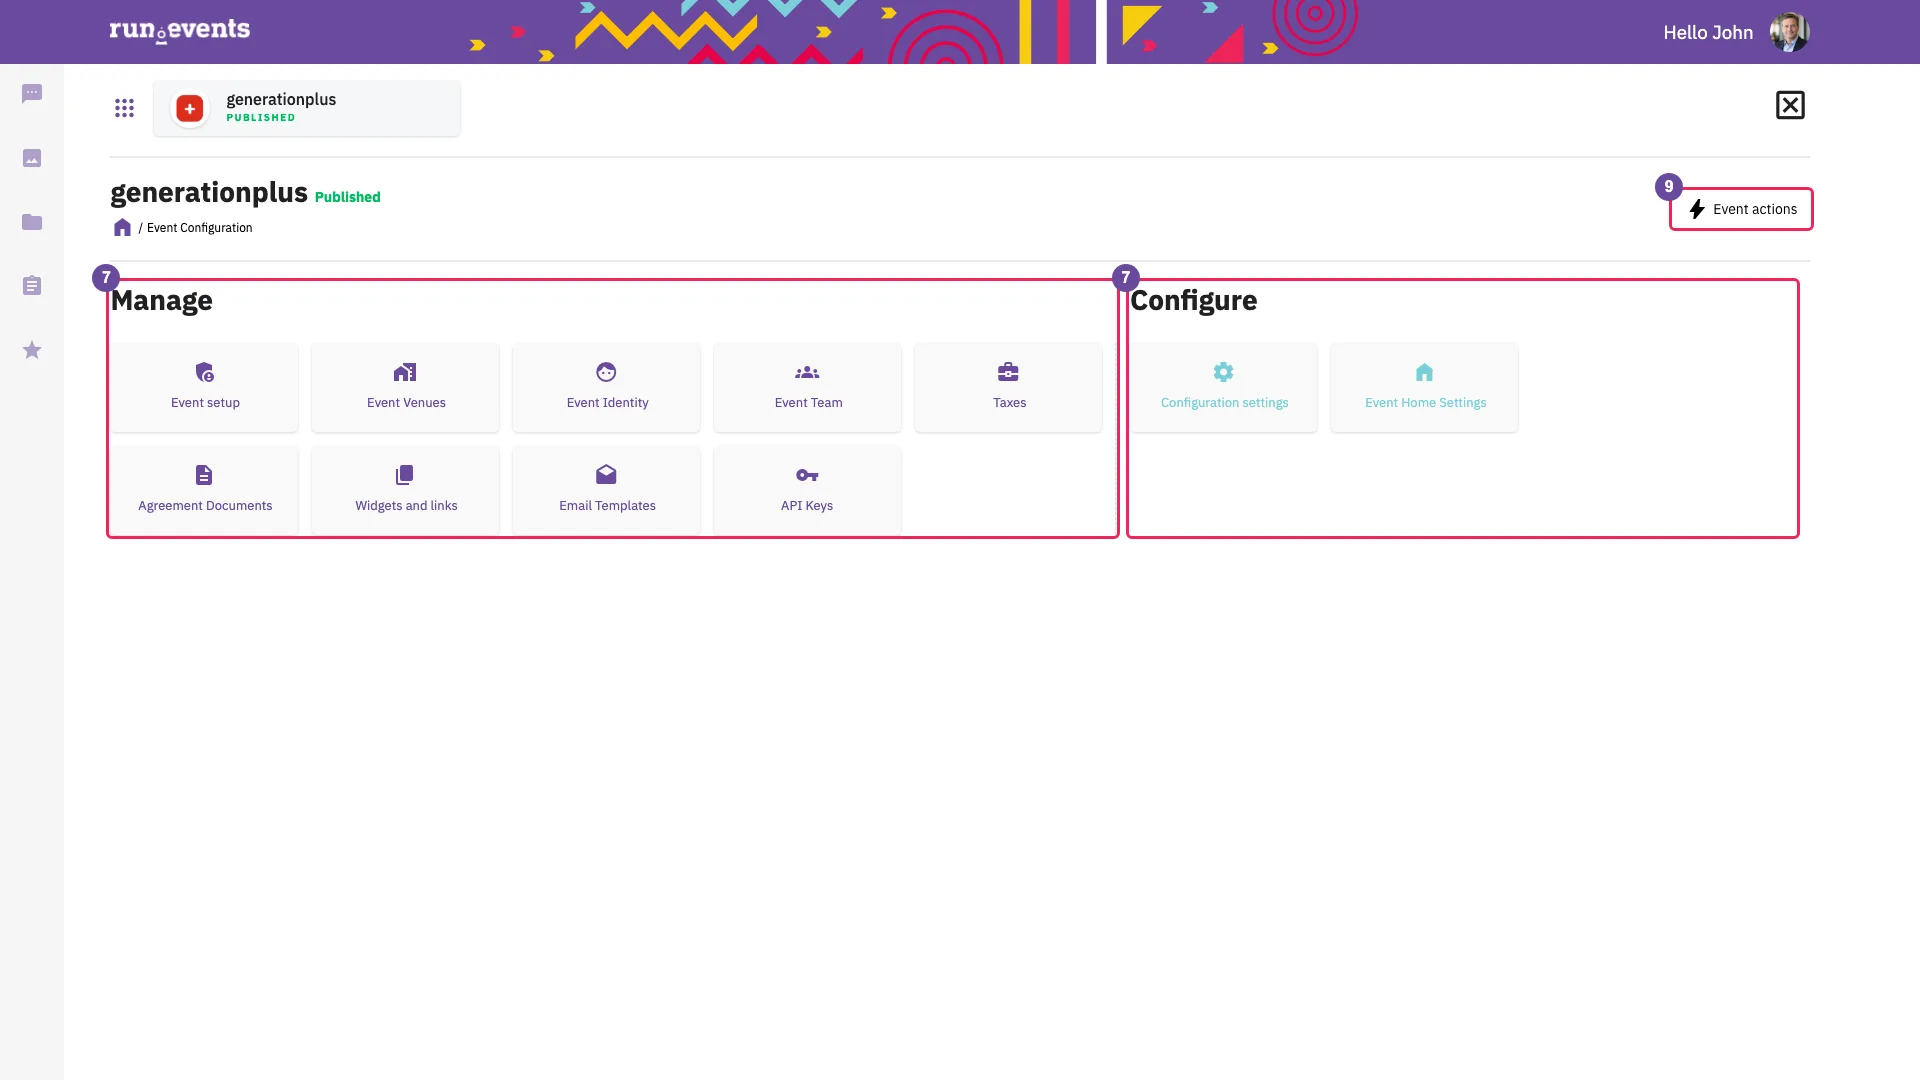
The event home Select the card Settings. The configuration home opens at
…/event-configuration; its breadcrumb reads Event Configuration. Look at:- the section Manage: Event setup, Event Venues, Event Identity, Event team, Taxes, Agreement Documents, Widgets and links, Email Templates, API Keys;
- the section Configure: Configuration Settings, Event Home Settings;
- the button Event actions.
Most later modules start here. Cards turn red or yellow for open tasks: for example, Event setup is red without a support email address, and Event Identity is red without a logo or a primary colour.
The event configuration home - 8Event setup: the wizard's data after creation
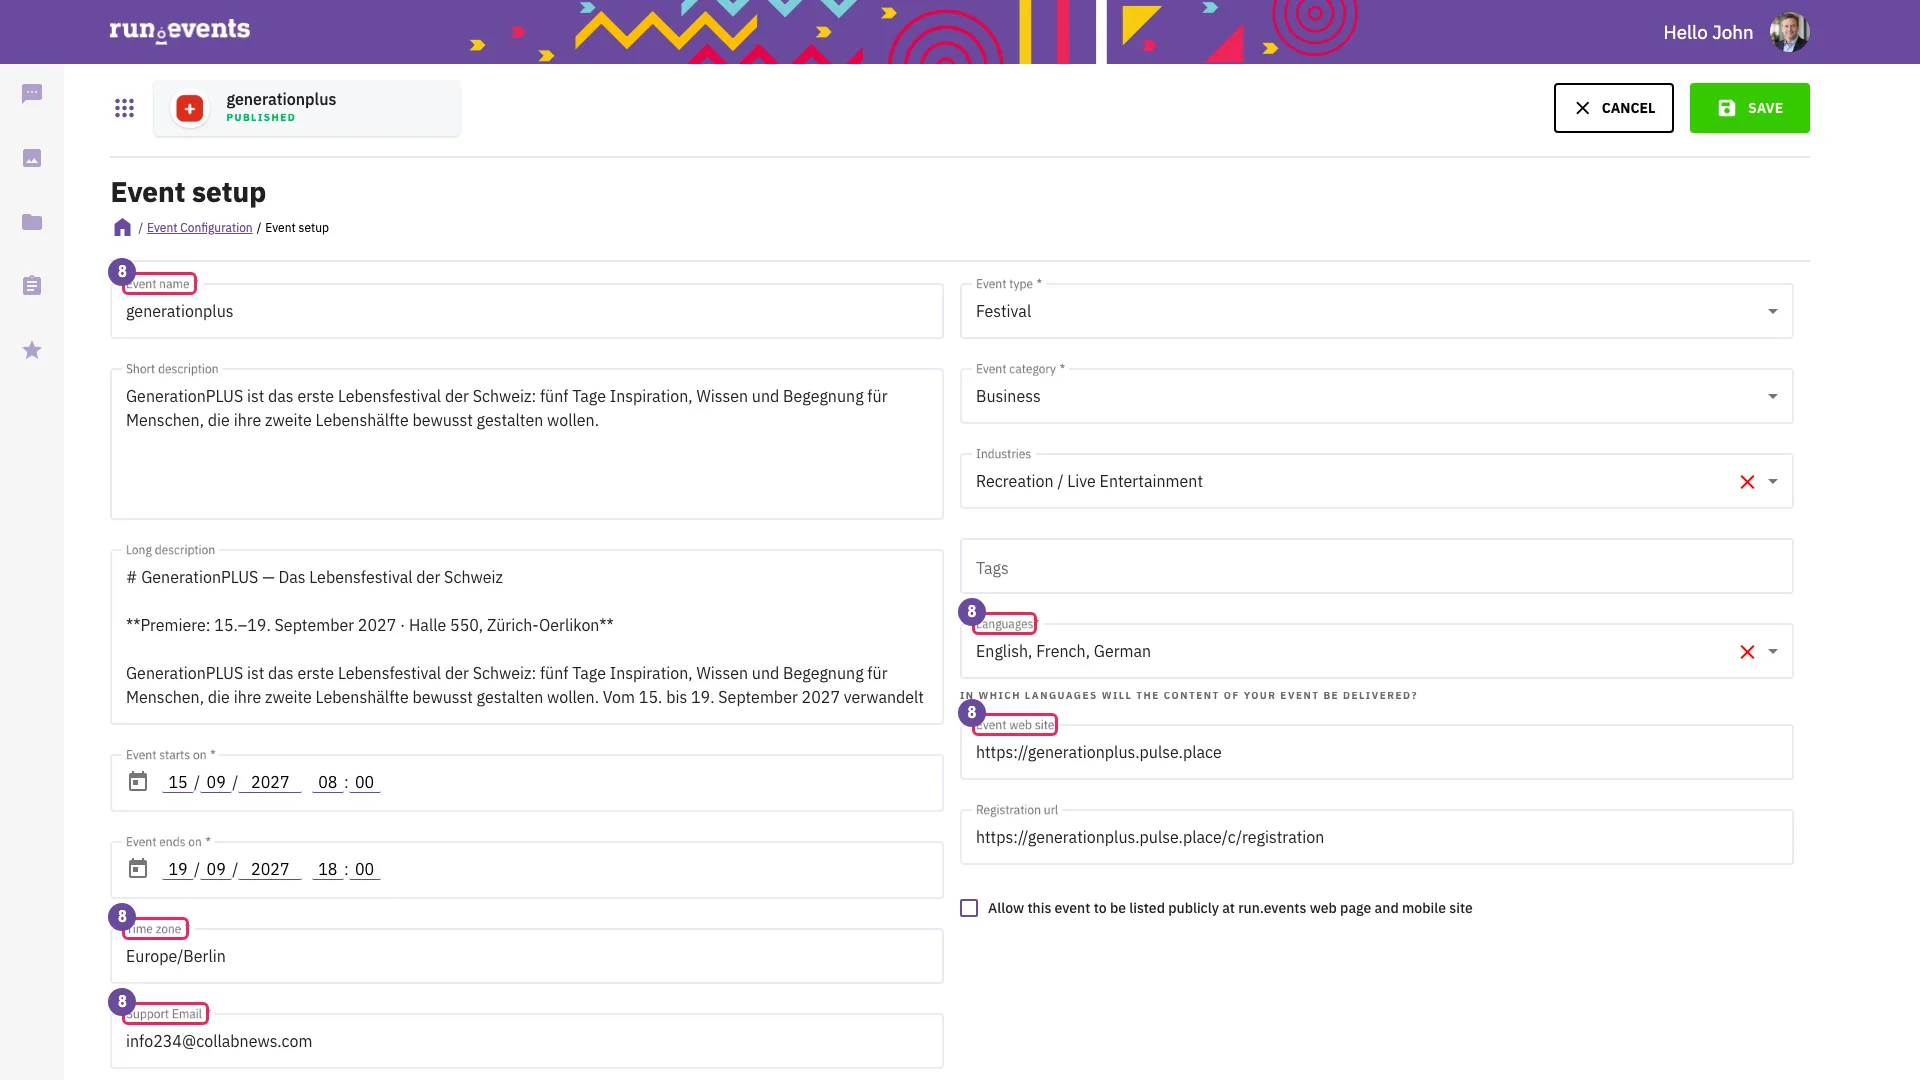
On the configuration home, select Event setup (
…/event-configuration/event-setup). Look at Event name, the short and long descriptions, start and end, Time zone, Support Email, event type and category, Industries, Tags, Languages, Event web site, Registration url, the checkbox for public listing, Cancel and Save.This is the edit view of the wizard's basic data. The long description starts as a copy of the short one; the short description shows on the root page, the long one on Info. There is no field for the slug. The page cannot be saved once the end date has passed. Whether the event takes place in person or online is set in Event Venues (In-person event?, Online event?), not here.
Event setup - 9Go live and Event actions
On the event home of a Draft event, select Go live; or, on the configuration home, select Event actions and then the action. The dialog shows either "This action is not possible due to the following reasons:" with the list of unmet conditions and only No, or a Comment field with Yes and No.
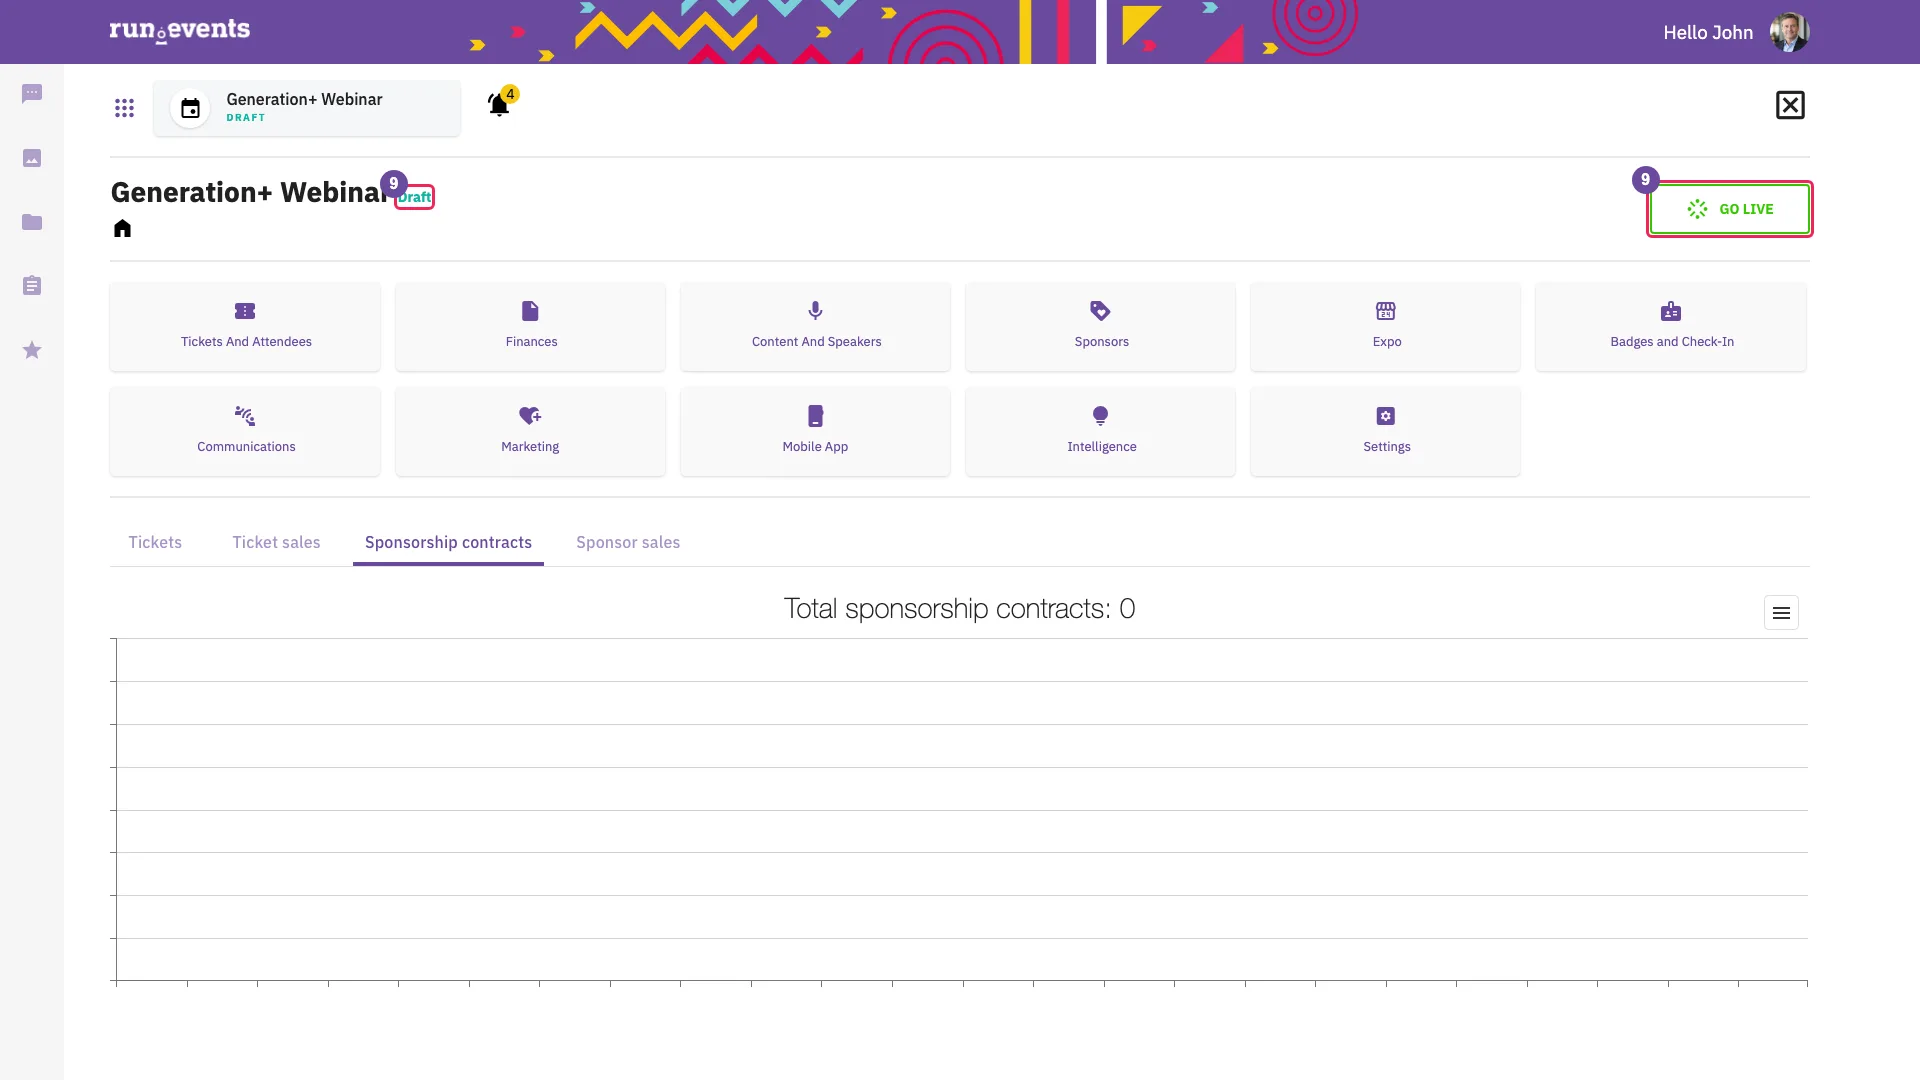
The event home of a Draft event The Event actions menu holds the requests an organizer may file from the current status. For a Draft event that is Go live. A Published event offers Published go demo and Cancel event, a Demo event Back to draft, and a Publish requested event Published requested go demo. None of them is selected from this menu in this course.
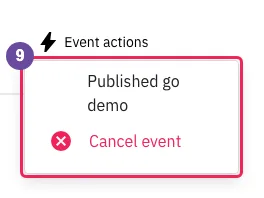
Event actions Opening the dialog only checks the conditions. Yes files a request to run.events; the event stays Draft on screen until run.events sets the new status. Publish requested still cannot sell; Published and Demo can. Each item of Event actions is a request, not a change. The condition texts and the action names are English in every interface language.
- 10The event portal root page
Open
e.runevents.net/{event}. Look at:- the header with the language code (signed in only) and the user icon;
- the hero with the event's name, location and date range, and Buy Tickets or Manage Tickets;
- the left navigation: Event Home, the configured sections (Info, FAQ, Speakers, Sessions, Agenda, Sponsors, Contact us), My Agenda, and LOG IN when signed out.
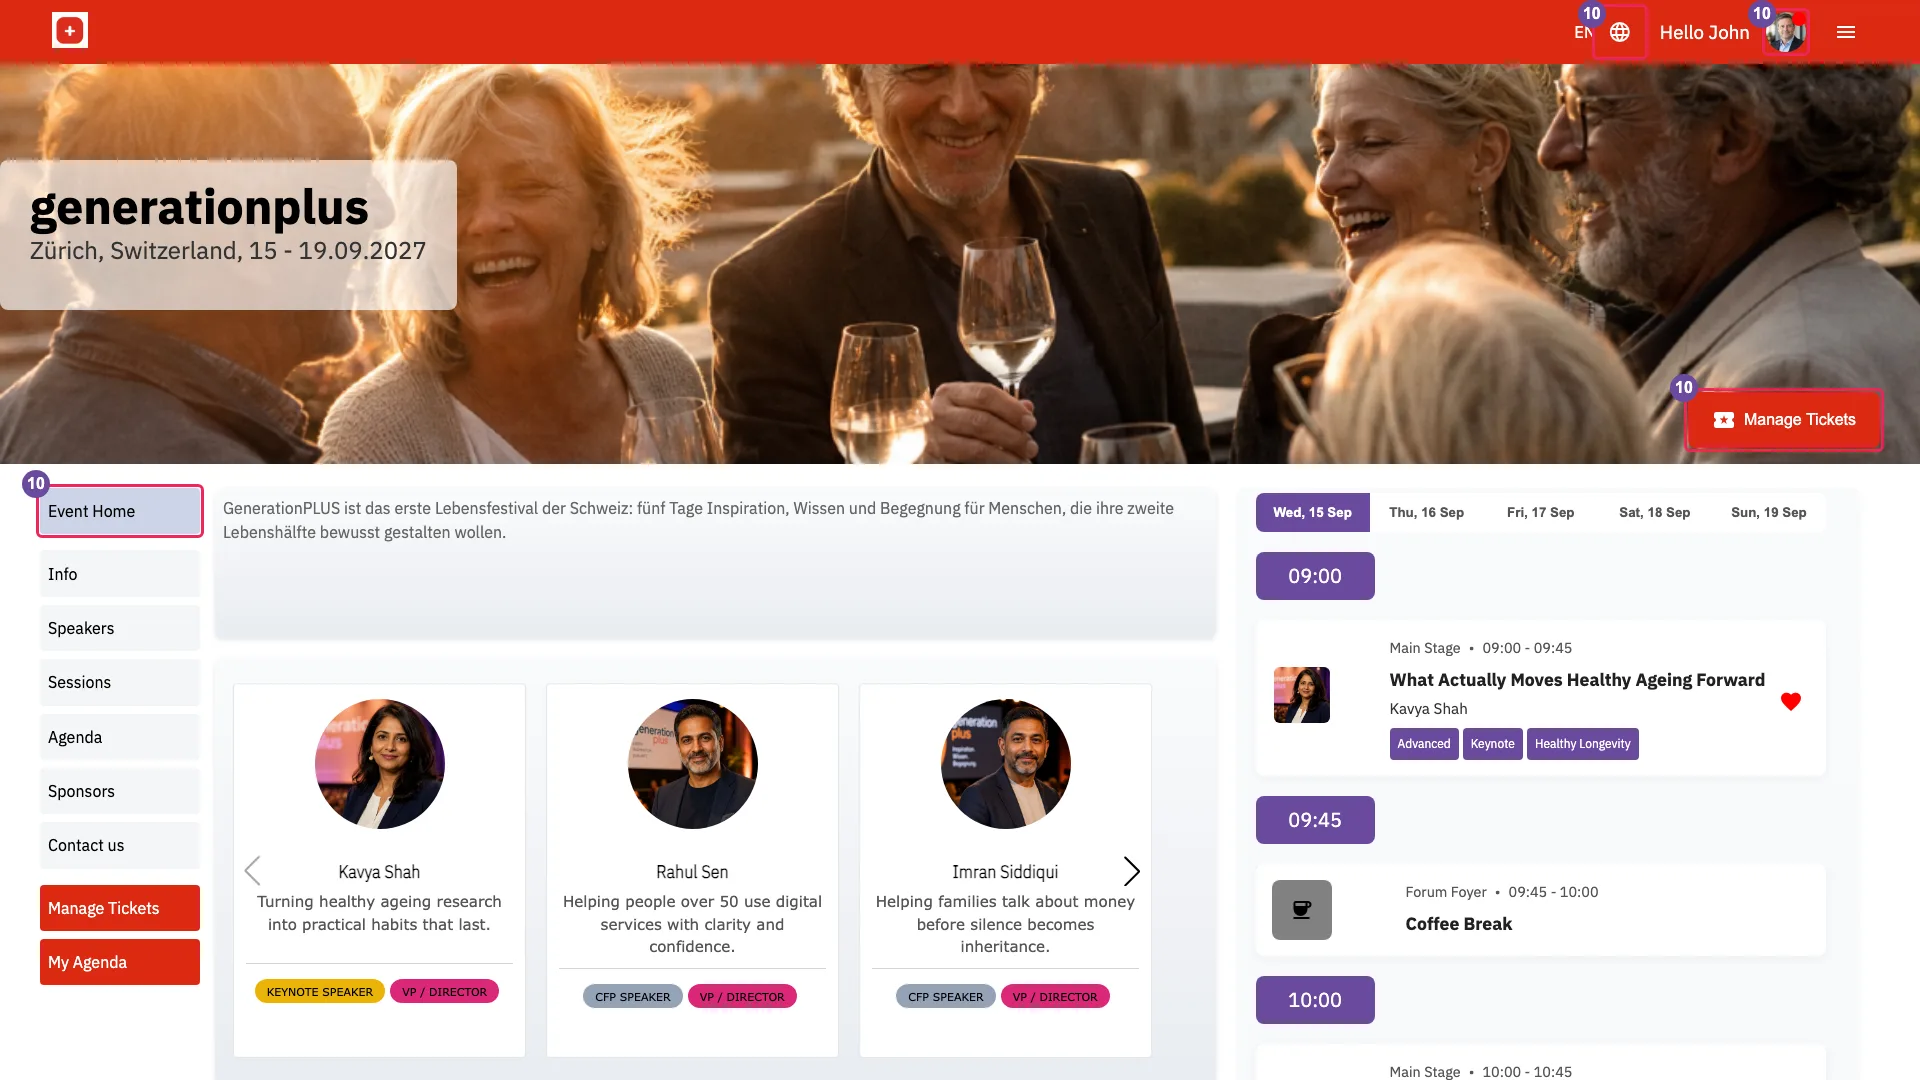
The event portal root page The page is public in every status. Event Home Settings chooses the sections (step 15): Info and Contact us show whenever they are selected, even without content, and both are selected by default; the other sections show only when the event has such content. Contact us needs the organizer's address; without it the page stays empty. Event Identity supplies the logo, the hero picture and the colours (step 14). The page does not follow your profile language: it keeps the language last used in this browser (step 2).
Signed-out visitors see no Buy Tickets while the event cannot sell. Signed-in visitors without a ticket still see it, and it leads to "THIS EVENT IS NOT SELLING TICKETS".
Do not select Call For Speakers or Speakers Dashboard on this page: neither button has a link.
- 11The event portal user menu and
/ticketsSelect the user icon in the header. A side panel opens with Home (the event's website), My profile, My tickets (shown in red as Personalize my tickets or Assign my tickets when a ticket needs it) and My invoices; Speaker dashboard for speakers and Sponsor dashboard for sponsor staff; Support, My run.events dashboard, My Agenda once you have marked sessions as favourites, and Log out. The sponsor and speaker entries lead to the sponsor portal and the speaker portal of later modules.
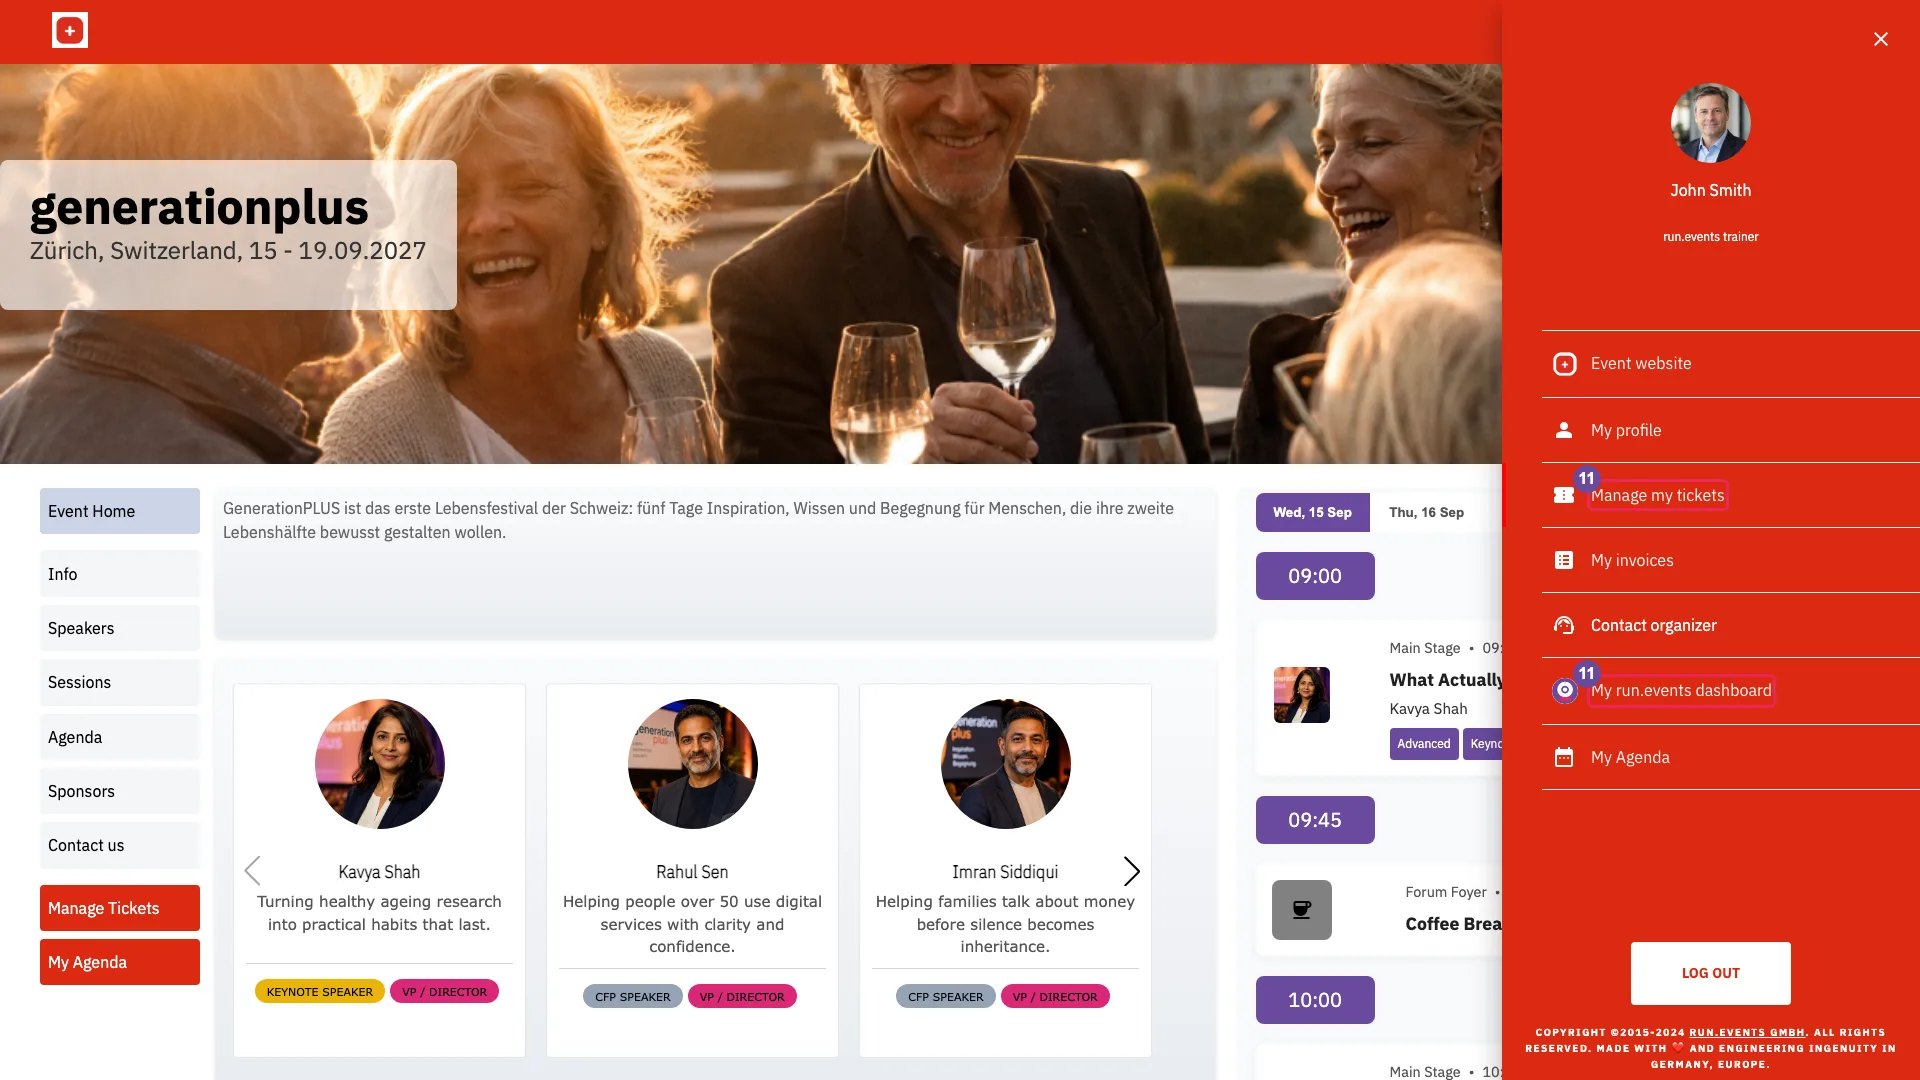
The event portal user menu Select My tickets. The page
e.runevents.net/{event}/ticketsshows buyer tabs and ticket cards. An assigned ticket shows the assignee's name and, where allowed, Unassign ticket; an unassigned ticket shows Assign ticket. The page also offers Buy more tickets.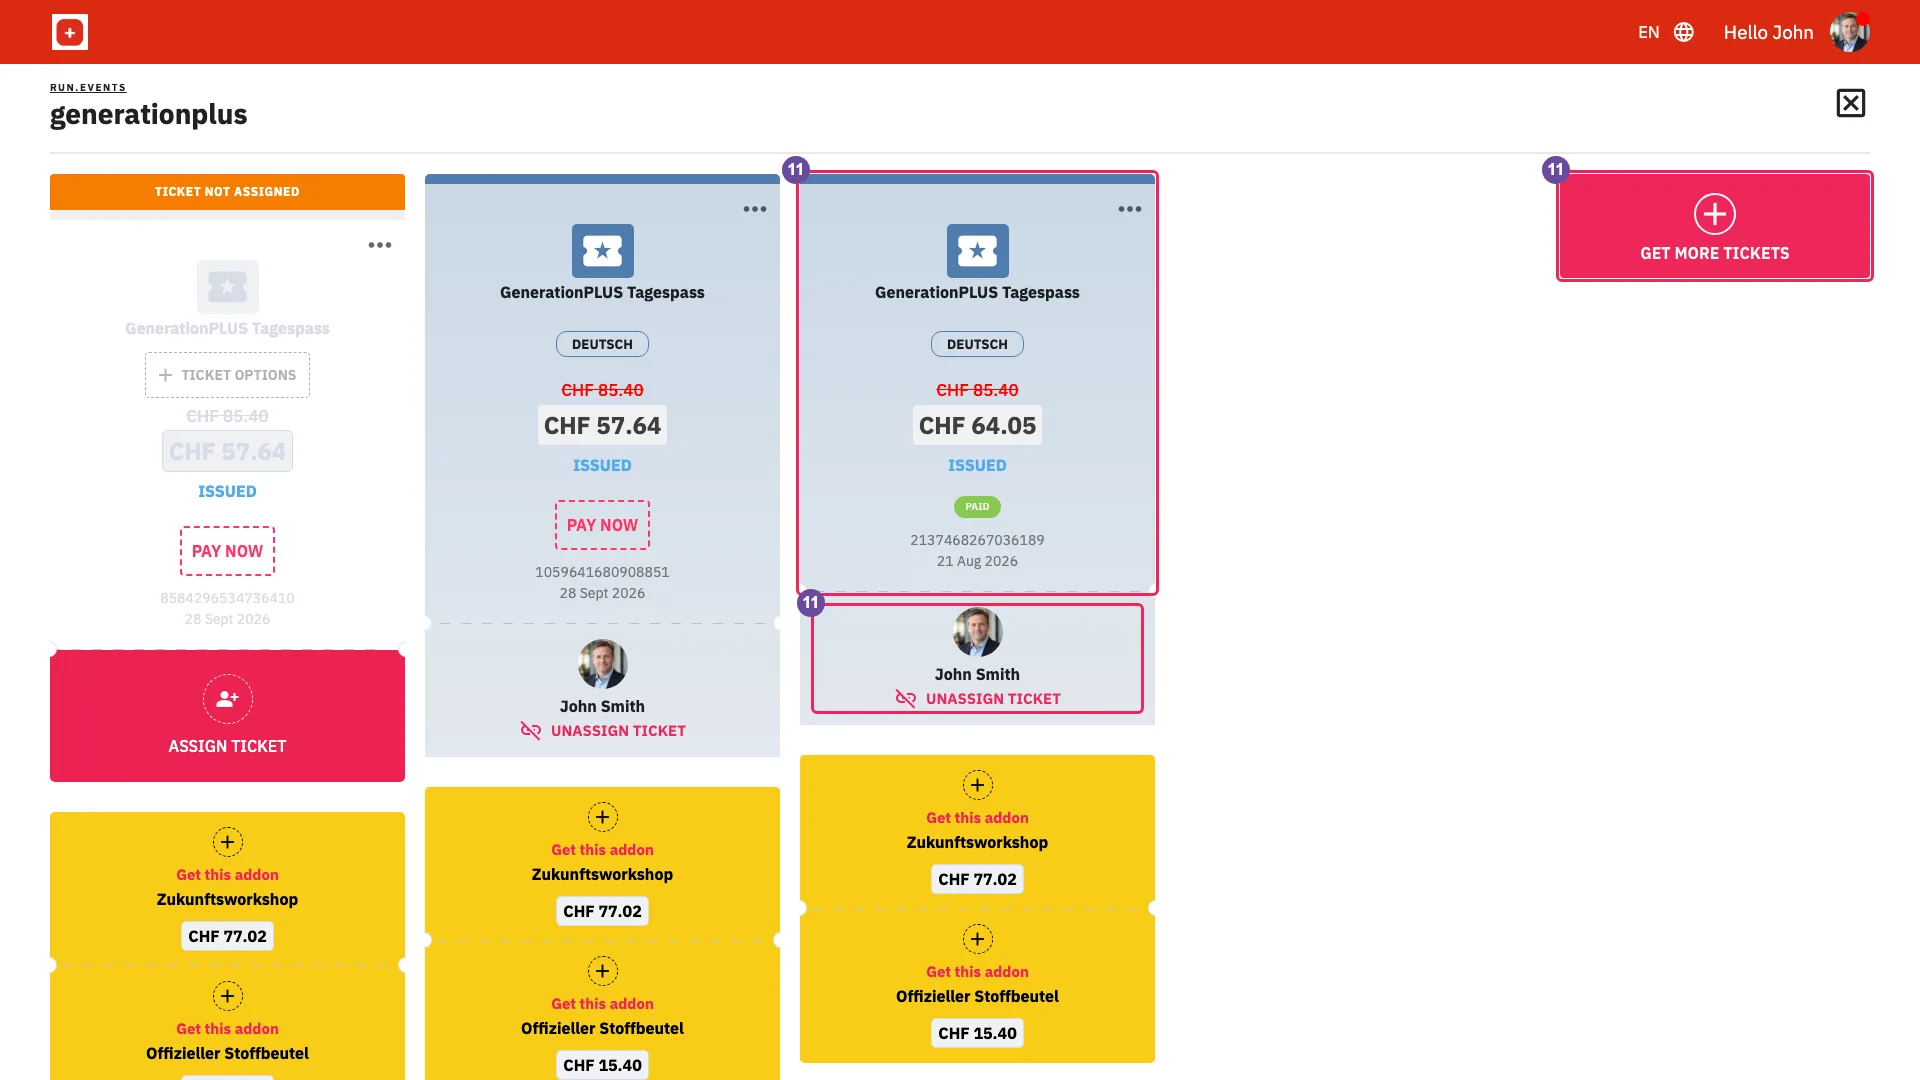
The ticket holder's tickets The card's … menu holds Cancel Ticket, which leads to Cancellation Request, and Print ticket. When print-at-home badges are active, Print-At-Home replaces Print ticket and a print icon appears on the card.
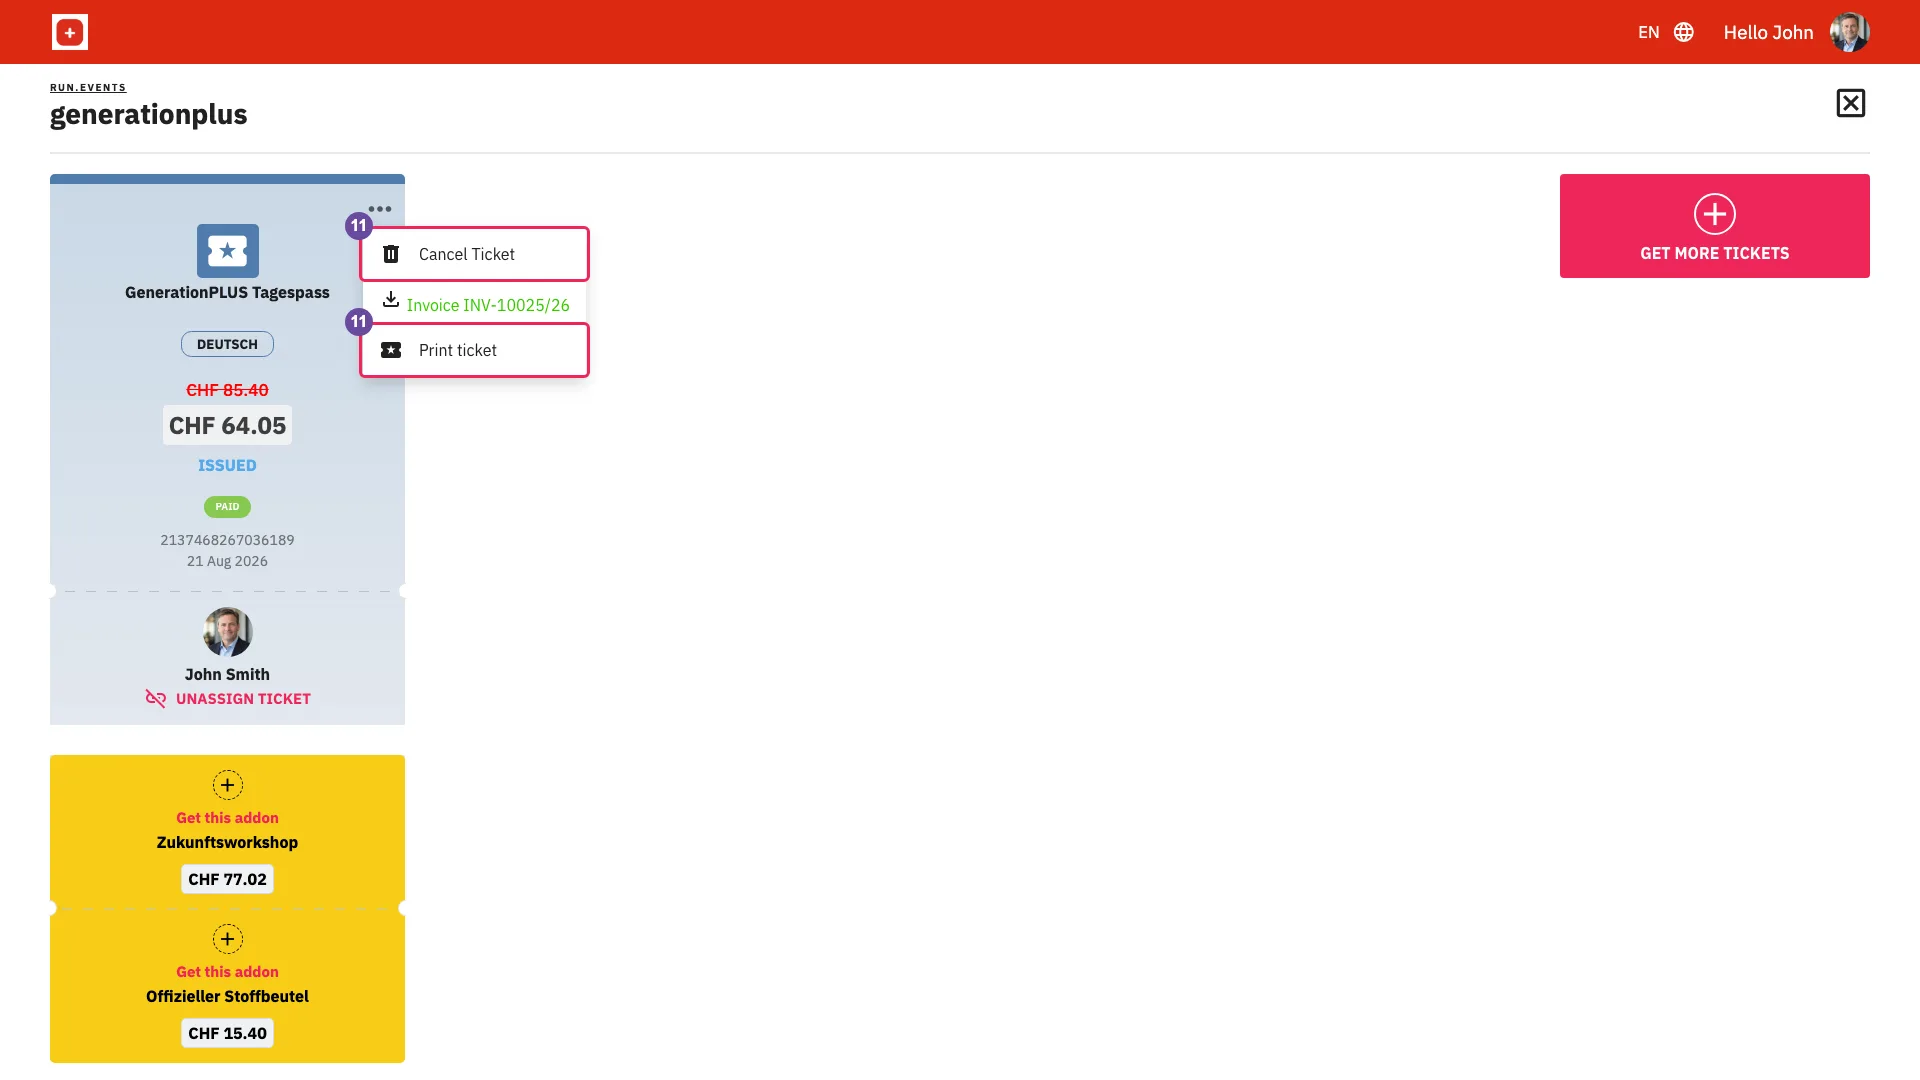
The ticket menu Attendees manage their own tickets here, not in the organizer portal. Print ticket opens a print page with a QR code; there is no PDF. Cancelling creates a request for the organizer, and it is offered only to the buyer and only before a badge exists for the ticket.
- 12
/checkoutSelect Buy Tickets, or open
e.runevents.net/{event}/checkout. Signed out, the header shows Log in for a faster experience and a language menu. On an empty cart of a selling event, the panel Add Tickets opens by itself, with the ticket types and Add Selected Tickets. Once tickets are in the cart, a summary with Place Order appears.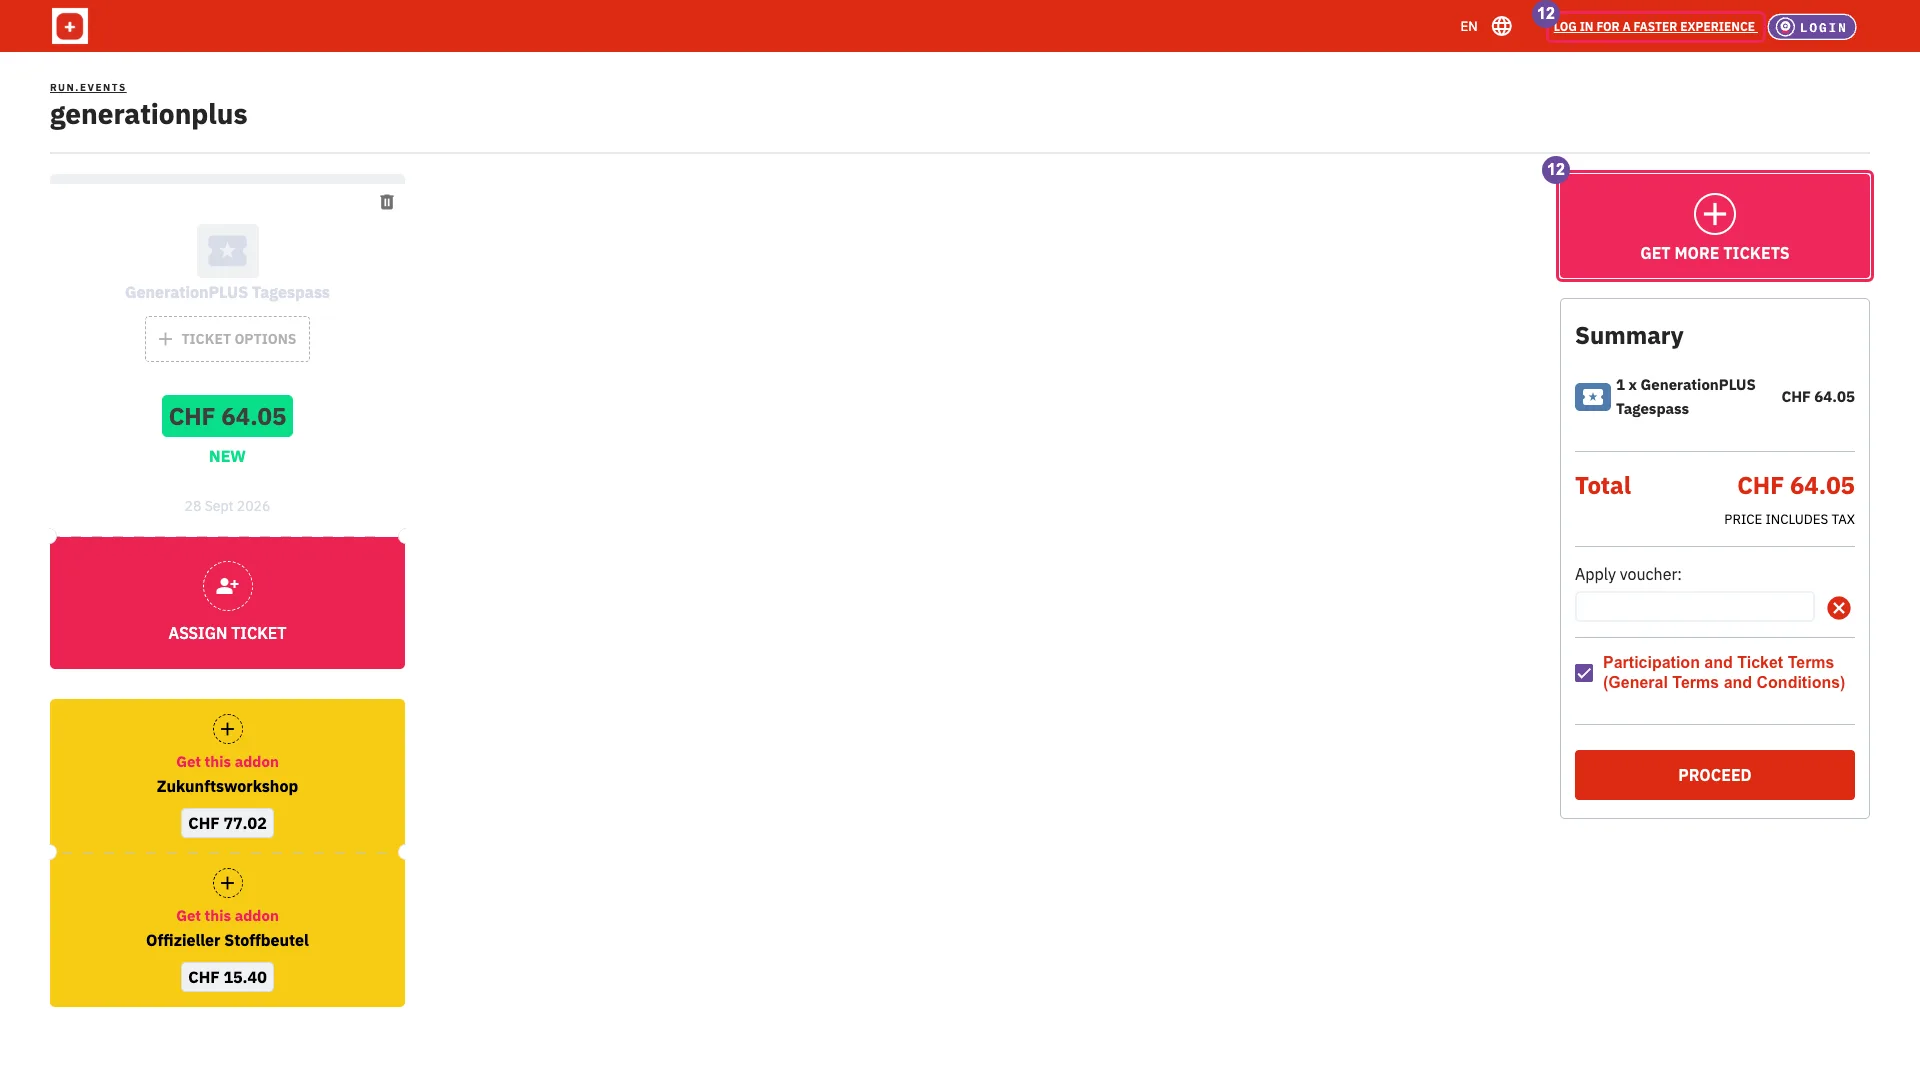
The checkout Then follow the buyer type, the buyer details with Buy Now, the email confirmation Please confirm your Email Address (signed-out buyers only) and the payment method with Complete Purchase (paid carts only).
A buyer needs no account beforehand: the email code creates one. When the event cannot sell, the page shows "THIS EVENT IS NOT SELLING TICKETS".
- 13Widgets and links: the ticket widget
On the configuration home, select Widgets and links (
…/event-configuration/widgets). Look at the first row, Tickets checkout widget: its read-only code, the copy icon (tooltip Copy content) and the description with its list of attributes.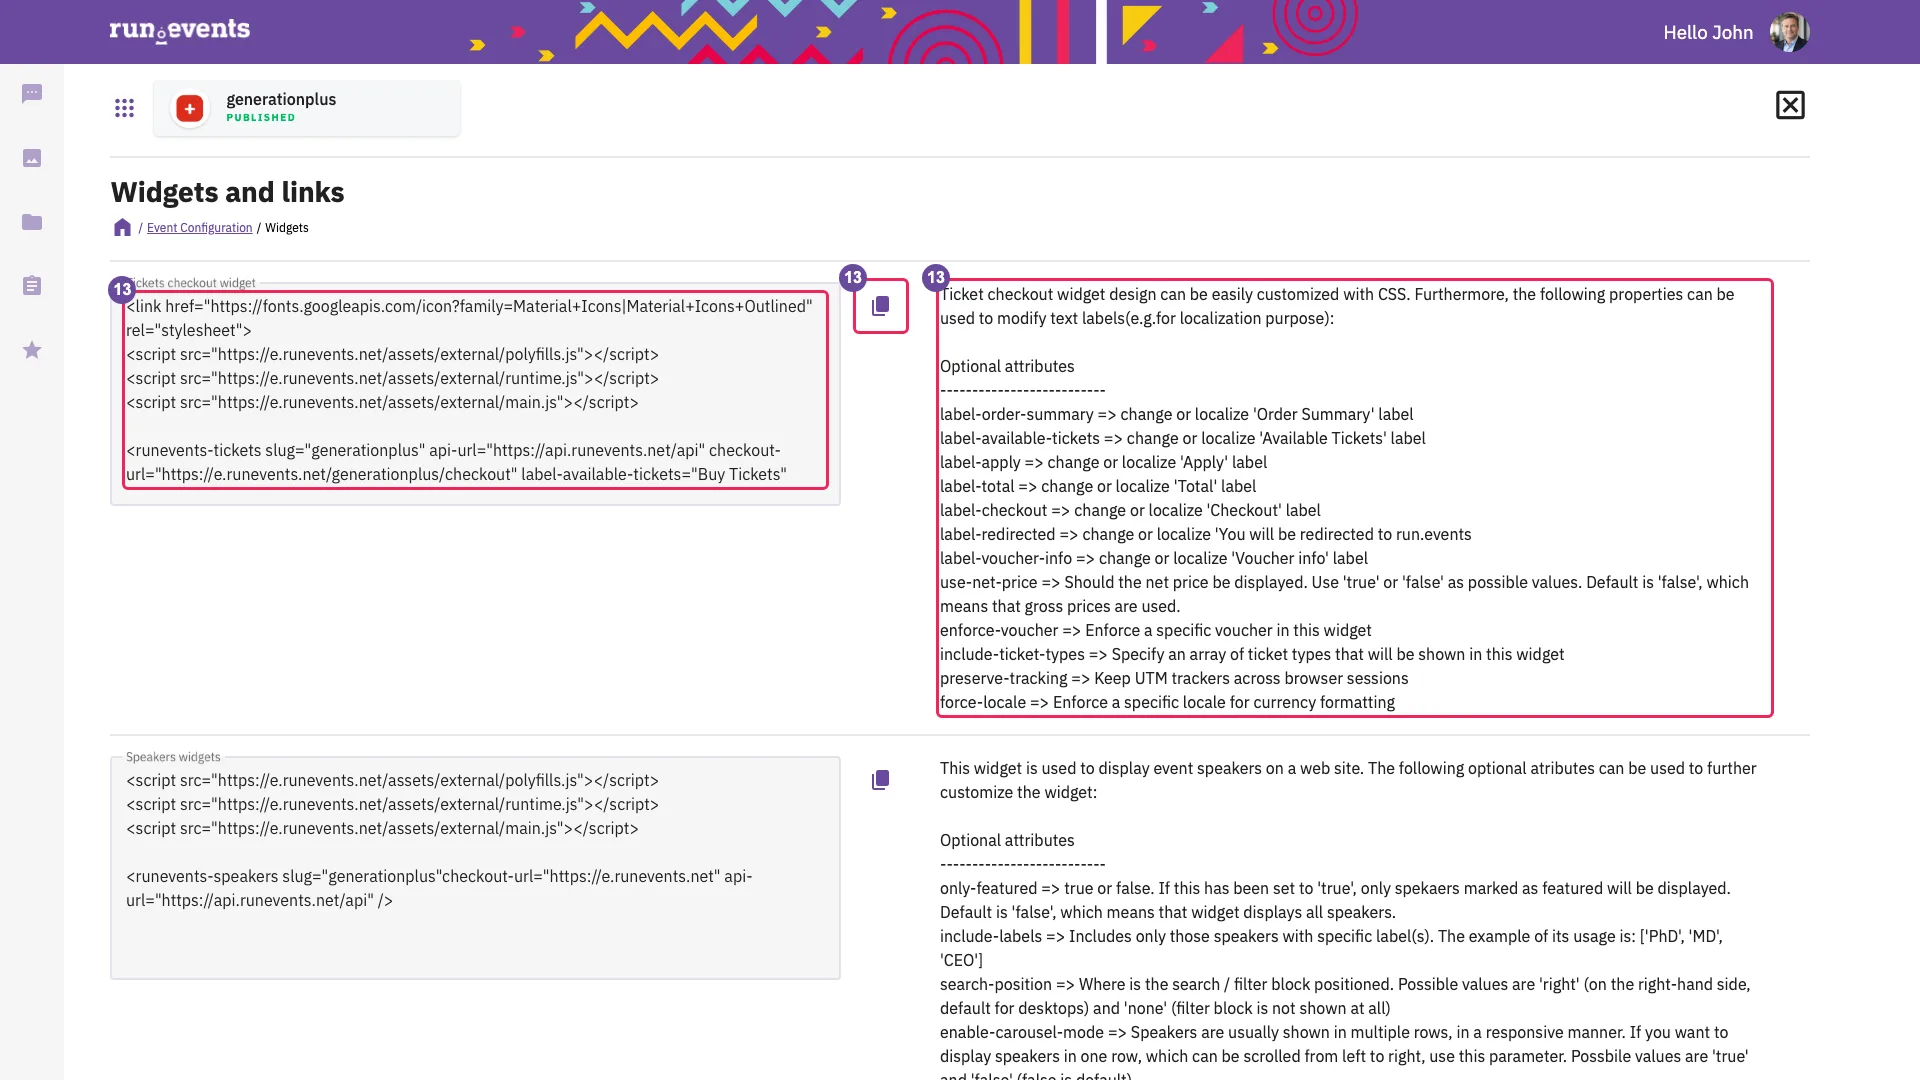
Widgets and links The code embeds the ticket list on the organizer's own website. Its button opens
/checkoutin a new tab with the chosen tickets in the cart, and passes on voucher and UTM parameters. The list stays empty until the event can sell. The attributeinclude-ticket-typesfilters by ticket type name, so renaming a ticket type removes it from such a widget.The further rows belong to later modules: the speaker, session, agenda and sponsor widgets, the single sponsor widget, the marketing tracking widget, the call-for-speakers links and FAQ. Row names and descriptions are English in every interface language.
The row Call for speakers backdoor link contains the event's secret call-for-speakers code. Share it only with the speakers who need it.
- 14Event Identity: logo, pictures and colours
On the configuration home, select Event Identity (
…/event-configuration/event-identity). The page title reads Logo and Identity. Look at:- three picture fields, each with its ideal size: the logo (600 × 600 pixels), the event header (1200 × 630) and the splash picture (1920 × 1080). A picture field opens the upload dialog; the minus icon on a picture removes it;
- Primary Color and Secondary Color, each opened by selecting its colour;
- Default email address for the event, a list of the organizer's sender addresses, and the link This can be done here., which leads to Integrations.
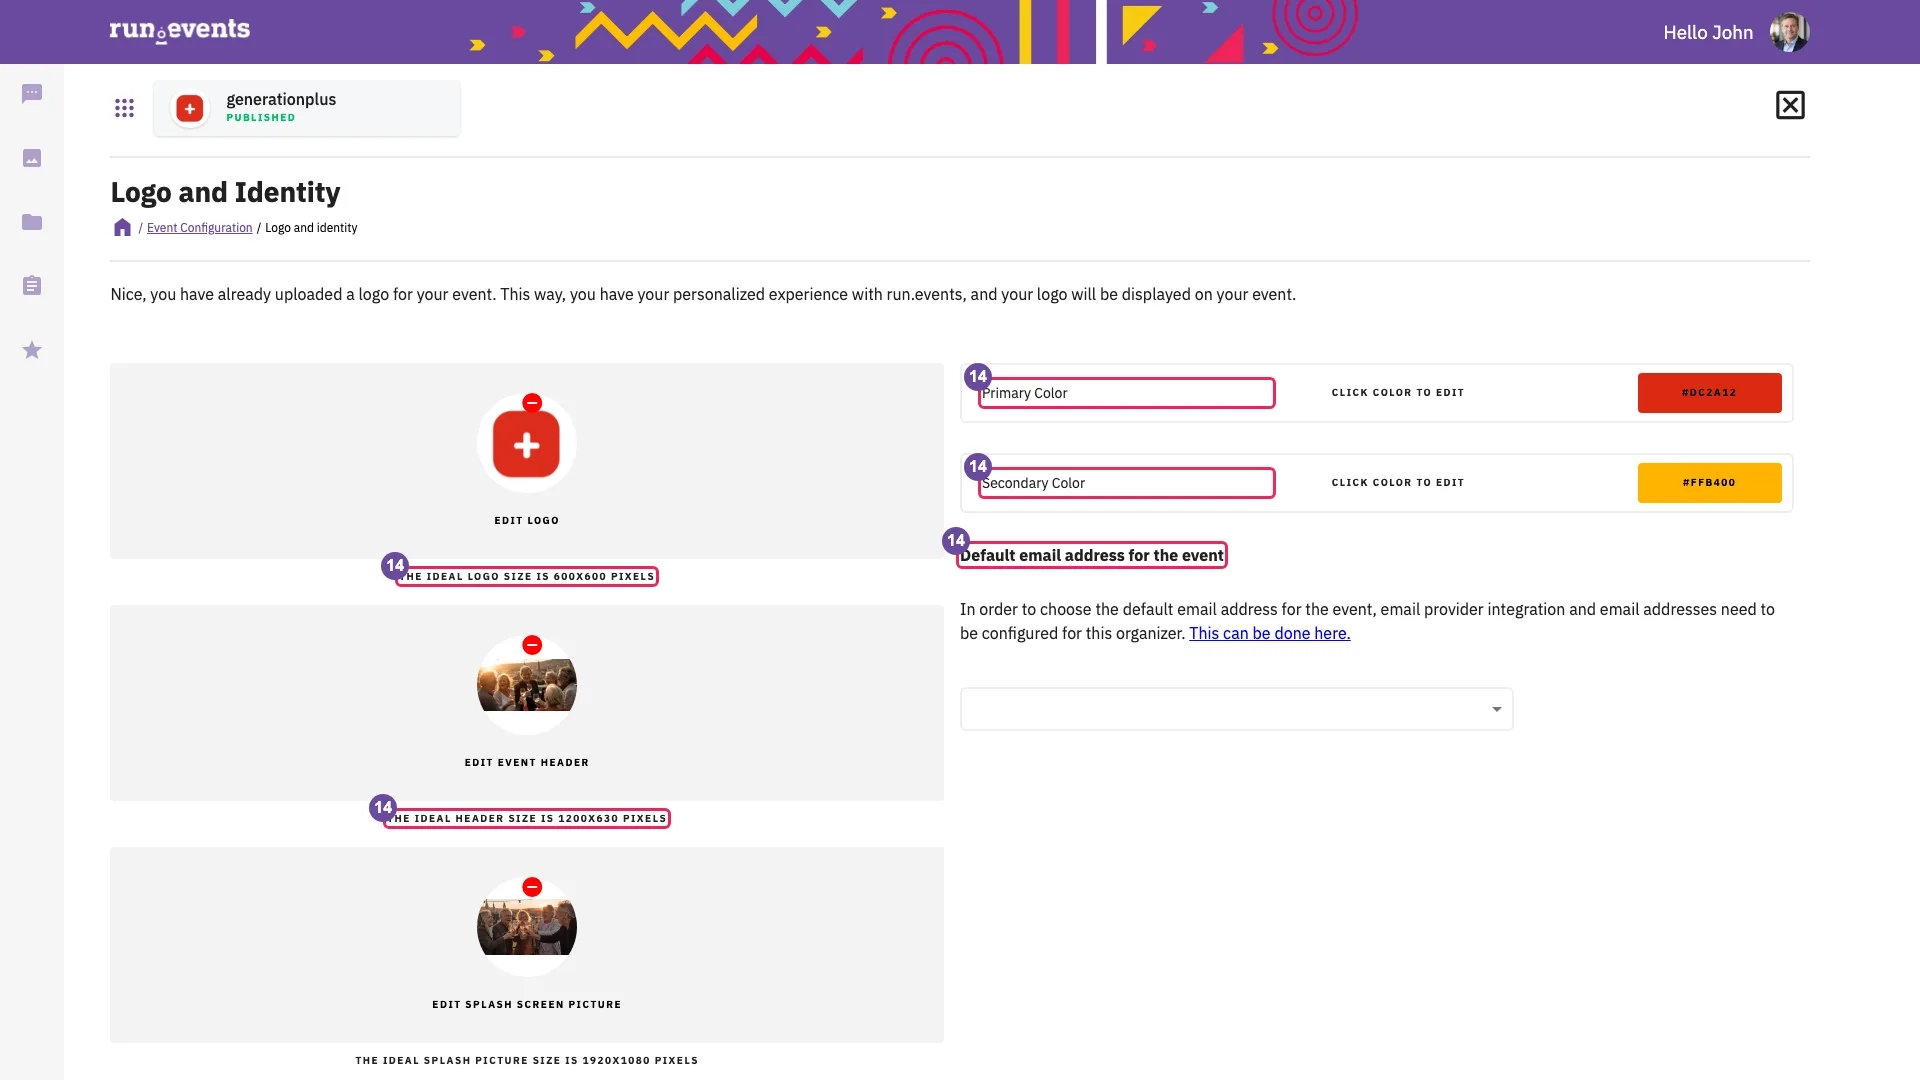
Event Identity The logo appears in the event portal header and menu panel and as the browser tab icon of the signed-in event pages and the checkout. The event header is the background of the root page's hero. The splash picture is the background of the sign-in page when a visitor signs in from the event. Primary Color colours the event portal header, the menu panel and the accents, and is the only colour of the public root page; Secondary Color is used on the signed-in event pages, for example the sponsor dashboard.
The default email address is the sender of the event's emails when no other sender is chosen. The list stays empty until the organizer has sender addresses (module 2). The Event Identity card is red while the event has no logo or no primary colour.
Every change is saved at once: a new picture, a colour once its picker closes, an address once picked. The page has no Save button and no undo.
- 15Event Home Settings: what the root page offers
On the configuration home, select Event Home Settings in the section Configure. A side panel with the same title opens. Look at:
- Menu: Info, FAQ, Speakers, Sessions, Agenda, Sponsors, Contact us;
- Home page: Description, Call for speakers button, Speaker dashboard button, Sponsor dashboard button, Featured speakers section, Agenda;
- Featured sponsors: one checkbox per sponsorship label of the event;
- Included FAQs, when the event has FAQs;
- Cancel and Save.
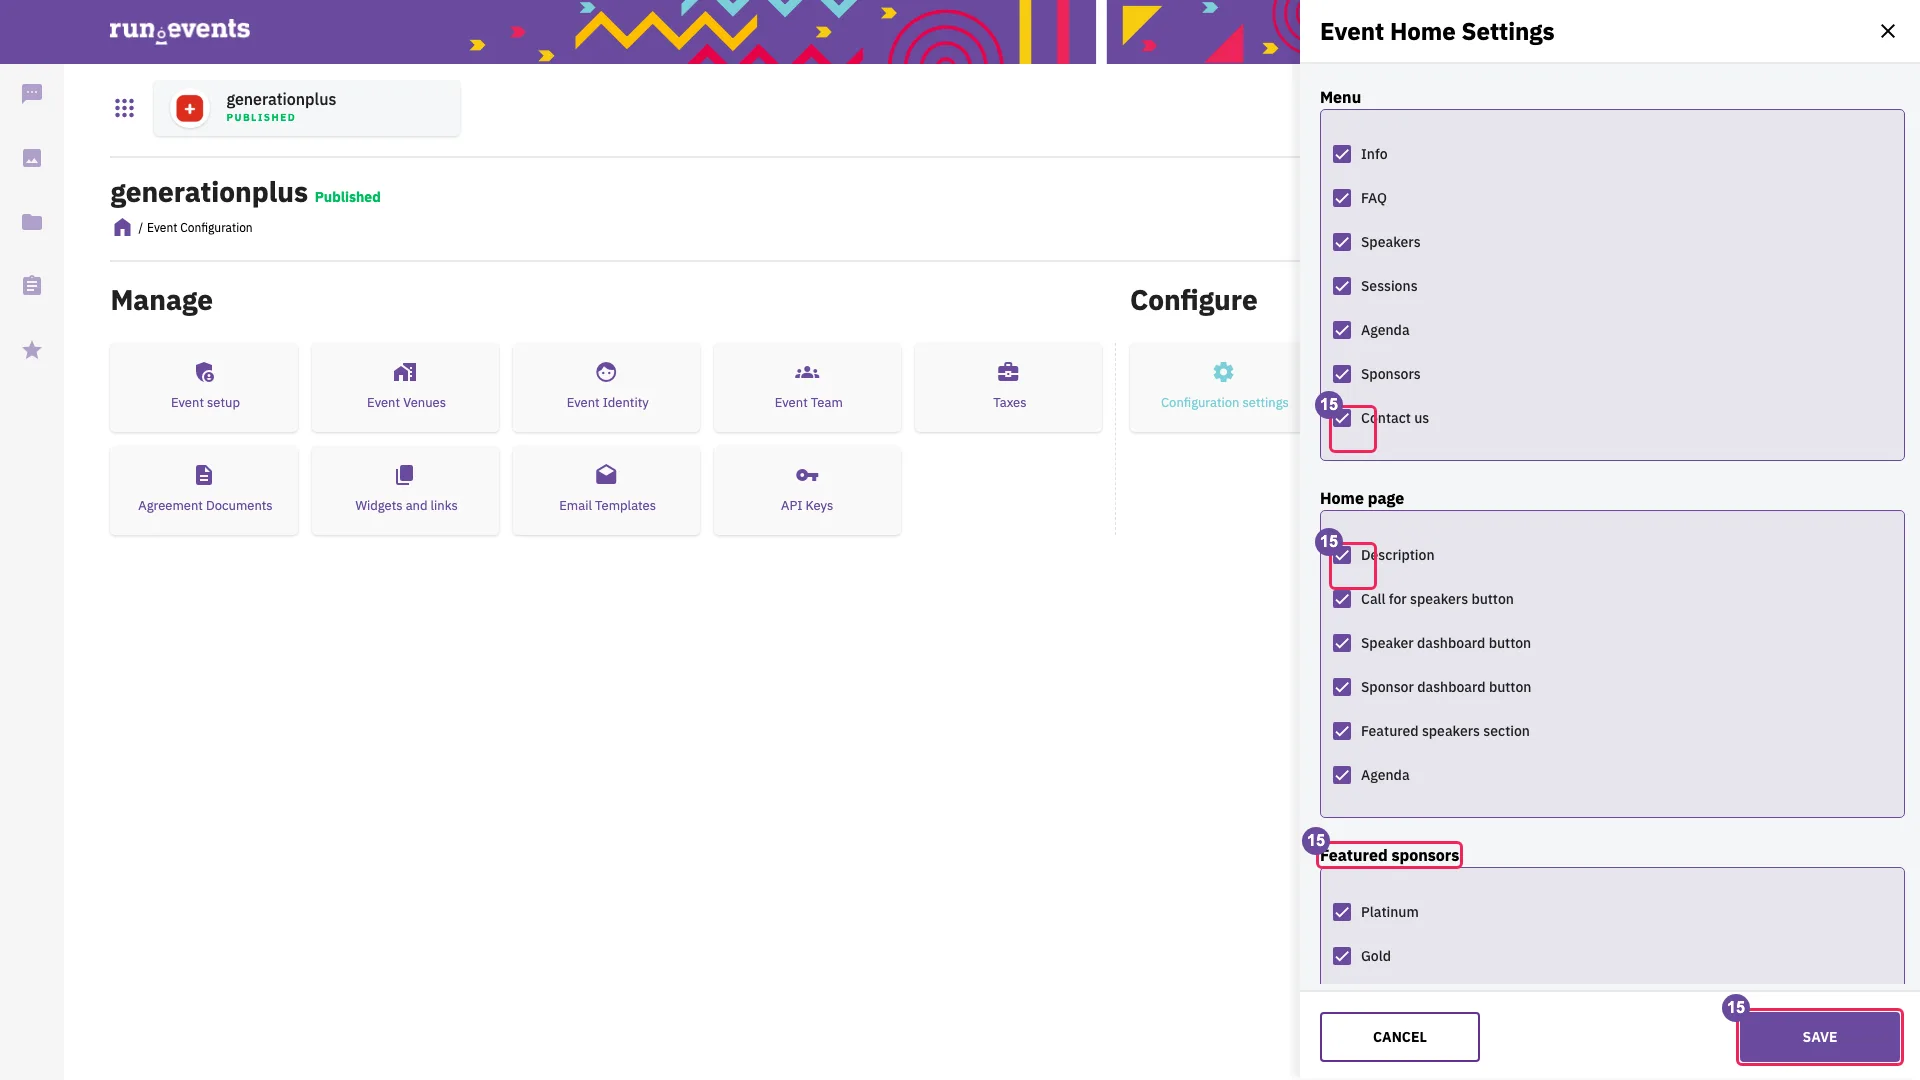
Event Home Settings Menu chooses the sections of the root page's left navigation, Home page the blocks of its Event Home page, and Included FAQs the questions the FAQ section shows. Ticking is not enough for most sections: FAQ, Speakers, Sessions, Agenda and Sponsors appear only when the event has that content, while Info and Contact us appear whenever they are ticked.
Until the first Save, every item is ticked: the event uses the defaults. Changes apply only with Save; Cancel closes the panel without saving. The item names are English in every interface language.
Exercises
Exercise 117 min
Goal
Switch your interface to English, create your own organizer team, create the training event that all later exercises start from, see how it looks from outside, and find its data and the settings that shape its public page.
Starting state
You work in your own run.events account. No input files are needed.
- Your own run.events account on the training environment, signed in. You created it before the course with the email address you gave run.events.
- The address, the country and the registration and tax values that your trainer names for your organizer team.
Tasks
- 1Switch to English
Open the user menu. If the labels are not in English, select EN. Reload the page and check that the labels stay English.
- 2Create your organizer team
Open My teams and select the card under Create a new organizer team.
- Registration details:
- Legal name as registered: your first name, your last name and "Training", for example "Anna Berger Training". It becomes your team's name.
- Address line 1, Town, Postal Code and Country: the address and the country your trainer names. The country cannot be changed later.
- What is a default time zone for your event: type the city that names your time zone (Berlin for Germany, Vienna for Austria, Zurich for Switzerland) and pick the entry, for example "Europe/Berlin".
- Select Next.
- Registration and tax details: leave We have European Union VAT ID Number off. Enter your trainer's values in Registration authority, TAX Number and Registration number, and your own name in CEO / Registered Agent. Select Next.
- Last but not the least: skip the logo. Under Terms and Conditions, open each document, read it and tick its checkbox; tick all of them. Select Submit once.
- Request submitted: select Close. Your team's organizer dashboard opens.
- Registration details:
- 3Create your training event
Select Run an event and complete the wizard.
- Basic event data:
- Event title: "Academy", your first name and your last name.
- Short description: one sentence.
- Start four weeks from today at 09:00; end four weeks and one day from today at 17:00.
- In which time zone are times above?: type the city that names your time zone, as in task 2, and pick the entry. The list holds time zone names, not every city.
- Charging for tickets.
- Support Email: your own address.
- Payment data:
- Which curency will be used for ticket prices? (spelt so on screen): type "euro" in lower case and pick the entry. Entries show the symbol and code, for example "EUR (EUR)"; the name appears once you have picked it.
- Tax name: VAT.
- Tax Scheme and Tax Category: keep the defaults.
- Tax percentage: 19.
- Event type and category: Event type conference; Event category Business.
- Event location:
- Keep In Person ticked and leave the venue empty.
- Do not open Choose venue.
- Event URL: www.example.com.
- Industries, tags and languages: Languages English (German as well if you like).
- Tick the mandatory agreements, if any are shown. Press the final create button, then Close.
- Basic event data:
- 4Check Go live readiness
On the event home, select Go live. Read the reasons, then press No.
- 5Look at your event from outside
Copy your event's slug, the part after
/event/in the address. Then, in a private browser window:- open your event's page in the event portal (address pattern as in walkthrough step 10; your trainer names the host);
- open Info and Contact us;
- add
/checkoutto the address.
- 6Find the event's data and public-page settings
Back in your normal window, on the event home, select Settings.
- Note which cards are red.
- Open Event Home Settings. Compare the ticked Menu items with the sections your event page showed in the private window. Close the panel with Cancel.
- Open Event setup. Check that your title, dates, Time zone and Support Email are there, and that no field holds your event's slug. Leave the page with Cancel, without saving.
Done when
- My teams lists your organizer team under My organizer teams, and its organizer dashboard offers Run an event.
- Your event home shows your title, the status Draft and the Go live button.
- The Go live dialog listed "Please define at least one ticket type" and offered only No.
- In the private window, your event page shows its name and dates and no Buy Tickets.
- Contact us shows your organizer team's name and address and your support address.
/checkoutshows "THIS EVENT IS NOT SELLING TICKETS".- The Event Identity card is red: your event has no logo and no primary colour yet.
- Event Home Settings showed every Menu item ticked, although your event page offered only Info and Contact us besides Event Home.
- Event setup showed your title, dates, time zone and support address, and no field for the slug.
Check questions
- Anna switches the menu to DE on her laptop. The next morning she opens the organizer portal on another computer. Which language does she see?
- You pressed Go live and then Yes. An hour later the event home still shows Draft. Can the event sell tickets?
- A client shares the link to their new Draft event with a colleague who has no run.events account. What does the colleague see, and can they buy a ticket?
- An attendee bought two tickets and wants to give one to a colleague. Where does the attendee do this?
- A client embedded the ticket widget on their website, but it shows no tickets although ticket types exist. Name two possible reasons.
- You created your organizer team this morning, and run.events has since set your training event to Demo. A private window still shows no Buy Tickets on the event page. What is missing?
- A client wants their brand colour on the event page, and wants the Speakers section gone although the event has speakers. Where does the client change each, and what should they know before trying a colour out?
Common mistakes
- The interface is German after sign-up.
- Recognize: the menu reads Mein Profil, Mein Konto.
- Fix: user menu → EN. The sign-in page language became the profile language at sign-up.
- Expecting Go live to make the event sell.
- Recognize: the event home still shows Draft and Go live after Yes.
- Fix: none on the organizer side; run.events sets the status. Pressing Yes again only files another request, and nothing prevents duplicates.
- Currency typed as a code.
- Recognize: "EUR" or "Euro" gives no suggestions, and Next stays disabled.
- Fix: type the name in lower case, for example "euro", or scroll the full list, which shows before you type. Entries show symbol and code, for example "EUR (EUR)". The Swiss franc is listed as "Switzerland Franc": type "franc" or "switz".
- Trying to skip payment data for a free event.
- Recognize: Next on Payment data stays disabled.
- Fix: the currency, Tax name and Tax percentage are always required.
- Misreading Event URL.
- Recognize: you enter an online-meeting link, or look for the run.events address.
- Fix: enter the event's own website. The event portal's menu item Home links there.
- Dates copied from a past event.
- Recognize: "End date should be greater then start date!" although the end is after the start.
- Fix: choose an end date in the future. The earliest allowed end is the later of the start and the present moment.
- Time zone typed, not picked, or looked up by your own city.
- Recognize: "Please select timezone from the list", or no entry appears for the city you typed.
- Fix: the list holds time zone names, not cities. Type the city that names your zone (Berlin for Germany, Vienna for Austria, Zurich for Switzerland) and pick the entry, for example "Europe/Berlin".
- In Person without a venue.
- Recognize: Go live lists "At least one venue has to be selected for in-person events".
- Fix: Event Venues → Add In-person venue, or mark the event online there. The rule does not apply to events marked online.
- Checking your own event page while signed in.
- Recognize: Buy Tickets is visible and leads to "THIS EVENT IS NOT SELLING TICKETS".
- Fix: use a private window to see what anonymous visitors see.
- Assuming the support email address stays private.
- Recognize: the address appears on Contact us.
- Fix: use a shared support mailbox.
- A casual event title.
- Recognize: the event address contains an old or mistyped title.
- Fix: none. The slug cannot be changed, and events cannot be deleted; they leave the organizer dashboard after their end date.
- Choosing the organizer team's country carelessly.
- Recognize: in module 3, the Stripe or reconciliation card is missing under Payment Settings.
- Fix: none in the product: the country cannot be changed after the team is created. Choose the country in which the team is registered; it decides the payment providers.
- Leaving the registration and tax details empty.
- Recognize: the organizer's task list shows "Fulfill your tax and registration data", and the team's documents lack seller data (module 3).
- Fix: complete Registration and Tax data in the organizer profile (module 3). In the organizer team wizard these fields are optional.
- Signing in with the old address after changing the notification email address.
- Recognize: a new sign-up starts.
- Fix: sign in with the new address.
- Event languages without English.
- Recognize: the event portal header offers no EN.
- Fix: add English under Event setup → Languages.
- Expecting a new organizer team to sell.
- Recognize: the event is Demo, but the event page shows no Buy Tickets, and
/checkoutshows "THIS EVENT IS NOT SELLING TICKETS". - Fix: wait for run.events to approve the team. A Requested team can create events but cannot sell.
- Recognize: the event is Demo, but the event page shows no Buy Tickets, and
- Trying out Event Identity on a live event.
- Recognize: the event page's colour or logo changed while you were only looking.
- Fix: set the previous value again. Event Identity saves every change at once; there is no Save and no undo.
- Expecting a ticked section to appear.
- Recognize: Speakers is ticked under Event Home Settings → Menu, but the event page has no Speakers section.
- Fix: add the content. FAQ, Speakers, Sessions, Agenda and Sponsors show only when the event has such content.
2Permissions and communications
Learning objectives
- Invite a person into an organizer team with a chosen organizer role, and say in advance which organizer cards and which events that person will see.
- Add an organizer team member to one event's team and choose event roles that open only the areas the person needs, including the right badge and desk level for onsite staff.
- Explain how organizer roles and event roles combine (roles only add access, nothing can be denied, and seeing an event is a separate check), and use these rules to predict whether a given person can open a given area of an event.
- For the main system emails, name who receives them, and assign the role that makes the team copies (refund, cancellation, speaker, booth) reach a person.
- Customize a system email template for one event language, then revert it to the system text.
- Set up the sender that info emails need, send a text info email and a rich info email to the holders of selected tickets, find both in the email log, and remove the sender again.
- Say what Agreement Documents and API Keys do for an event: which legal texts buyers accept at checkout, and how an event API key is created, shown once and deactivated, with no role protecting it.
Concepts
Two teams at two levels
An organizer works with two kinds of team.
- The organizer team is the group of people who work for the organizer. Its members hold organizer roles, and an organizer role applies to every event of that organizer. Only active members of the organizer team can open the organizer portal.
- The event team is a subset of the organizer team, added to one event. Its members hold event roles, which apply to that event only. Only organizer team members can be added to an event team, inactive members included.
Who starts with which role
- Whoever creates an organizer team becomes its representative, marked with a star in Team management, and an Admin. You created your own organizer team in module 1, so you are its representative and an Admin.
- An invited person never becomes the representative by accepting an invitation. The star moves only when a nominated Admin accepts the nomination through the link in the nomination email.
- The representative always keeps Admin: if the role is unticked, saving restores it. The representative cannot be deactivated or deleted in the interface.
- The representative hands the role over with Make representative on the record of another Admin, who accepts by email link.
- Whoever creates an event becomes its Event Manager. Other Admins are not added to the event team; they see the event because Admin includes the permission to see all events.
The interface assigns roles, not permissions
Internally, run.events checks individual permissions, but no screen lists or edits the permissions of a person. You tick roles, and each role is a fixed bundle of permissions.
- Organizer roles are ticked on the invitation form, when a join request is confirmed, and on a member's record (User info). Event roles are ticked in the event team flyouts.
- The role lists are the same for every organizer and every event. You cannot create your own role or give a single permission.
- The hover text on the invitation form repeats the role name and does not explain the role. This handbook therefore describes each role by what it opens.
- The only screen that lists event permissions is the API Keys flyout (step 10), and there they belong to a key, not to a person.
Three access rules
- Roles only add. A person gets access if any role they hold grants it. Nothing can be denied.
- Organizer roles count on every event; event roles count only on their own event. An organizer Admin cannot be restricted on a single event, and setting an Admin's event-team row to inactive changes nothing for that Admin.
- Seeing an event is a separate check. An event appears in the event list, and can be opened, only for people who hold the permission to see all events (organizer Admin) and for active members of its event team, even members without any event role.
A card appears only when the person holds the matching permission. If someone opens an area by its address without permission, the server refuses without a message: some lists return to the level above on their own, others stay empty.
Organizer roles
| Role | Opens | Receives because of the role |
|---|---|---|
| Admin | Every organizer card: Team management, CRM, Organizer profile, Payment Settings, Integrations, Communities, and the Run an event button. Every event and every area of it, within the products and configuration of the event, including the full Badges and Check-In area | None of the team copies that are sent by role |
| Finance manager | Payment Settings. Inside an event: Finances, and Taxes under Settings, but only in events whose team the person belongs to, because the role does not include seeing all events. The team chat panel | The team copies of refund and cancellation requests for every event of the organizer, even while the person is inactive and without an event-team row |
| Partner manager | CRM. Inside an event: Sponsors in events without a master event, and Expo where Expo is licensed. The team chat panel | Notifications of reserved booths |
Only an Admin can use Team management; the server enforces this for every list and action there. A member without any organizer role sees the text “Ooops… seems to be empty here. Please choose your event from the selector above.”
Event roles
The event role list is fixed. The table lists the roles taught on this day.
| Event role | Opens on this event | Receives because of the role |
|---|---|---|
| Event Manager | Everything except Badges and Check-In, session rating, customers and Assemblies; includes Event team and Event actions | None of the finance, content or expo team copies |
| Ticket Manager | Tickets And Attendees; the Settings card, where only Widgets and links, Email Templates and API Keys appear | — |
| Finance Manager | Finances; Taxes under Settings | The team copies of refund and cancellation requests for this event |
| Content Owner | All of Content And Speakers | The team copies of speaker profiles and sessions |
| Content Team Member | Session rating in Content And Speakers (module 6) | — |
| Agenda Manager | The agenda builder only | — |
| Sponsors Manager | Sponsors (events without a master event) | Booth reserved |
| Expo Manager | Expo (where licensed) | Booth status and booth reserved |
| Marketing Manager | Marketing | — |
| Communication Manager | Communications, Mobile App | — |
| Gamification admin | Gamification (where enabled, events without a master event) | — |
| Chat participant, Chat admin | The team chat panel; the moderation rights of Chat admin are not enforced | — |
| Badge designer manager | The full Badges and Check-In area, and the Badge button in the Tickets list. Global Check-Ins opens only with a tickets permission as well | — |
| Registration Desk | Badges and Check-In: the Registration Desk card only | — |
| Support Desk | Registration Desk, Support Desk (with walk-in registration) and Session Check-Ins. Global Check-Ins also needs a tickets permission | — |
| Partner Manager, Customers Manager, Event CRM Manager | Nothing: these roles carry no permissions | — |
Two event home cards do not depend on roles at all. Intelligence appears when the organizer or the event has any run.events product, and Assemblies when it has the Assemblies product. Every member of the event team then sees them.
Badge and desk levels
The Badges and Check-In area has three levels.
| Level | Who has it | Cards |
|---|---|---|
| Full | Organizer Admin, or event role Badge designer manager | All desk cards, plus Badge Designer, Kiosk App Setup and Print at Home Settings. Global Check-Ins also needs a tickets permission: an organizer Admin has it, Badge designer manager alone does not |
| Support Desk | Event role Support Desk | Registration Desk, Support Desk, Global Check-Ins (only with a tickets permission) and Session Check-Ins; no configuration |
| Registration Desk | Event role Registration Desk | Registration Desk only: search and badge printing (module 5) |
An Event Manager holds none of these permissions, so onsite staff need a desk role.
Deactivate, remove, delete
Organizer team:
- Switching Status off keeps the person in the organizer team, but removes their organizer permissions and their access to the organizer portal.
- Delete member removes the membership.
- Neither action touches the person's event-team rows, although the delete dialog says that all event roles are revoked.
- Deactivating or deleting anyone cancels a pending representative nomination.
Event team:
- Switching Active off hides the event from the person and stops their event permissions. Their organizer roles are not affected.
- Removing a person from an event team also deletes their session ratings and their content assignments (module 6).
- Saving a member with no event role ticked removes the member.
Invitations:
- An invitation stays open until it is accepted, declined or cancelled with Cancel Invite; it does not expire.
- The invited person sees it under My teams only when signed in with exactly the invited email address.
- The invitation email is always in English.
- Adding someone to an event team sends no email.
Agreement Documents
Agreement Documents holds the legal texts of one event that buyers accept at checkout. Admin and Event Manager see the card under the event's Settings.
- A document has a type, Mandatory, Active, Valid From, Valid To, an Internal Comment, and a title and text in a default language, plus translations.
- The type for ticket buyers is “Purchasing Tickets (Event level)”. The type for speakers belongs to module 6.
- At checkout, the order summary lists every valid “Purchasing Tickets” document as a checkbox: those of the event, and platform documents that belong to no event, each active and within its validity dates. The buyer must tick every mandatory document; otherwise the order is refused with “You need to agree to all required documents”. The acceptance is stored for the buyer with the event.
- The checkout shows the text in the buyer's language, otherwise in the document's default language, otherwise in English.
- The list shows Type, Title, Mandatory, Active, Active From, Active To and Agreements (the number of confirmed acceptances). A document that is inactive or outside its validity dates is shown in red.
- The checkout records every document it offered, ticked or not. Once such a record exists, the delete icon of the document disappears; switch Active off instead.
- The card is marked as a warning while the event has no agreement document (“Define at least one agreement document”).
API Keys
An event API key is meant to let another system work with the data of this event, limited to the event permissions ticked on the key.
- Add new asks for a Description, a Key Validity of 6, 12 or 24 months, the Permissions (the event permission list, in English) and Active.
- Save creates the key and shows it once, in the dialog API Key Created. run.events stores only a fingerprint of the key and its first four characters, so the key cannot be shown again.
- The list shows Key (the first four characters), Description, Active, Valid Until, Created By and Created On; expired keys are marked.
- A row opens Edit API Key, where the description, the permissions and Active can be changed, but not the validity.
- The delete icon acts at once, without confirmation, and only deactivates the key: “API key deleted successfully.” appears, the row stays with Active off, and switching Active on again in Edit API Key makes the key usable again.
- No role protects the card. Everyone who reaches the event's Settings page sees API Keys and can create, change and deactivate keys.
- The product does not show which systems accept an event key. Ask run.events before you hand a key to anyone.
Three kinds of email
- System emails are sent automatically when something happens, for example a checkout, a refund request or a session submission.
- Organizer-team emails (invitation, join request, approval, representative nomination, test email) belong to the organizer and do not appear in the log of any event.
- Info emails are sent by a team member from the Tickets list.
Every email is queued, logged and then sent by a background process. If the email provider rejects an email, it is tried again after one and after two minutes, and marked as failed after the third attempt. An email without a recipient is logged but never sent.
Which text a system email uses
For an event email, run.events takes the first text it finds in this order:
- the event's custom template in the email language;
- the event's custom template in English;
- the organizer's custom template in the email language;
- the organizer's custom template in English;
- the system template in the email language.
No screen writes organizer custom templates, so in practice customization is per event and per language, under Email Templates.
- Account and platform emails ignore event customization.
- No system email can be switched off. Only run.events can hide a template from an event's list, and the Assemblies templates appear only in events with the Assemblies product.
- The template names and the help texts of the placeholders are in English in every interface language.
One email language per event
System emails of an event use one language for every recipient: the event's first language. The first language is decided by an internal order, not by the order in which the languages were added. In practice it is English when the event includes English, and German when the event includes German but not English. In an event with English and German, German custom texts are therefore not used for system emails.
Who receives which email
Recipients are fixed by run.events and are shown nowhere in the product. Team copies go to specific roles, not to Admin or Event Manager. Refund and cancellation mail for the customer goes to the buyer, not to the ticket holder. The last column gives the name under which the email appears in Email Messages.
| Recipient | Sent when | Name in the log | |
|---|---|---|---|
| Ticket with QR code | The ticket's assignee. For Send Ticket and Resend Ticket: the assignee, otherwise the invitee, otherwise the buyer | Checkout (assigned tickets only); later assignment or personalization; Send Ticket or Resend Ticket | TicketClaim (with add-ons), TicketWithoutAddonsClaim |
| Personalize your ticket | An assignee other than the buyer | The ticket type requires work information or custom fields, and the ticket is not yet personalized | TicketAssignment |
| Free registration | The invoice email address or addresses entered at checkout | Order total of zero | FreeTicketPurchase |
| Multiple tickets | The buyer's account email | More than one ticket, tickets issued before payment | MultipleTicketBought |
| Ticket reserved | Buyer | Reserved-ticket mode only (module 4): tickets issued after payment, order total above zero | TicketReserved |
| Payment instructions | Buyer | Bank transfer chosen | PaymentInstructions |
| Invoice (PDF) | Invoice recipient | Paid order with an invoice; not when invoices are issued after payment | InvoiceCreated |
| Receipt | The invoice email address or addresses | Payment succeeded | Receipt, ReceiptWithAdditionalData |
| Unassignment | The former assignee | Ticket unassigned | UnassigmentEmail |
| Badge (PDF) | The assignee, otherwise the buyer | Send Badge | SendBadge |
| Refund or cancellation request received | The buyer who paid (each buyer if the request spans orders); not the ticket holder | Request made | CustomerRefundRequest, CustomerCancellationRequest |
| Refund or cancellation request, team copy | Event role Finance Manager and organizer role Finance manager. If nobody holds either role, the refund copy is logged with an empty recipient and never sent, and no cancellation copy is created | Request made | RefundRequest, CancellationRequest |
| Request declined | The buyer who paid, plus the addresses in the decline form (pre-filled with the invoice email); not the ticket holder | Refund or cancellation declined | DeclineCorrection |
| Invoice correction or cancellation document | The buyer and the invoice contact, plus the addresses the organizer enters; not the ticket holder | Refund or cancellation approved | InvoiceCorrectionCreated, InvoiceCancellationCreated |
| Speaker profile created; session submitted or edited | Speaker | Speaker action | SpeakerProfileCreated and others |
| Speaker profile or session, team copy | Content Owners of the event | Profile or session created or edited | SpeakerProfileCreatedToTeam, SpeakerProfileEditedToTeam, NewSessionSubmitted, SessionEdited |
| Booth reserved | Sponsors Manager or Expo Manager of the event, plus organizer role Partner manager | Booth reserved | ExpoBoothReservedToOrganizer |
| Support request | The event's Support Email (in Event setup), with reply-to set to the attendee | A signed-in attendee uses Support in the event portal | SendSupportEmail |
| Team invitation, approval, nomination | Invitee (always in English), approved requester, nominee (in the recipient's language) | Actions in Team management | Not in the event's log |
Speaker, sponsor and expo emails are taught in their own modules (6, 8 and 9). This module shows the rule that team copies follow roles.
Senders
- Without any set-up by the organizer, system emails are sent through the platform's email provider.
- An Admin can add email providers (SMTP, SendGrid, MailJet) and sender addresses under Integrations. Creating a provider creates its first sender address automatically; an address cannot exist without a provider.
- Credentials are not checked when a provider is saved.
- An event can choose its own default sender under Logo and Identity (module 1, Event Identity). The page saves as soon as an address is picked.
- Whether a given system email uses the organizer's sender depends on a setting per template that only run.events controls. The organizer's sender may therefore not apply to every system email.
Info emails
- An info email is sent only from a selection of tickets in the Tickets list.
- Send Email appears only once the organizer has a sender address, and it is enabled only while tickets are selected.
- The recipients can be the buyers (their account email), the assignees and the invitees of the selected tickets, in any combination. Invitees are used only while a ticket is unassigned. Duplicates and blanks are removed.
- Text sends plain text inside the branding of the organizer or of the event (logo, colour, address or event data). No placeholders are replaced. The log shows it as
SendEmailFromOrganizerorSendEmailFromEvent. - Rich sends an email design made in EIC for the same event, with the recipient type Ticket owners. The subject is typed in the flyout, and no placeholders are replaced. The log shows it as
UserCreatedEmail. - The design is made in EIC (step 15), which opens from the event home card Intelligence. That card appears only when the organizer or the event has a run.events product.
- EIC templates belong to one organizer. A new organizer has none, so its first design is made with New with AI.
- A text info email needs a tickets permission (Admin, Event Manager, Ticket Manager). A rich info email also needs a communications permission at organizer level, so in practice only an organizer Admin can send it.
- The log is Communications → Email Messages. It shows the emails of this event only, and Resend appears only for failed messages. Its Email body tab removes every image before showing the stored email, so logos and QR code images do not appear there.
Guided walkthrough
In the addresses below, {organizer} and {event} stand for the short names of the organizer and the event as they appear in the address bar.
Roles and teams
- 1Open the organizer dashboard
Open
o.runevents.net/{organizer}, or in the side menu choose My teams and then the organizer's card.The dashboard shows the cards Team management, CRM, Organizer profile, Payment Settings, Integrations and Communities, the Run an event button and the event list.
Each card appears only when one of your roles grants it: Team management, Organizer profile, Integrations and Communities for Admin only, CRM for Admin and Partner manager, Payment Settings for Admin and Finance manager. The event list shows every event of the organizer to an Admin; a Finance manager, or a member without any organizer role, sees only the events whose team they belong to. This dashboard is the quickest check of what a new colleague can see.
On your first visit to an organizer team you have joined, the dialog Our legal documents have changed opens first and closes only with I Agree. It lists the run.events legal documents for organizer teams. Each person accepts them once for each organizer team they join, and again when run.events changes them. Whoever creates a team accepts them while creating it, so you do not see the dialog on your own team.
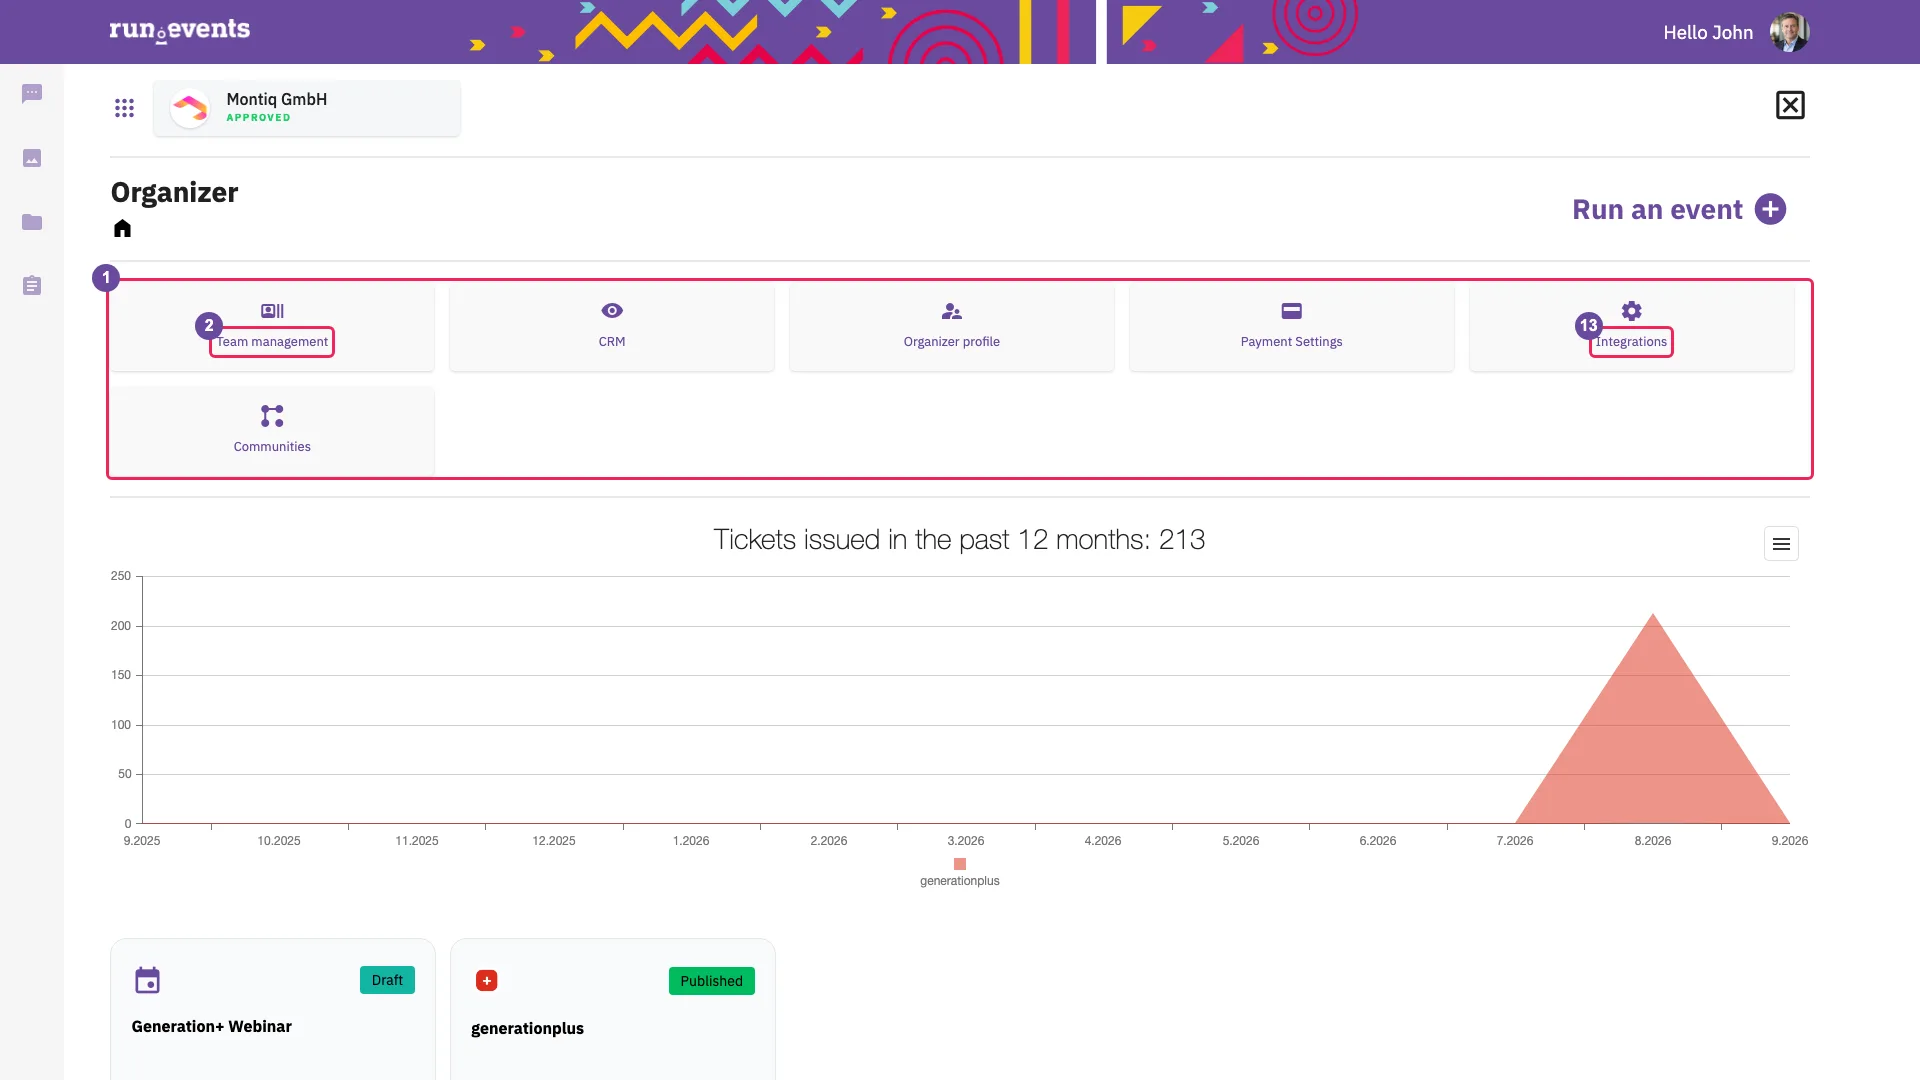
The organizer dashboard: the cards follow your organizer roles. Marker 13 points to Integrations (step 13). - 2Read the organizer team
Choose Team management (
o.runevents.net/{organizer}/team-members). The page has the tabs Team Members, Requests and Invites.In Team Members, the star marks the representative; in the training, that is your own row, because you created the team. “Active” and “Inactive” are shown in English in every interface language. The last column lists each member's roles. Invites lists open invitations only, with their roles and Cancel Invite. Requests lists join requests with Approve and Decline.
The representative is the team's main contact. The representative always holds Admin and cannot be deactivated or deleted. The role is handed over only with Make representative on another Admin's record; that Admin accepts by email link.
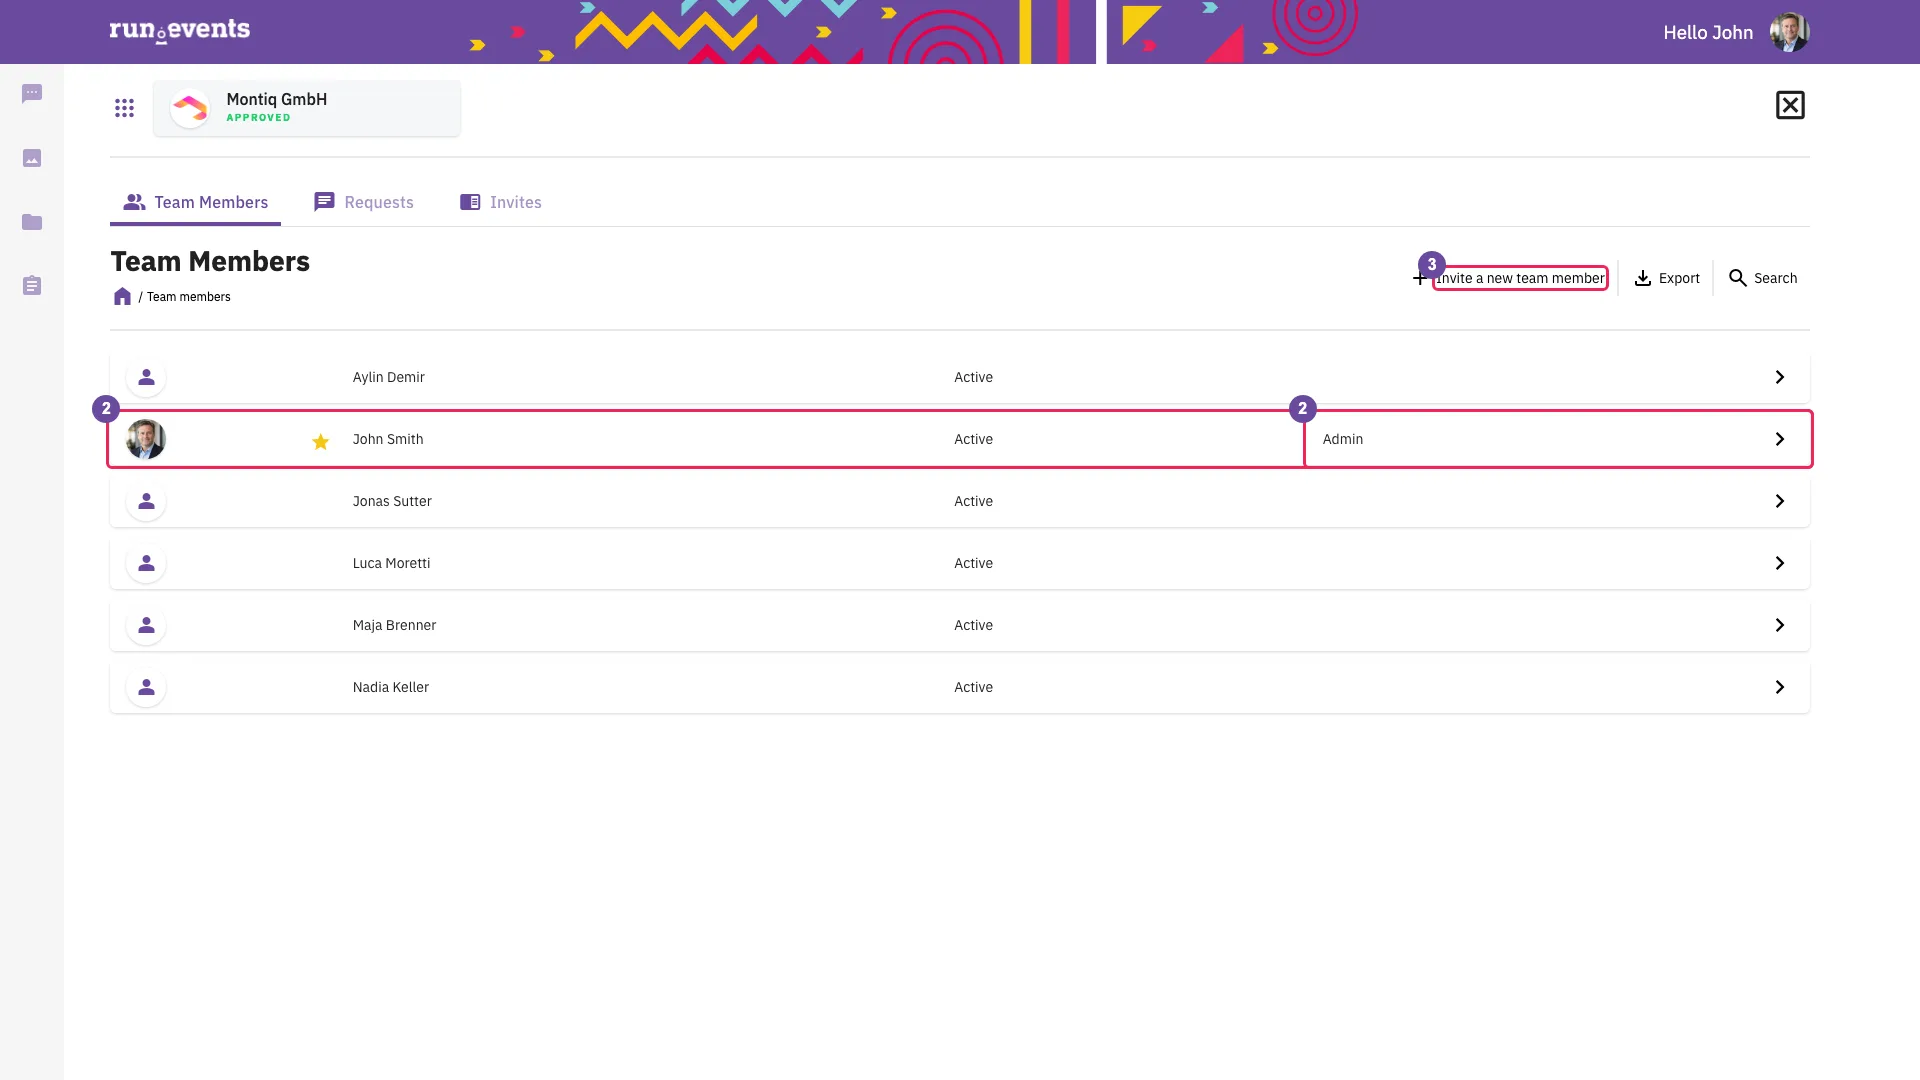
Team management: the star marks the representative - 3Open the invitation form
Choose Invite a new team member (
…/team-members/invite-member).The form Invite member has the fields E-mail address and Invitation message:, and under Choose the roles of this new team member: one checkbox each for Admin, Finance manager and Partner manager, followed by Cancel and Send.
Send stays disabled until the address and the message are valid. It creates an open invitation with the ticked roles and emails the person in English; an invitation without any role is allowed. After Send the page returns to the Team Members tab, not to Invites. The person accepts under My teams → Team invitations → Accept → Yes, signed in with exactly the invited address.
Tick only the roles you want. If you tick a role and untick it again, every role ticked after it is dropped from the invitation, while the screen still shows them ticked.
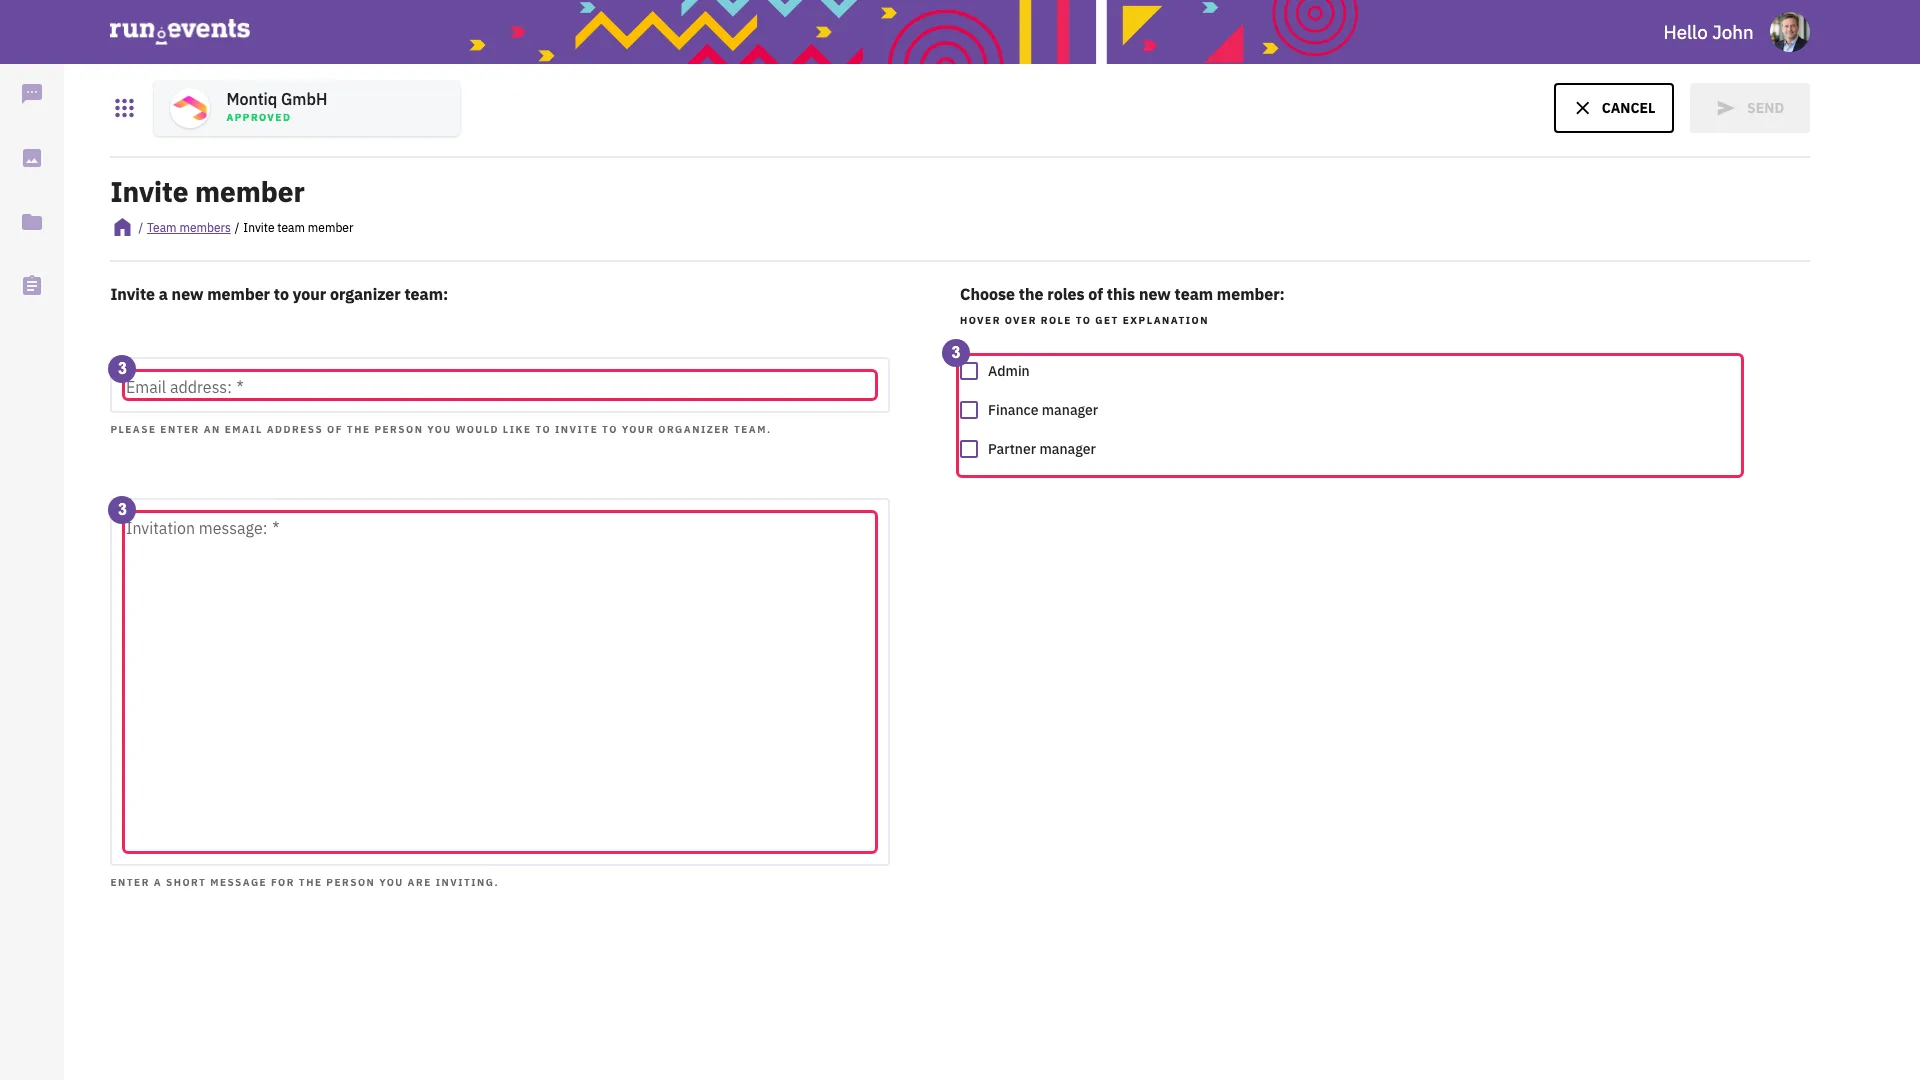
The invitation form - 4Open a member's record
Click a row in Team Members (
…/team-members/user-info/…).The record shows Status with the Active toggle, Assigned roles with one checkbox per organizer role, Delete member, the member's events (shown to holders of the finance permission), and Cancel and Save. Make representative appears only on the record of another Admin who is not the representative; once that Admin is nominated, Withdraw representative nomination replaces it.
Save writes status and roles together. Status off keeps the person in the team without organizer access. Delete member removes the membership. Despite the text of its dialog, neither action removes the person from any event team. On the representative's record, and while a nomination is pending, Status and Delete member are hidden, and the representative's Admin role cannot be removed.
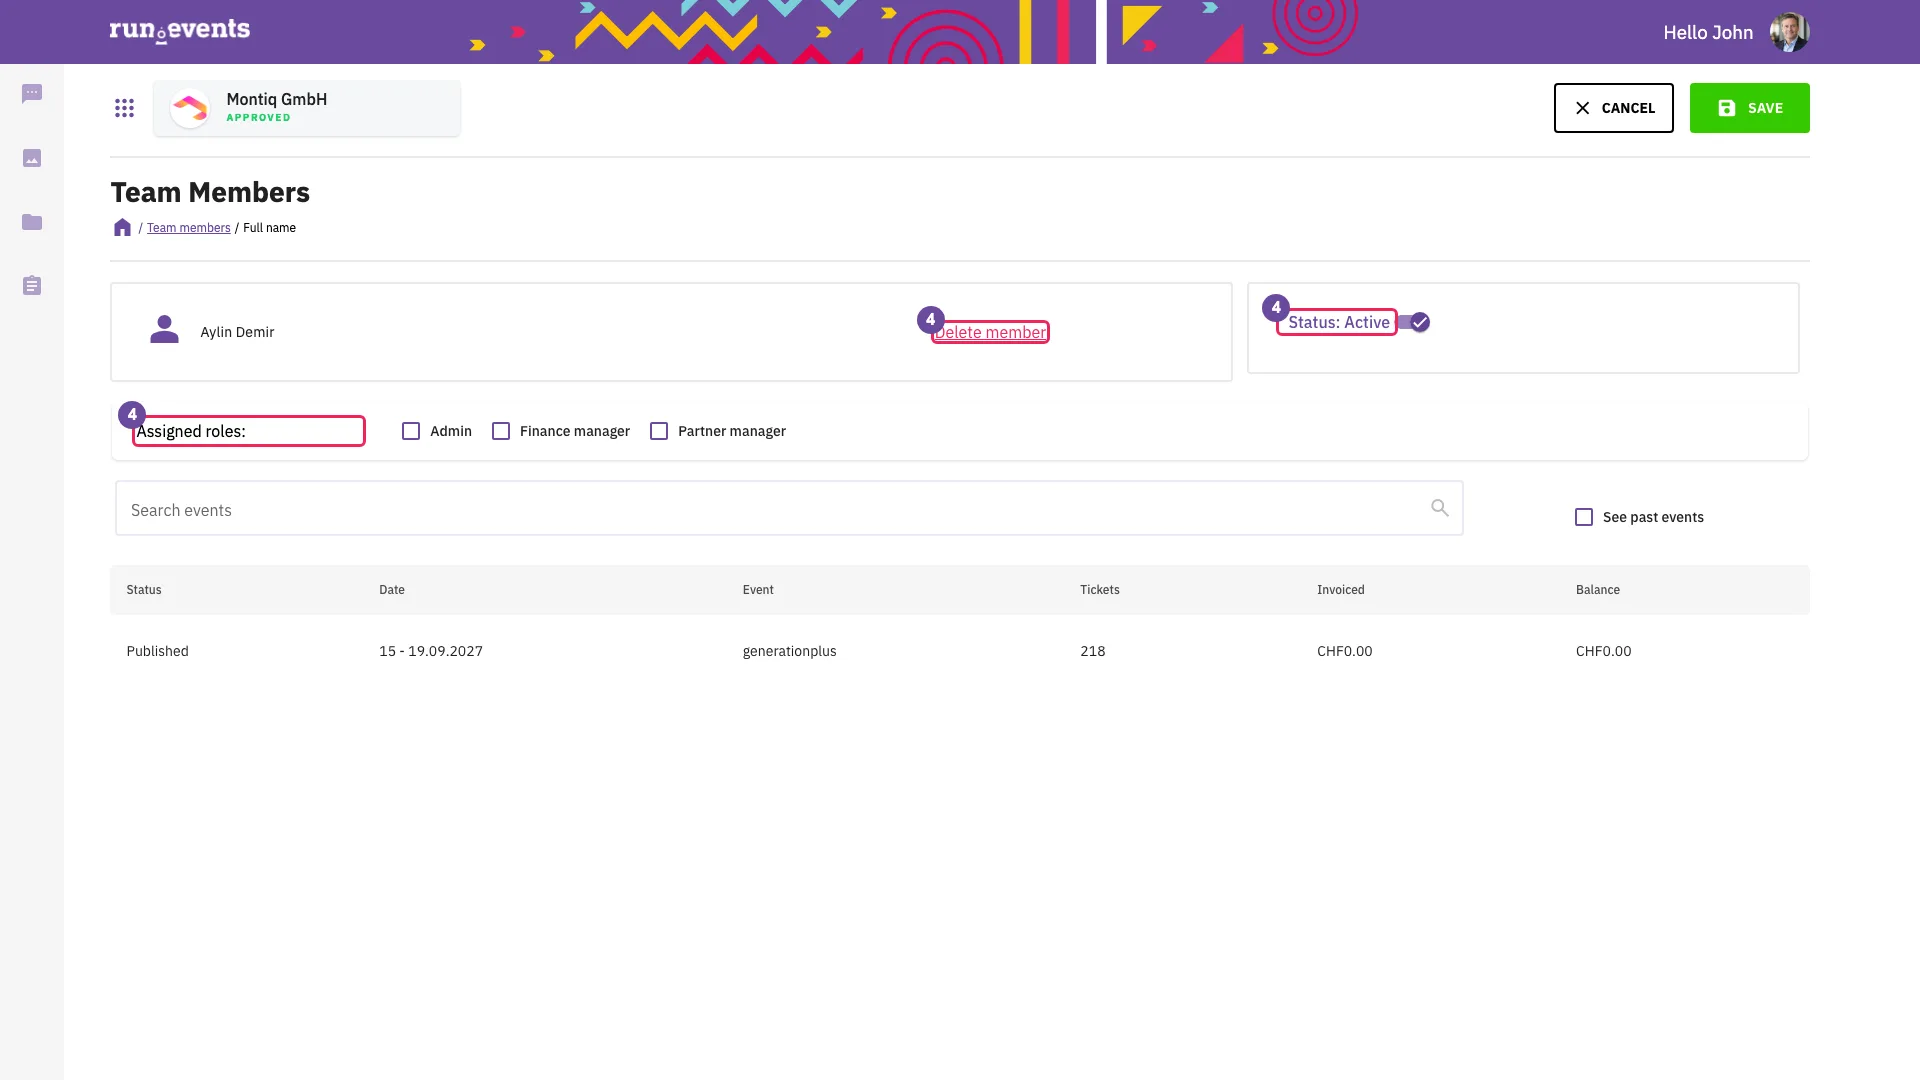
User info of an Admin who is not the representative - 5Open the event home
In the event list, choose the event's card (
o.runevents.net/{organizer}/event/{event}).The event home shows the cards Tickets And Attendees, Finances, Content And Speakers, Sponsors, Expo, Badges and Check-In, Gamification, Communications, Marketing, Mobile App, Intelligence, Assemblies and Settings.
Each card needs a permission from an organizer role, or from an event role on this event (tables in Concepts). Intelligence and Assemblies depend only on run.events products. Sponsors and Gamification are not available in events with a master event.
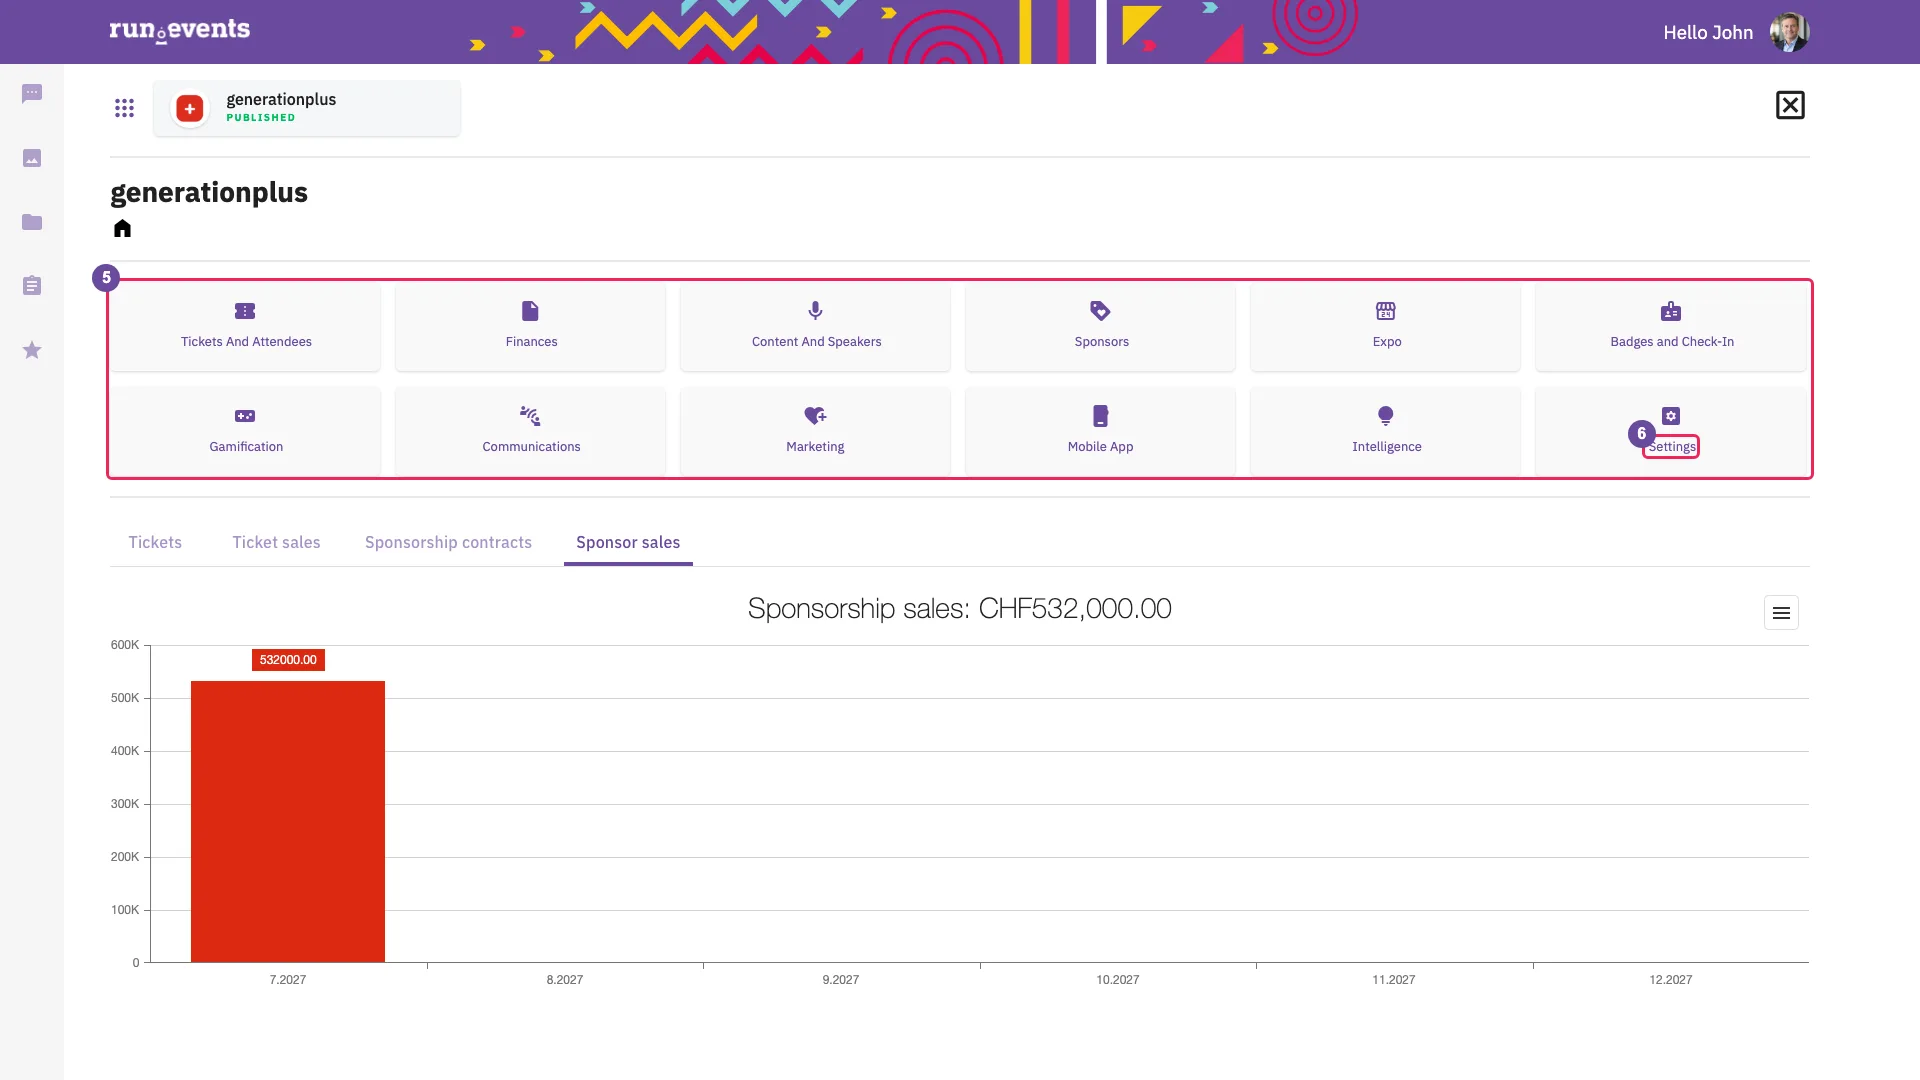
The event home: each card needs a role or a product. Marker 6 points to Settings (step 6). - 6Open the event's settings
Choose the Settings card (
…/event/{event}/event-configuration); the breadcrumb reads Event Configuration. The page lists its cards under Manage and offers the Event actions menu.This module uses the cards Event team (marker 6, used in step 7), Agreement Documents and API Keys (markers 9 and 10, used in steps 9 and 10) and Email Templates (marker 11, used in step 11).
Admin and Event Manager see all cards. Finance and ticket roles also reach this page, but see only the cards that have no role condition, Widgets and links, Email Templates and API Keys, and, with a finance role, Taxes. Email Templates then stays empty, because its data needs Admin or Event Manager.
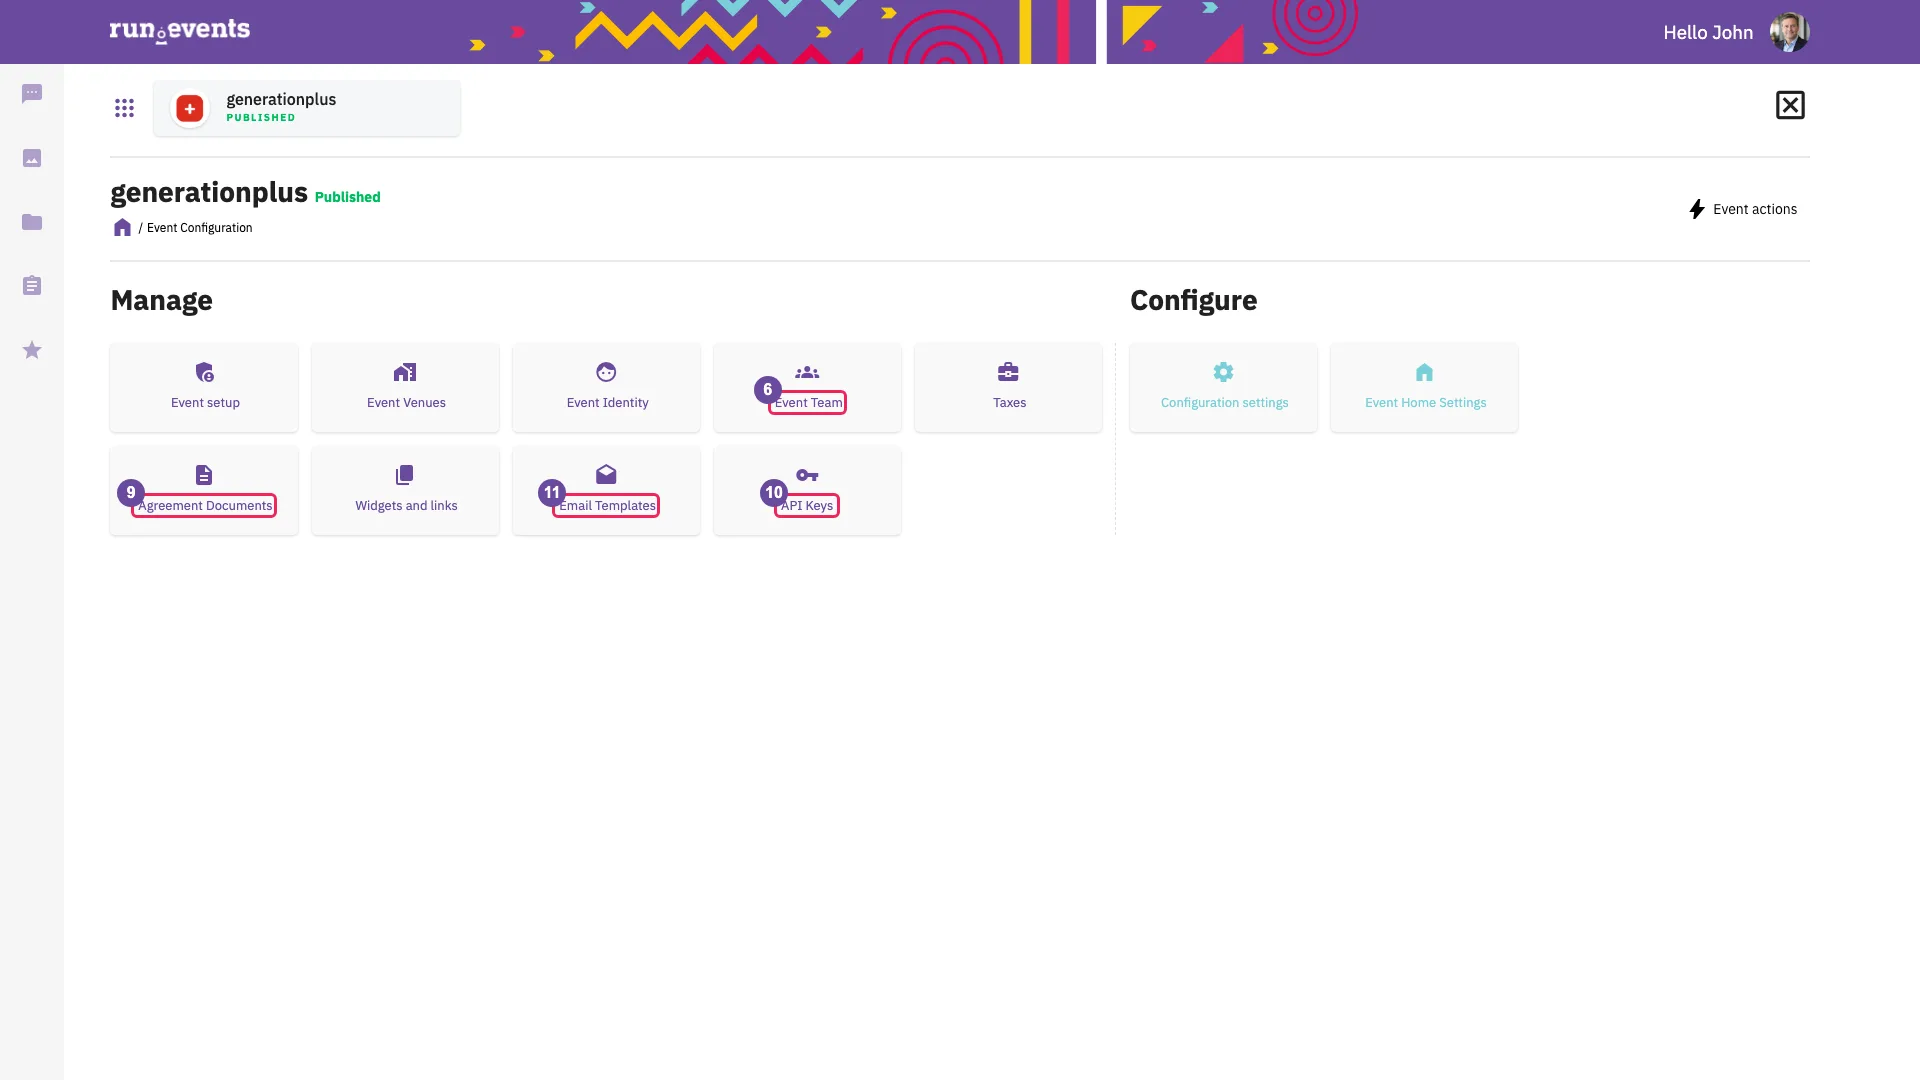
The event's settings, with the cards used in steps 7, 9, 10 and 11 - 7Manage the event team
Choose Event team (
…/event-configuration/event-team).The list offers Add a new event team member, Export and Search, and shows the columns Image, Name, Status and Roles, with a delete icon in each row. Add a new event team member opens the flyout Add team member with Select event team members:, Choose the event roles for the team member(s): (the fixed event role list) and Save. A click on a row opens Edit team member with Status (Active), Assigned roles and Save.
- Only organizer team members who are not yet on this event can be selected.
- All people selected together receive the same roles; saving without any role is allowed.
- In Edit team member, saving with no role ticked removes the person from the event.
- Unticking Content Team Member opens a dialog whose Yes writes at once, before Save.
- The delete icon opens Remove team member: the person is removed from this event only, together with their session ratings.
- Adding or removing a person sends no email.
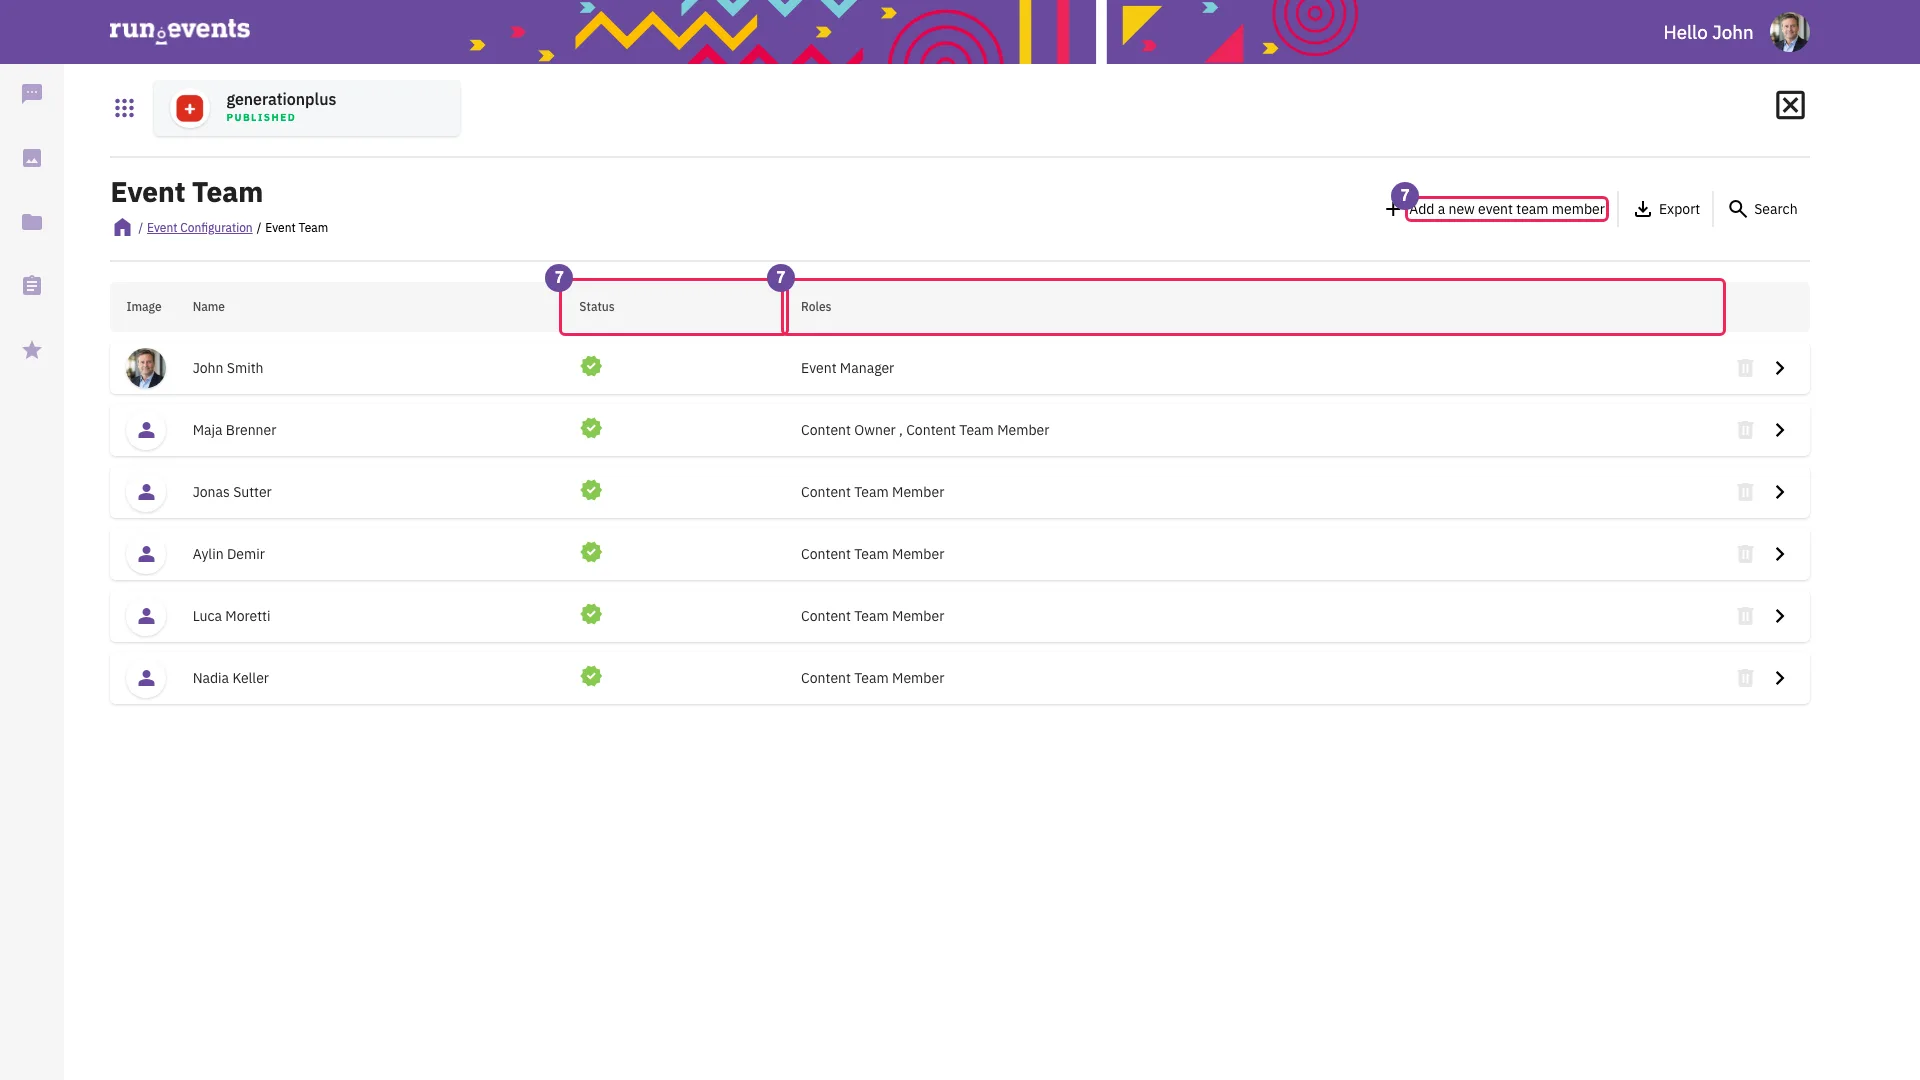
The event team 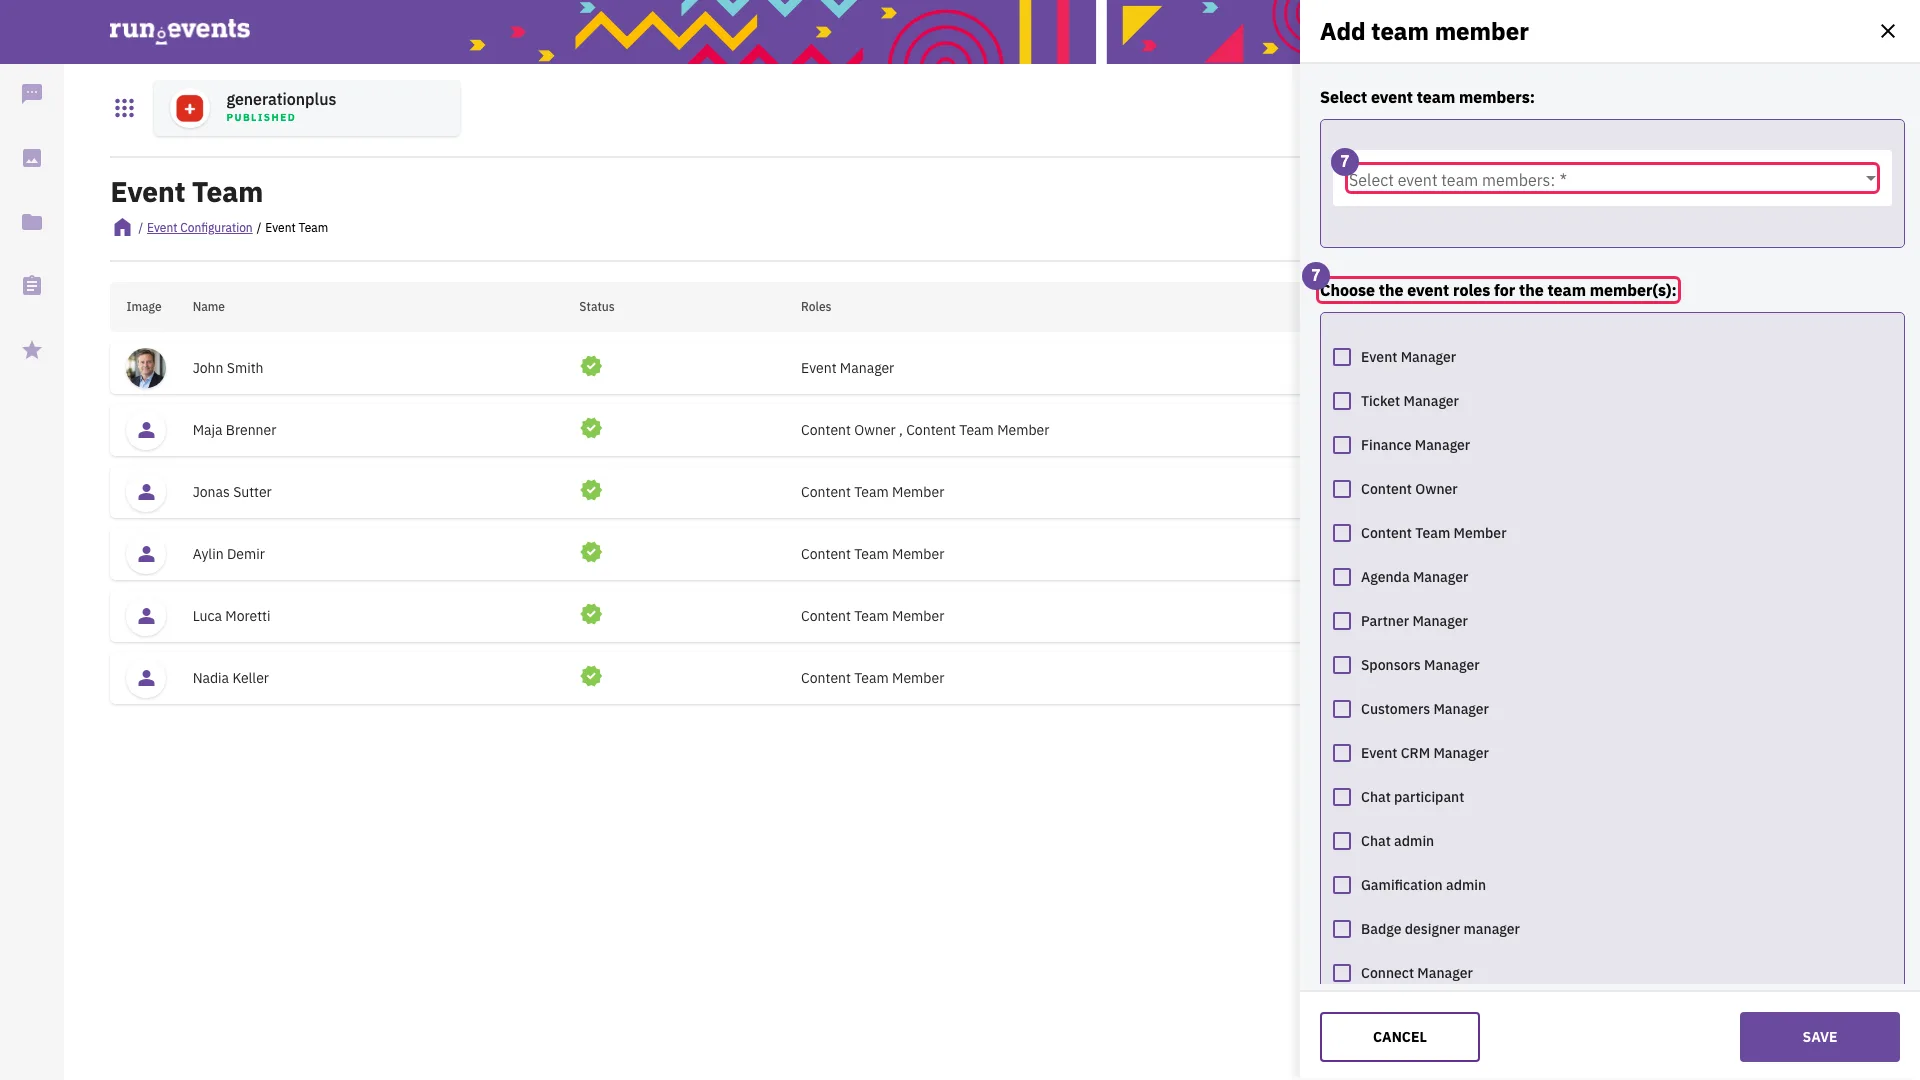
Adding organizer team members to the event team 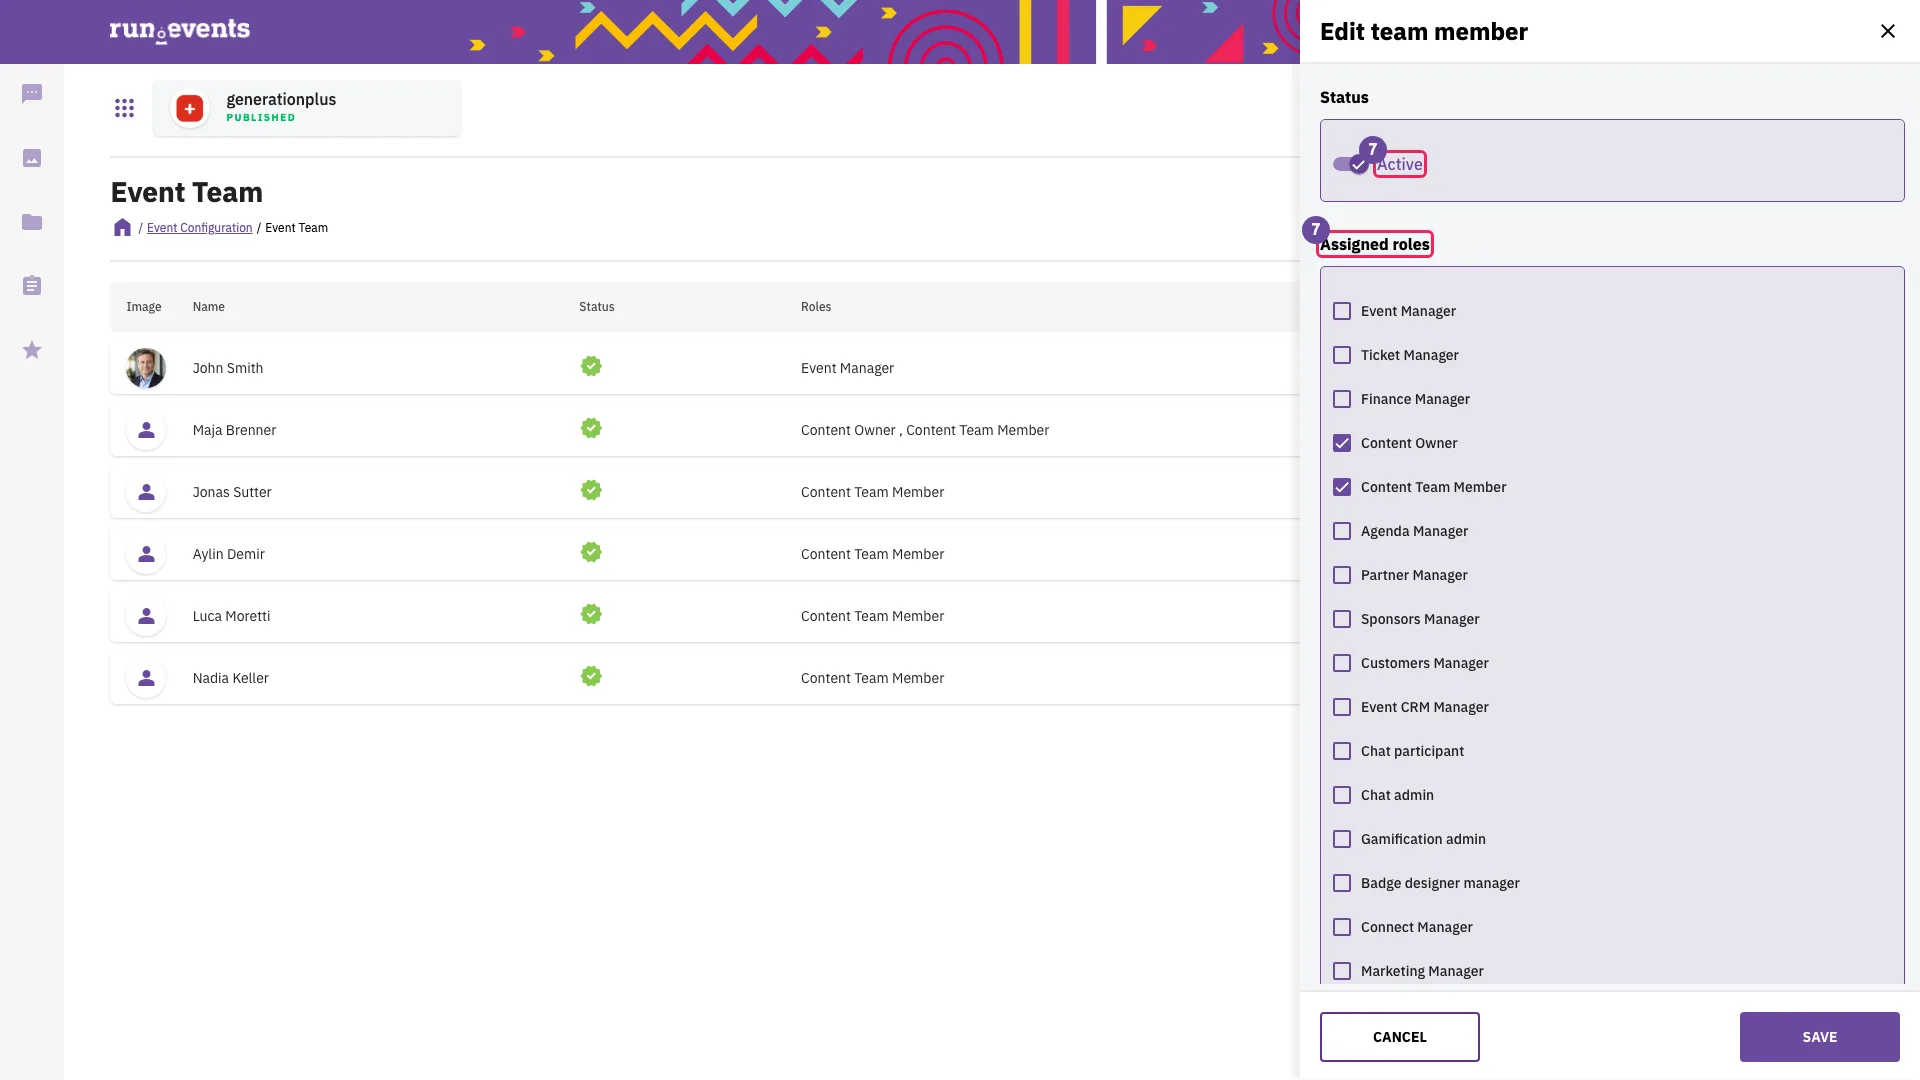
Changing the roles of an event team member - 8Look at the levels of Badges and Check-In
On the event home, choose Badges and Check-In (
…/event/{event}/badges-and-check-in).The page shows Registration Desk; Support Desk, Global Check-Ins and Session Check-Ins; and the configuration block with Badge Designer, Kiosk App Setup and Print at Home Settings.
Which of these a person sees depends on the three levels in Concepts. An Event Manager sees none of this area, so onsite staff need a desk role. Global Check-Ins also needs a tickets permission at every level.
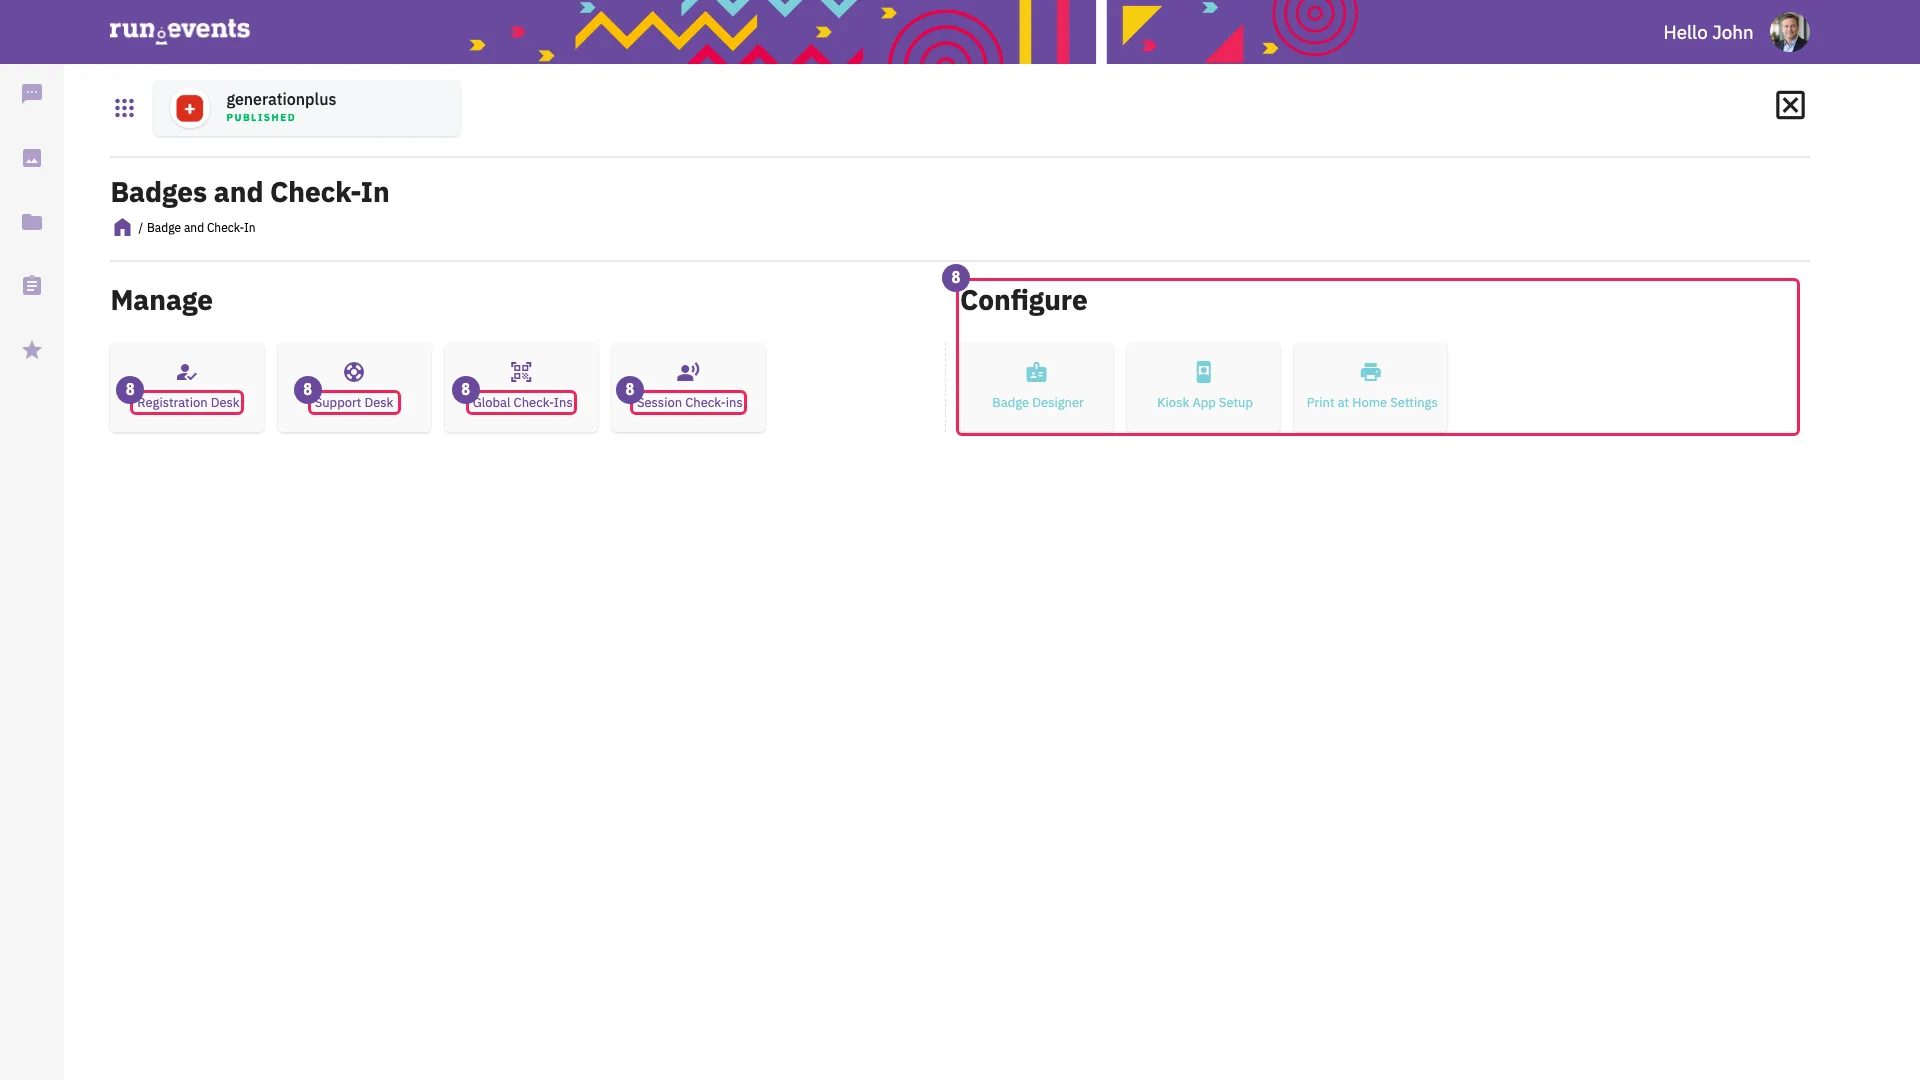
Badges and Check-In at the full level
Agreement Documents and API Keys
Both are cards on the event's Settings page (step 6).
- 9Look at the agreement documents
Choose Settings → Agreement Documents (
…/event/{event}/event-configuration/agrement-documents, the product's spelling).The list offers Create a new agreement, Export and Search, and shows the columns Type, Title, Mandatory, Active, Active From, Active To and Agreements, with a delete icon per row where deleting is still possible. Create a new agreement opens the flyout Agreement Documents with an empty document: Agreement Type, Mandatory, Active (ticked), Valid From, Valid To, Internal Comment, Default language with the language, Title and Agreement Text, and Translations with Add Translation, followed by Cancel and Save.
- Buyers see every valid “Purchasing Tickets” document of the event as a checkbox in the order summary at checkout. A mandatory document must be ticked, or the order is refused.
- A document that is not active, or lies outside Valid From and Valid To, is not offered at checkout and is shown in red.
- Agreements counts the buyers who accepted. Once any buyer has checked out while the document was offered, ticked or not, the delete icon disappears; untick Active instead.
- The card is marked as a warning while the event has no agreement document.
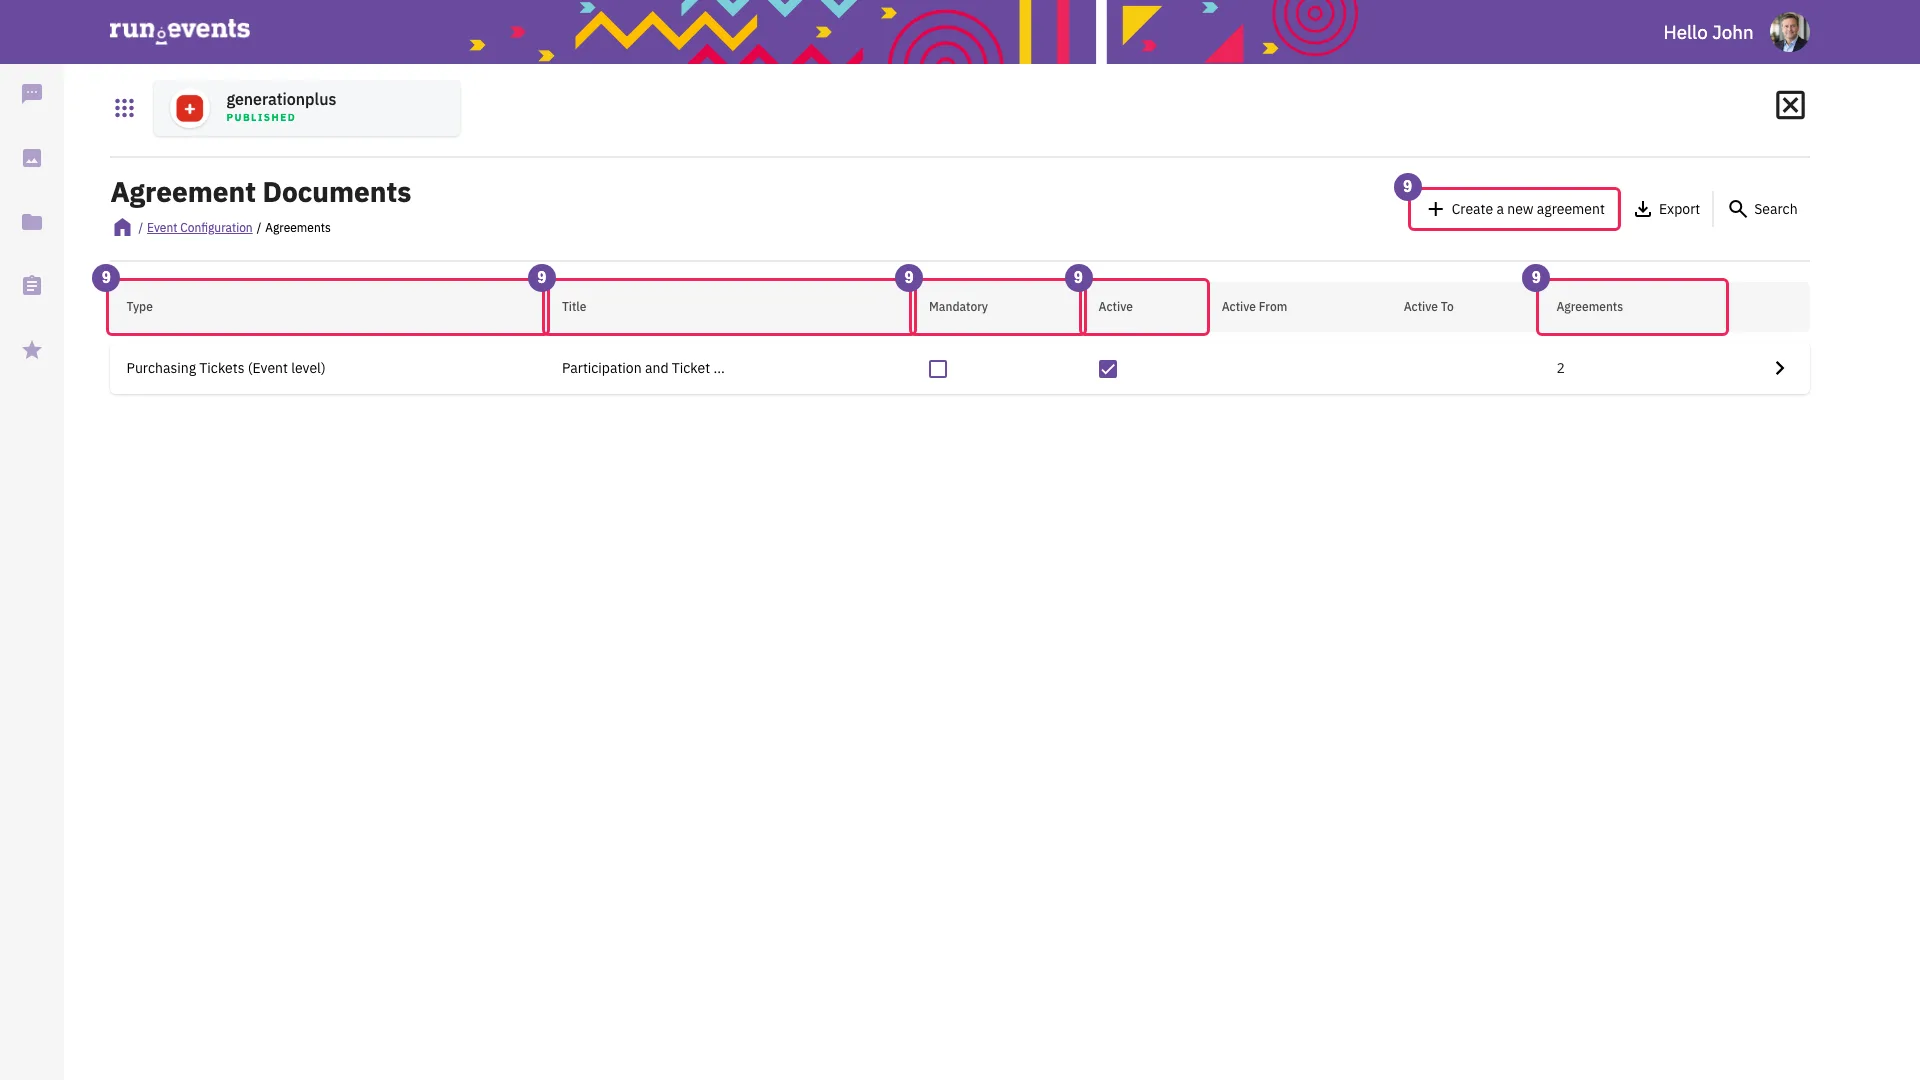
The agreement documents of the event 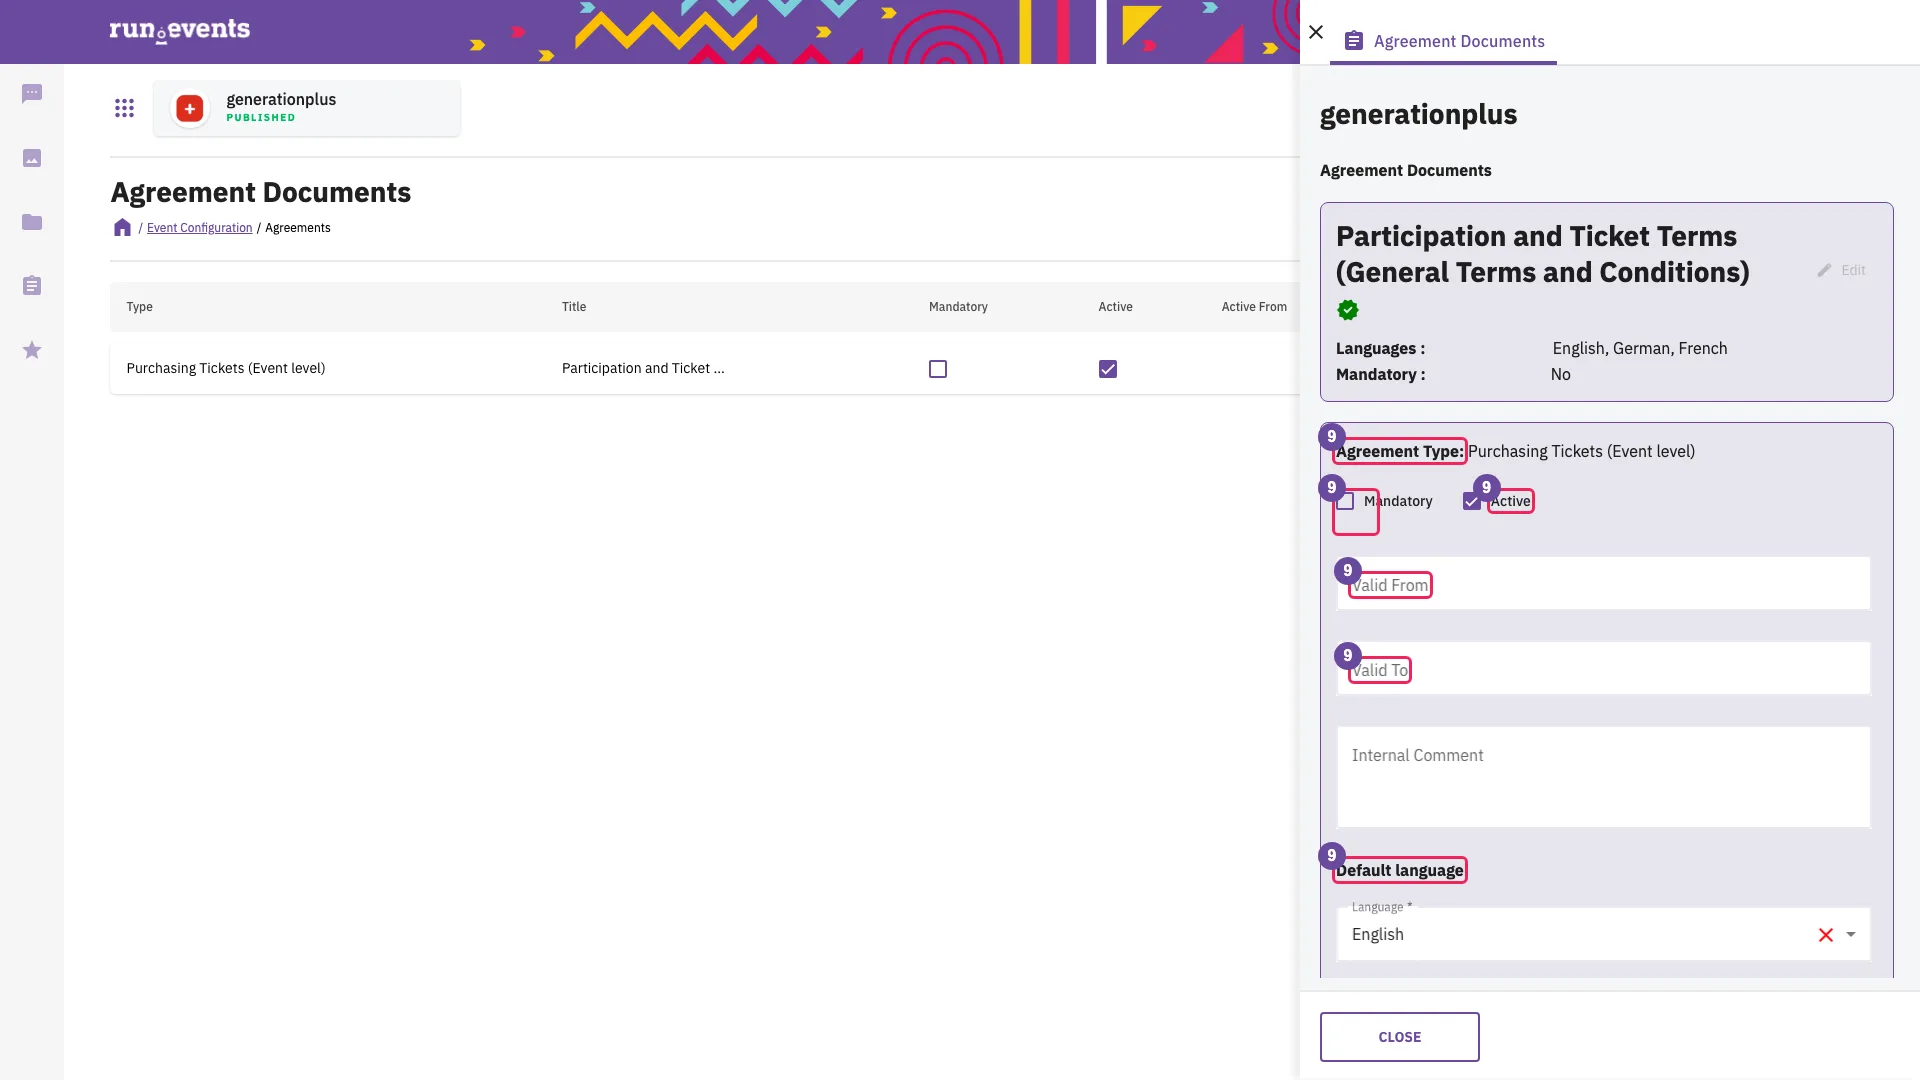
A new agreement document - 10Look at the API keys
Choose Settings → API Keys (
…/event/{event}/event-configuration/api-keys).The list offers Add new and shows the columns Key, Description, Active, Valid Until, Created By and Created On, with a delete icon per row. Add new opens the flyout Create New API Key with Description, Key Validity (6, 12 or 24 months), Permissions (one checkbox per event permission, in English) and Active, and Save. After Save, the dialog API Key Created shows the key with a copy button and Close.
- The key is shown only in that dialog. Afterwards the list shows its first four characters.
- The delete icon deactivates the key at once, without confirmation. The row stays with Active off, and Active in Edit API Key switches the key on again.
- The validity cannot be changed after creation.
No role protects this card: everyone who reaches the event's Settings page can create, change and deactivate keys. Keep the event team small, remove keys nobody uses, and ask run.events which interface accepts a key before you hand one to another system.
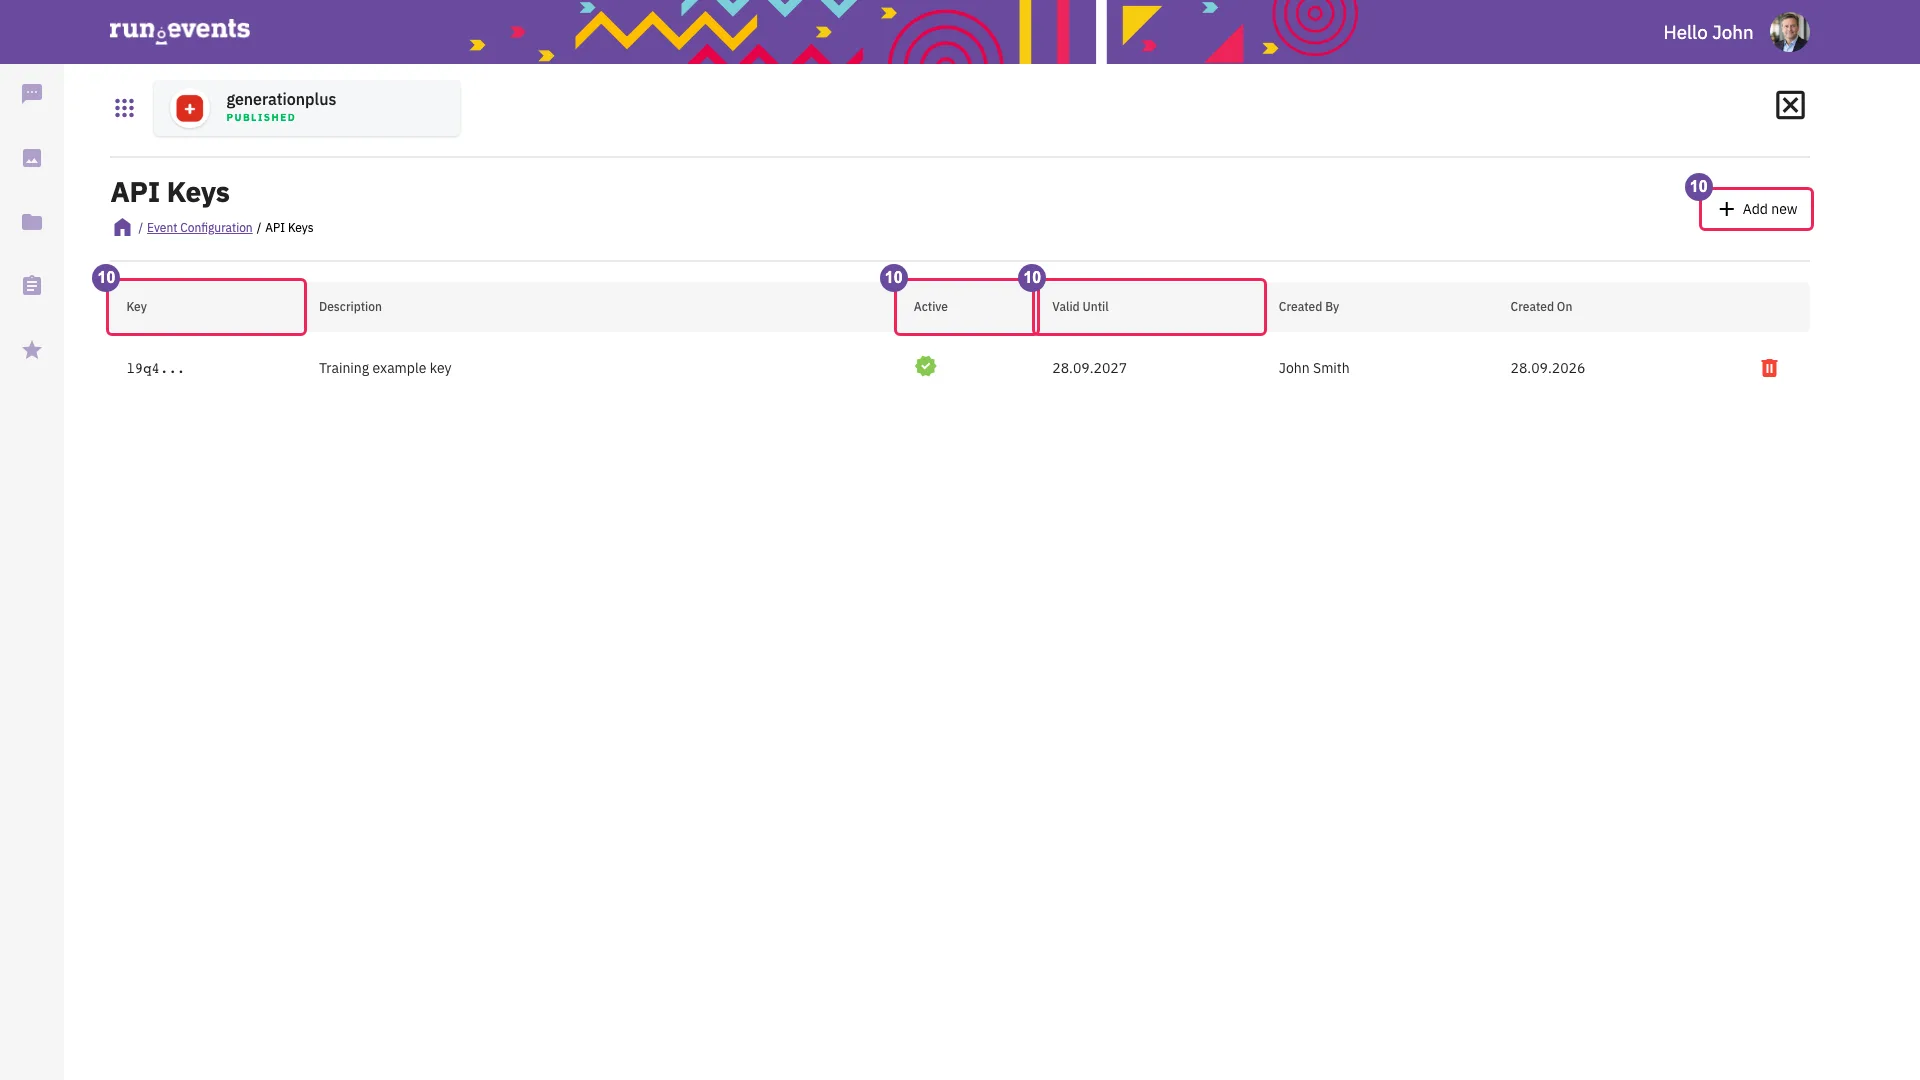
The API keys of the event 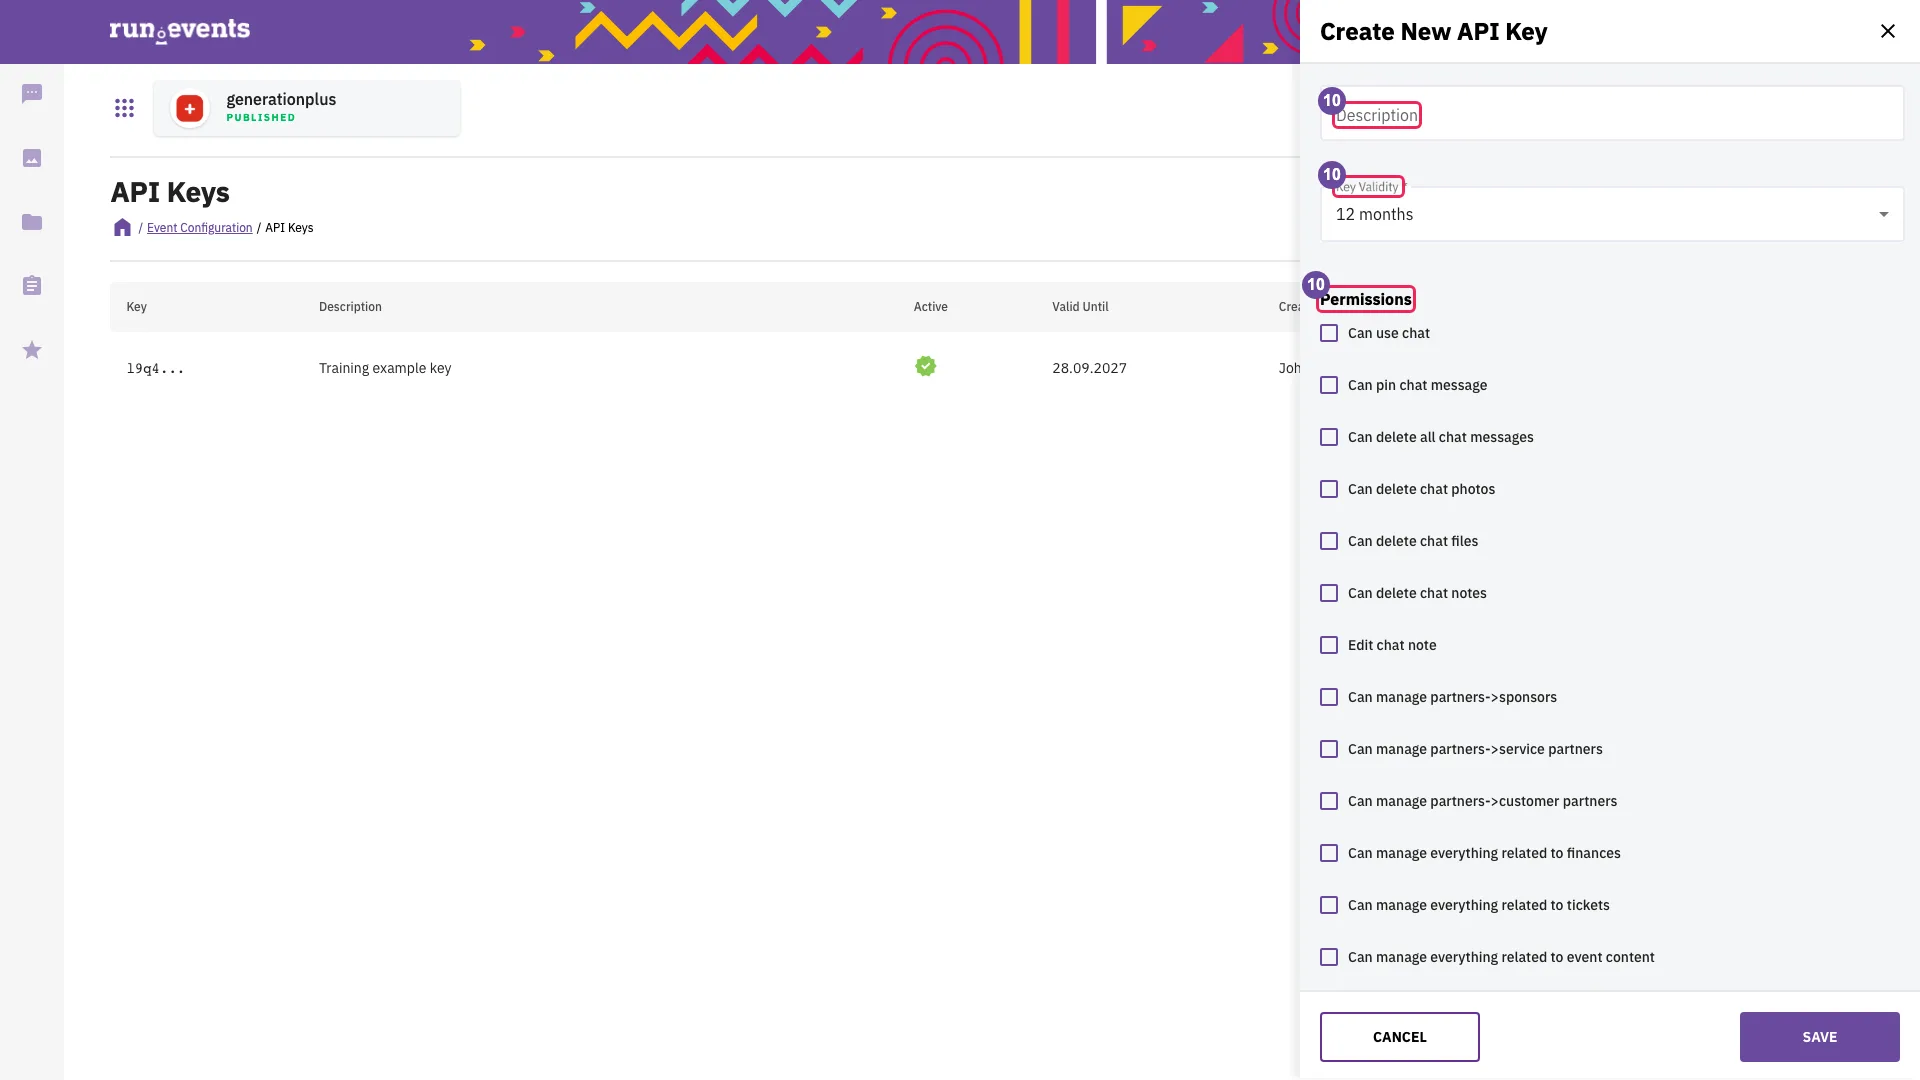
A new API key
Emails
- 11Open the system email templates
Choose Settings → Email Templates (
…/event-configuration/email-templates).The list shows the Name column with the template names (in English in every interface language), one column for each event language that is also an interface language, System or Custom in each cell, and Search.
The list is the platform's set of event templates, minus any template run.events has hidden; the Assemblies templates appear only with the Assemblies product. No template can be switched off.
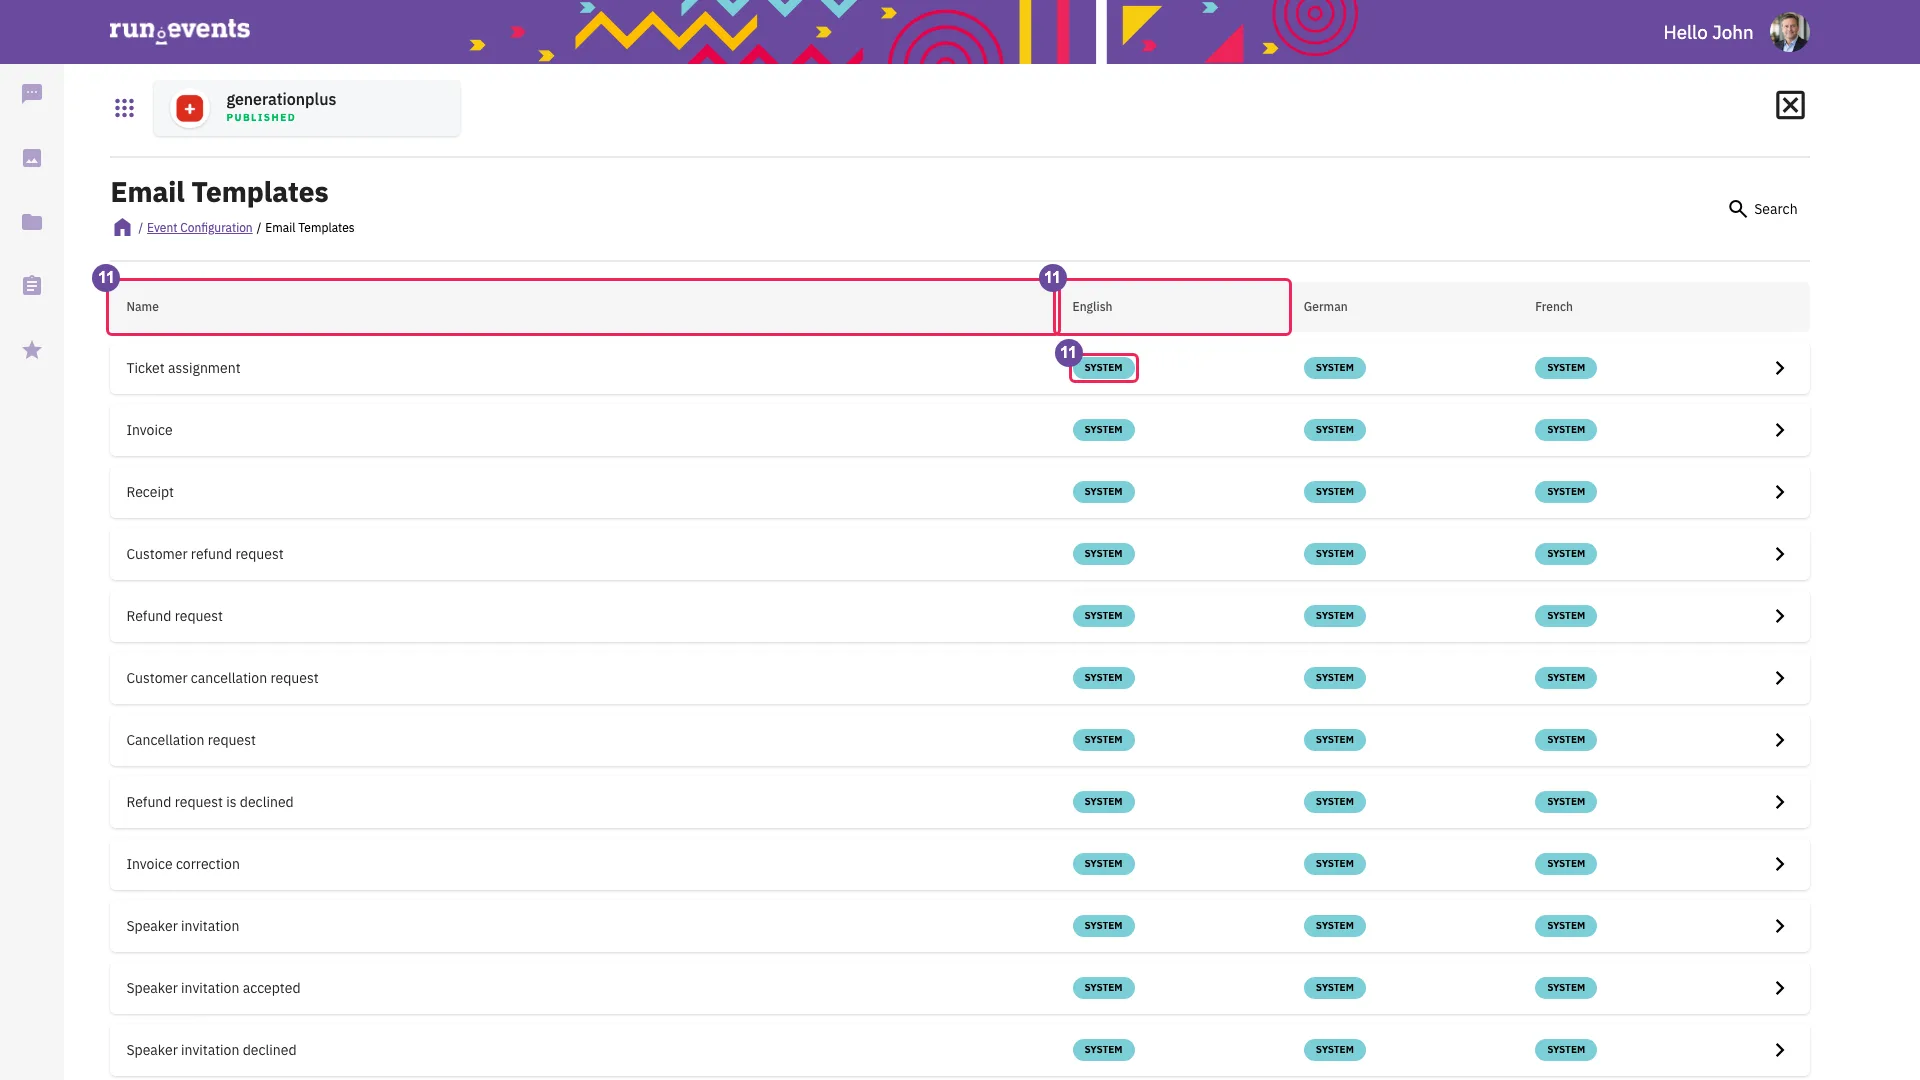
System email templates, per language - 12Customize a template
Click a row. The flyout has one tab per language.
Each tab shows Modify this message template and the toggle Use Custom Message Template. With the toggle on, the tab shows Message Template, Subject, Body (the HTML of the system text) and the placeholders you can use, followed by Cancel and Save.
- Switching the toggle on loads the system text. Save stores your text for this event and this language, and the cell shows Custom.
- Saving without changes still freezes a copy of the system text: later changes of the system text no longer reach this event.
- An empty Subject or Body saves nothing, but the flyout still closes.
- Placeholders work only in their exact spelling and case.
Switching the toggle off and saving deletes your text at once, without confirmation.
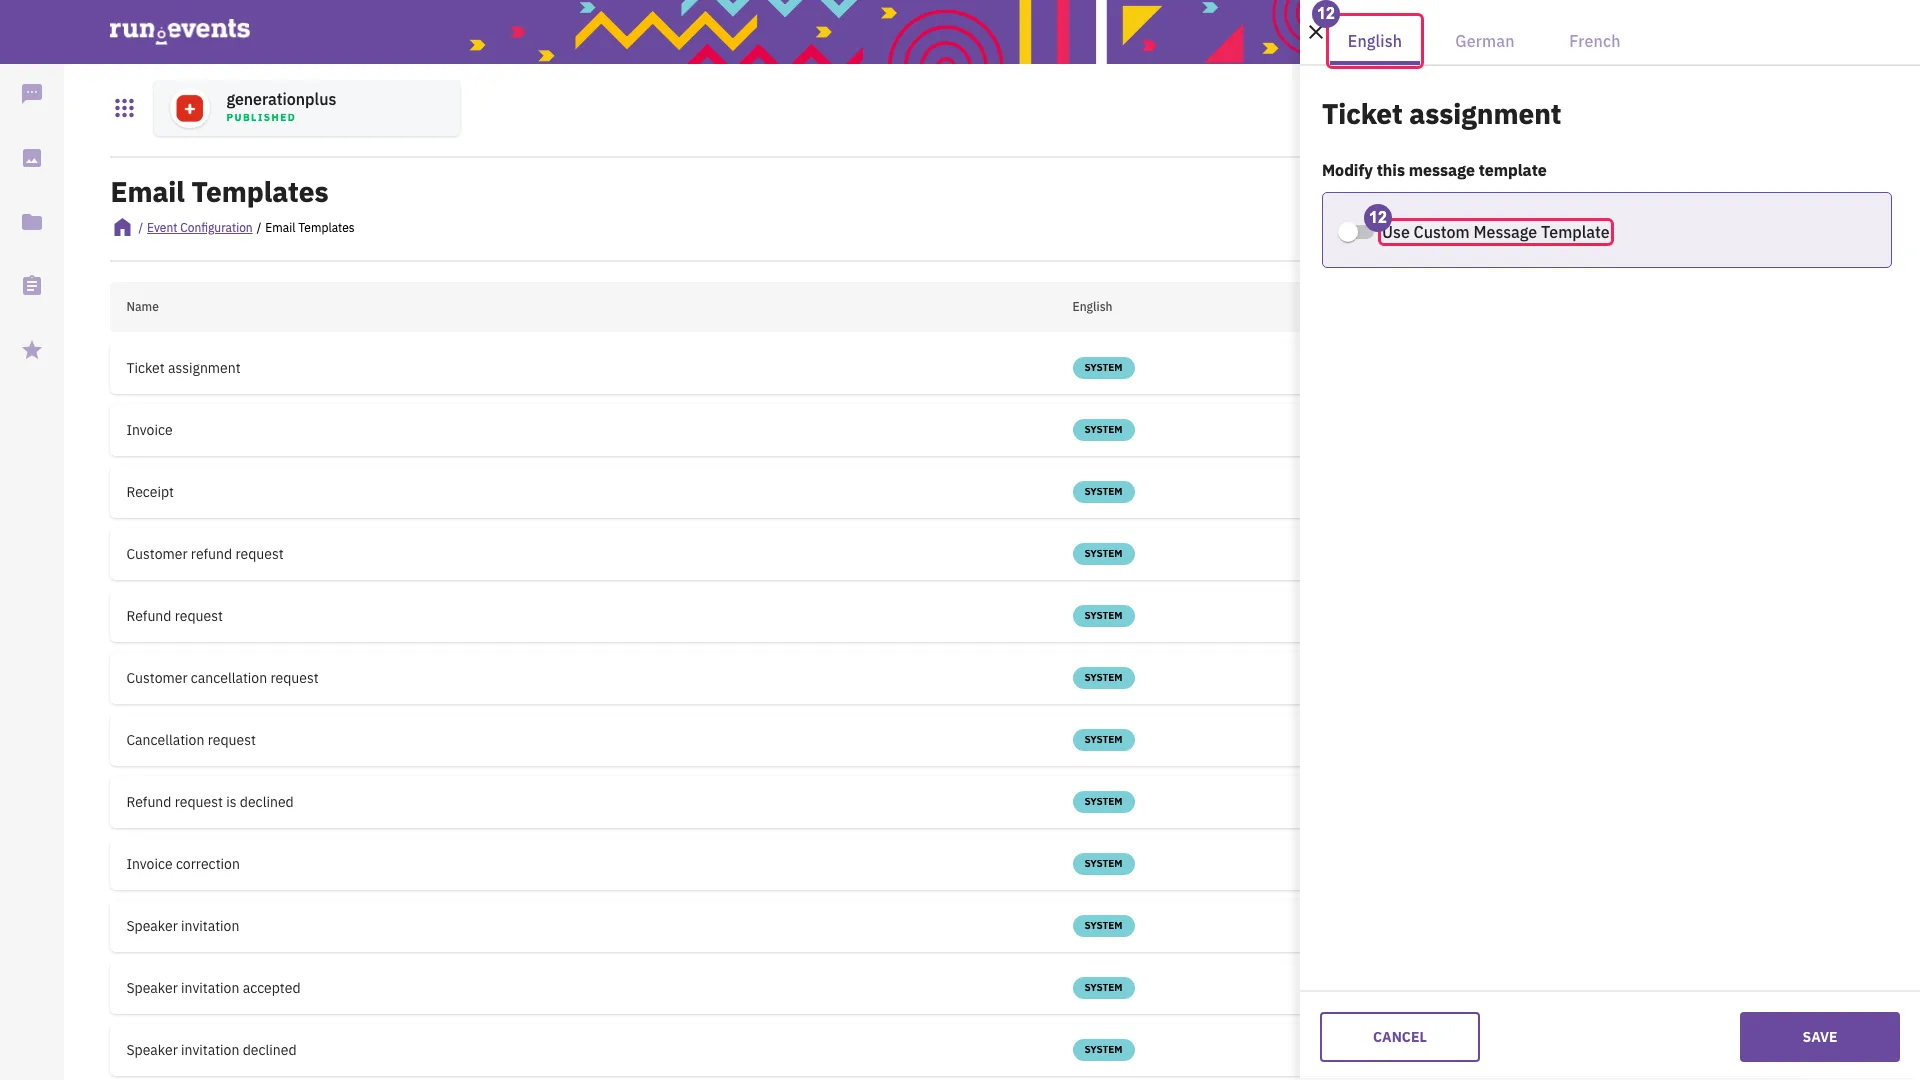
A custom template for one language - 13Set up a sender under Integrations
On the organizer dashboard, choose Integrations (
o.runevents.net/{organizer}/integrations). The page has the cards Email settings, Email addresses and External Services; the third is not part of this module.Email settings opens the page Email provider settings with the columns Provider Type, Auth type, Host or key, Default Sender Email, Default Sender Name and Default Provider. Add new opens the flyout Email Settings with Main settings, Provider Type (SendGrid preset), Authentication type, the SMTP fields or Auth Key (plus Secret Key for MailJet), Default Email Provider?, and Default sender with Sender email and Sender name, followed by Save. Email addresses opens the page Email Addresses with Provider Type, Email Address and Email Sender Name; an address's flyout offers Test Email Address.
- The Integrations card is for Admin only.
- Creating a provider creates its first sender address. The first provider is always the default.
- Credentials are not checked on save. Test Email Address sends a real email to your own address and reports it when sending fails.
- System emails do not need any of this; info emails do.
- The delete icon in a provider's row asks “Are you sure that you want to delete this email provider?”. Yes removes the provider, its sender addresses and any event default sender that points to it. Without a sender address, Send Email disappears from the Tickets list.
- Module 1 showed Event Identity (page Logo and Identity). Its Default email address for the event is the event's own default sender, and it saves as soon as an address is picked.
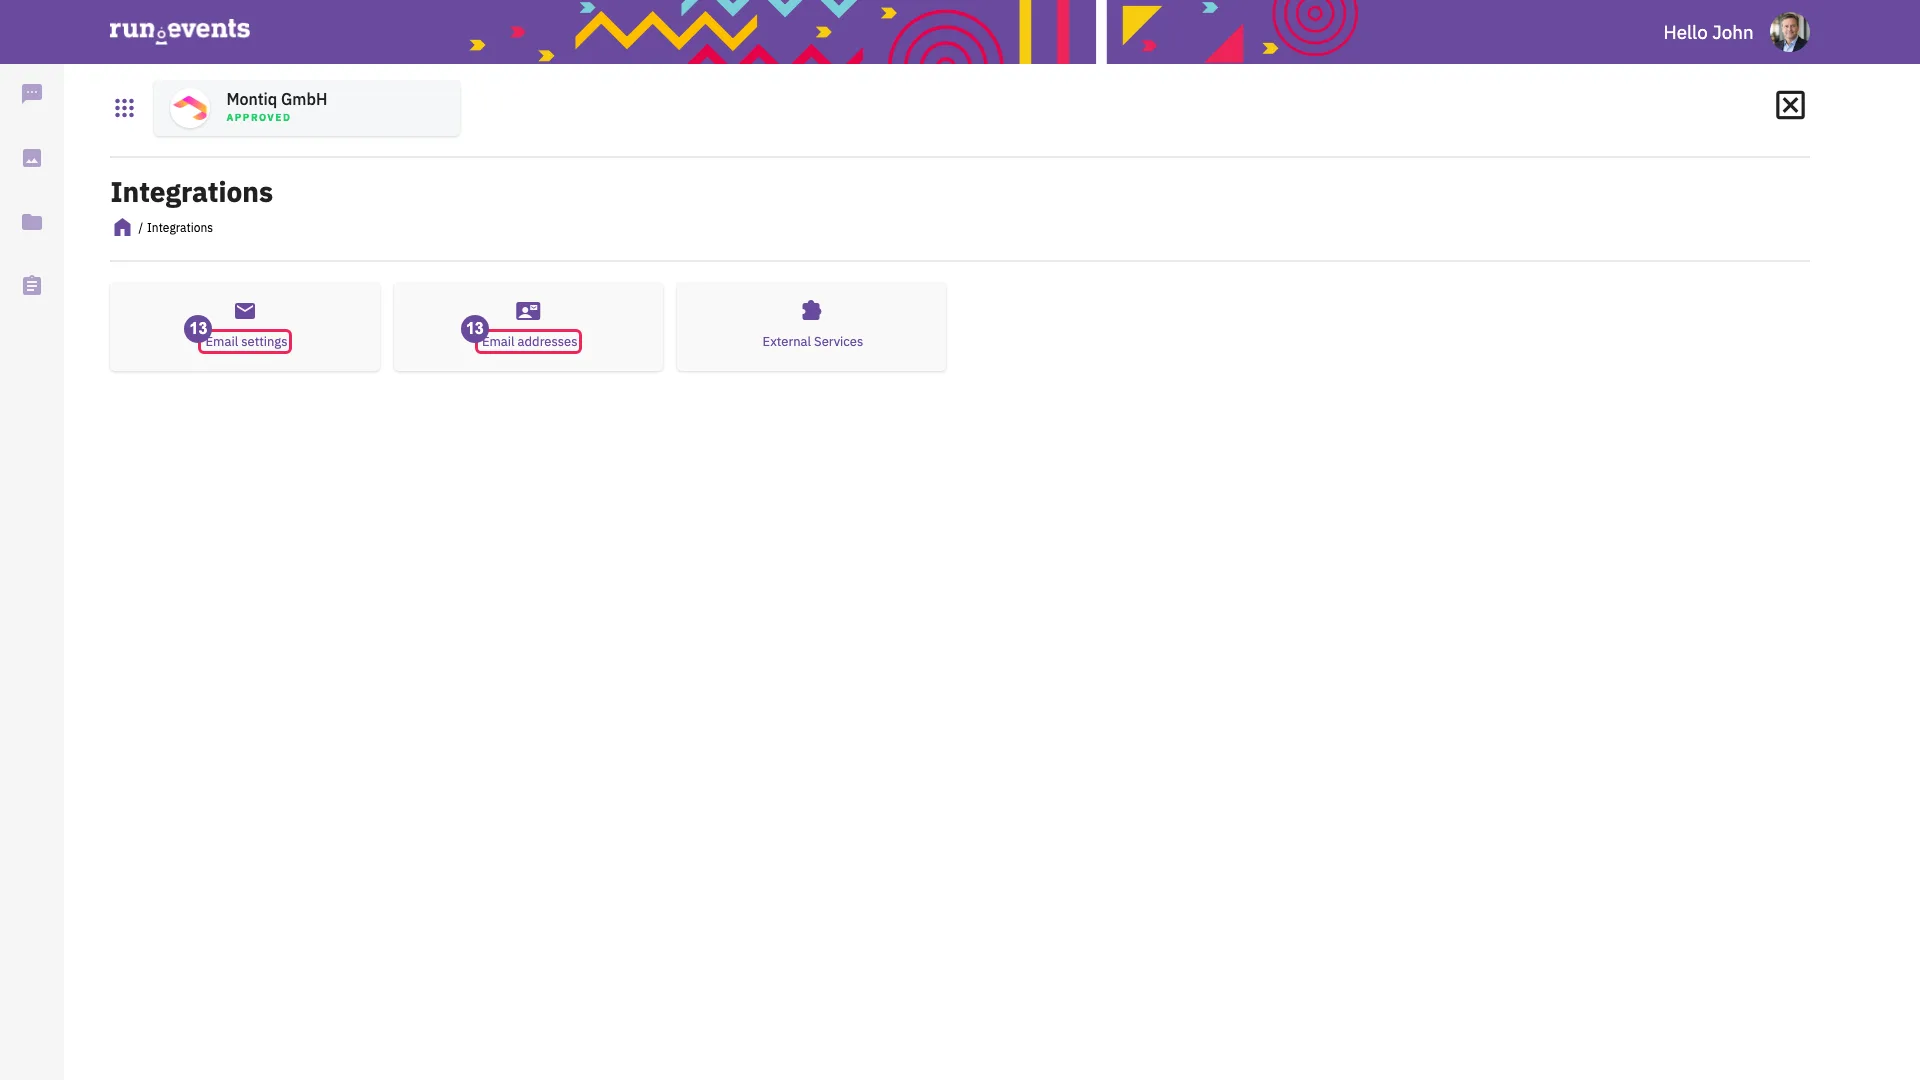
Integrations 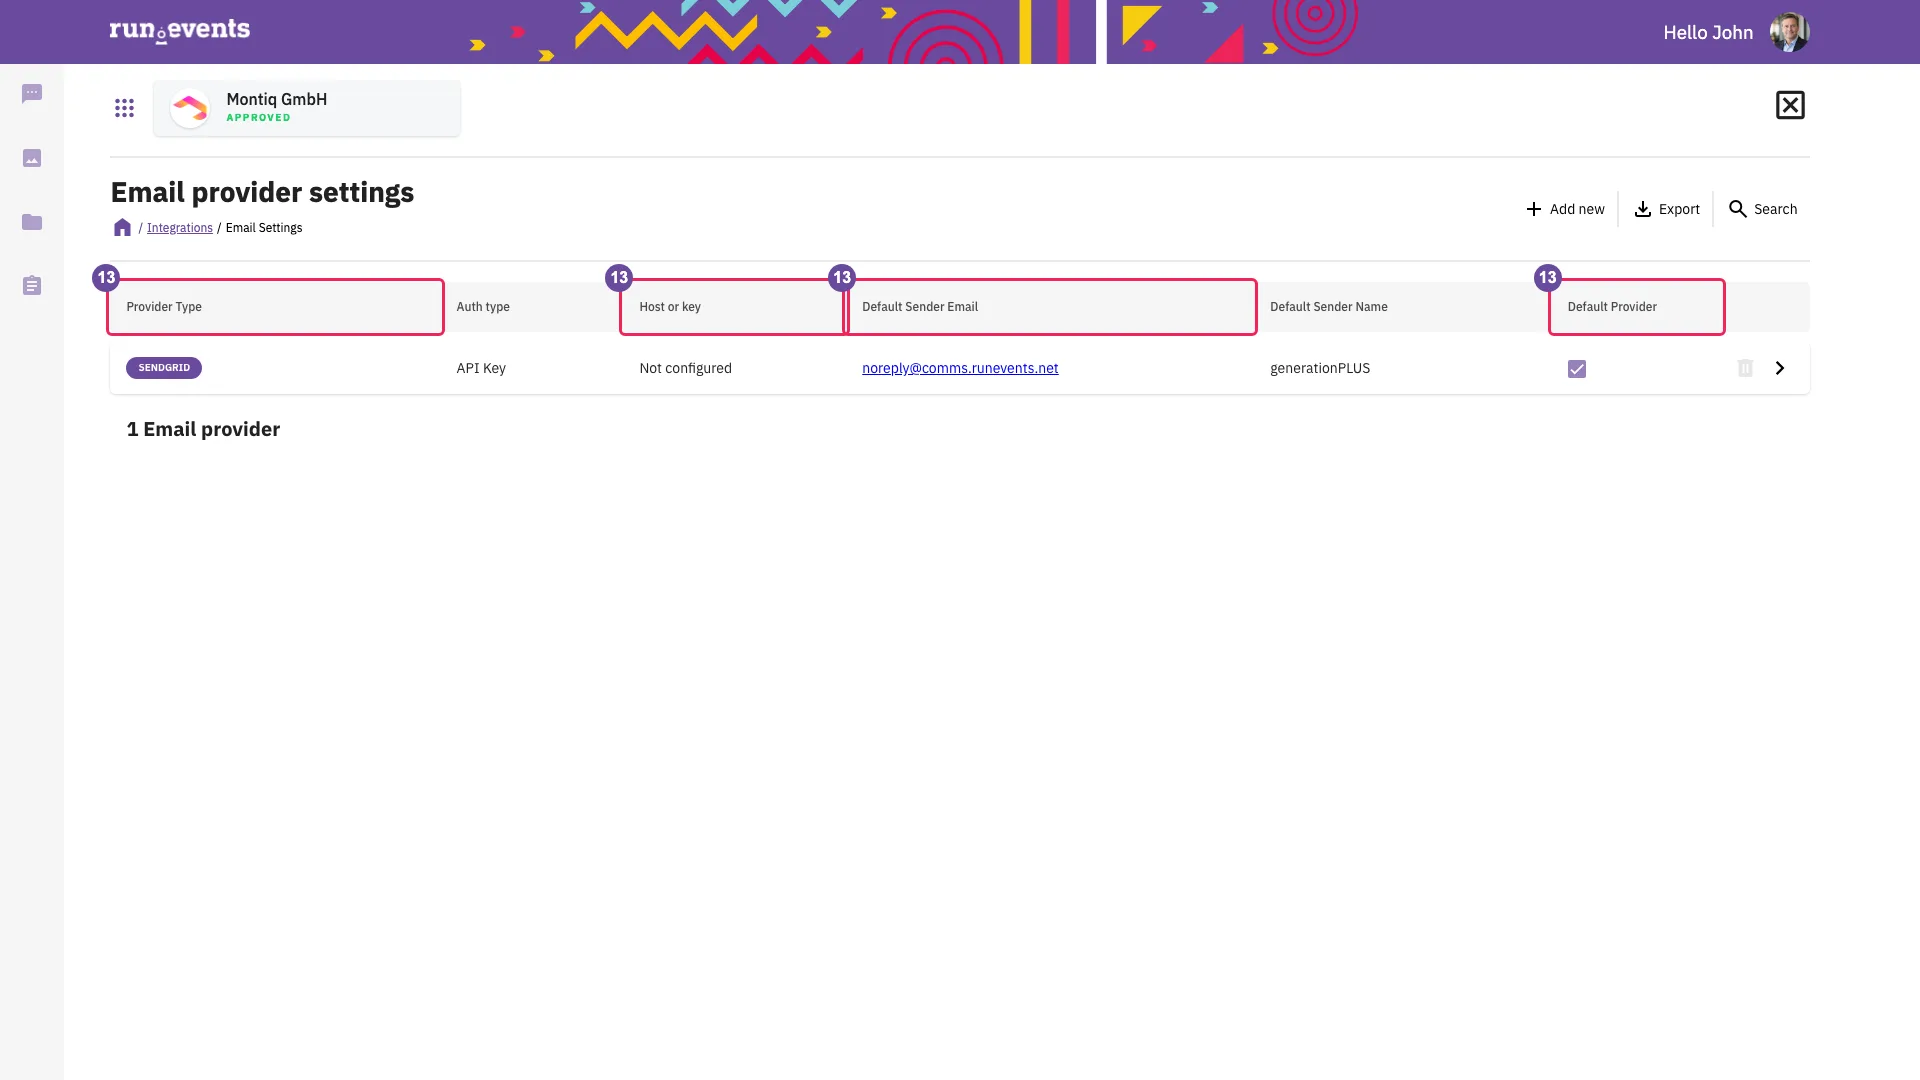
The email providers of the organizer 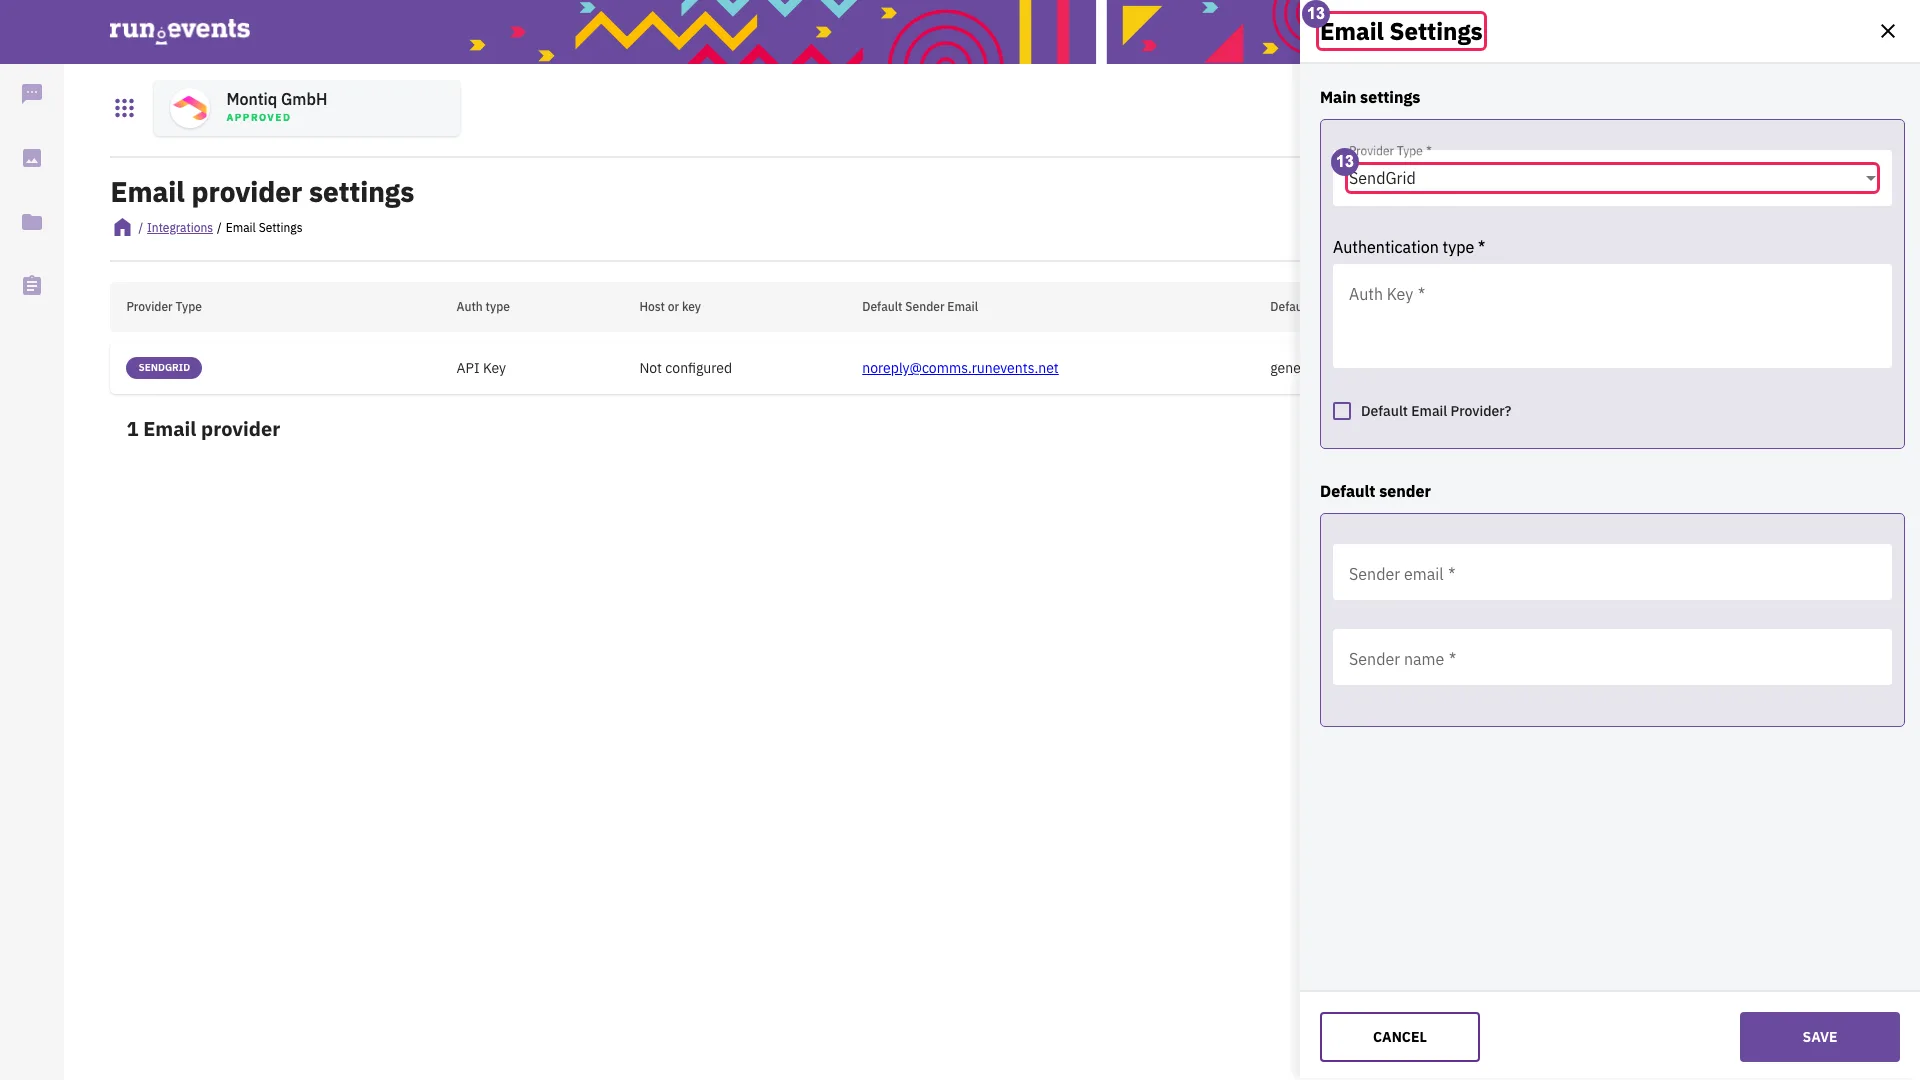
Adding an email provider 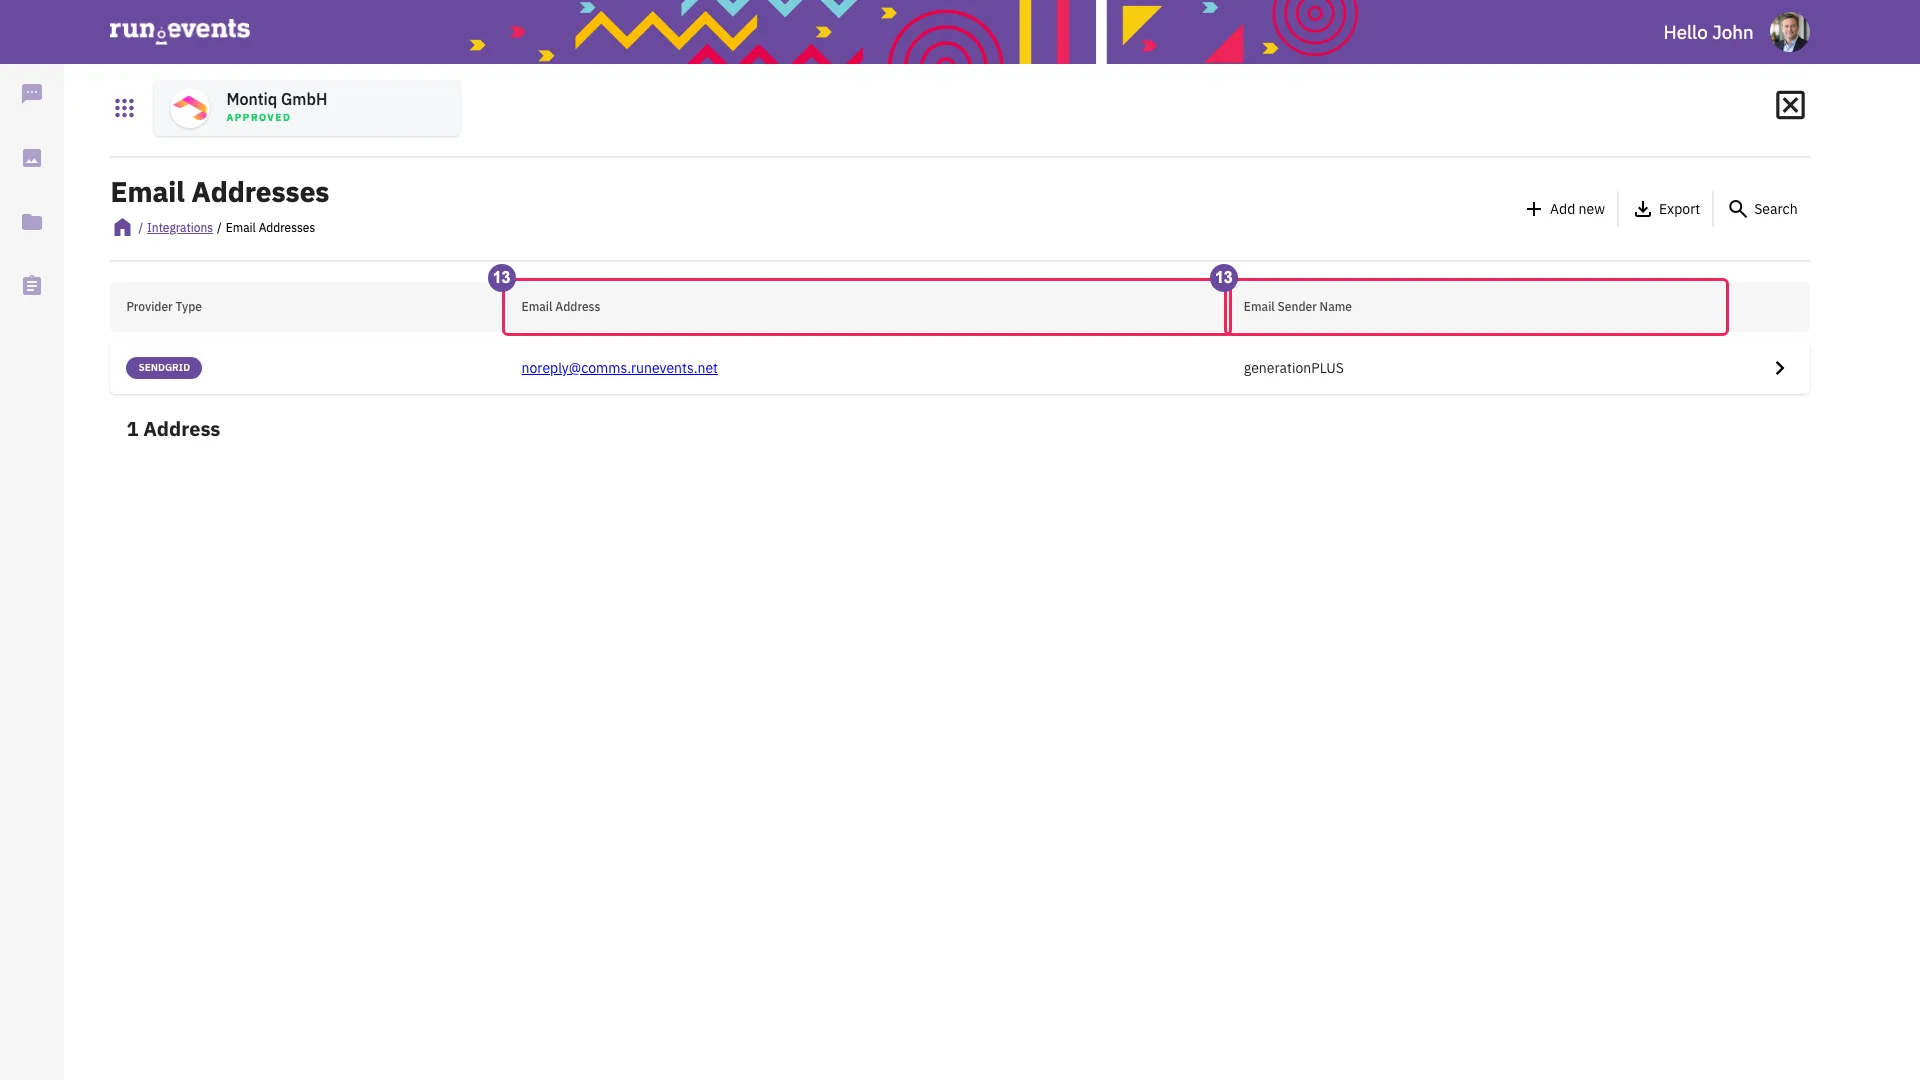
Sender addresses - 14Send an info email from the Tickets list
On the event home, choose Tickets And Attendees → Tickets (
…/tickets-attendees/tickets).The list offers Send Email (shown only when the organizer has a sender address, and disabled until tickets are selected), Send Ticket and Resend Ticket (the same action: the ticket email is sent again) and Send Badge (only with print-at-home badges), and a checkbox at the start of each row. Ticking a row's checkbox only selects the ticket; it sends nothing. A click elsewhere in the row opens the ticket.
The flyout Send Email shows Attendee email, Email from, Reply to: (if different from the address above) and Send this email to: with the boxes Persons who purchased selected tickets, Persons to whom the selected tickets are assigned (can be empty) and Persons who is invite to claim the selected tickets (can be empty) (the spelling on screen). Below follow the toggle Text email / Rich email, Use template (the organizer's name or the event's name, which chooses the branding), Subject, Body (text only) and Send.
With the toggle on Rich email, Use template and Body disappear, and the designs of this event with the recipient type Ticket owners appear as small previews with their names. A click selects a design; a second click deselects it. Without such a design the flyout says “User created emails cannot be sent before creating templates.”, and Send without a selected design shows “Can not send emails as no email templates exist or is not chosen!”.
A text info email carries no personalization, and the buyer is reached at the buyer's account email, not at the invoice address.
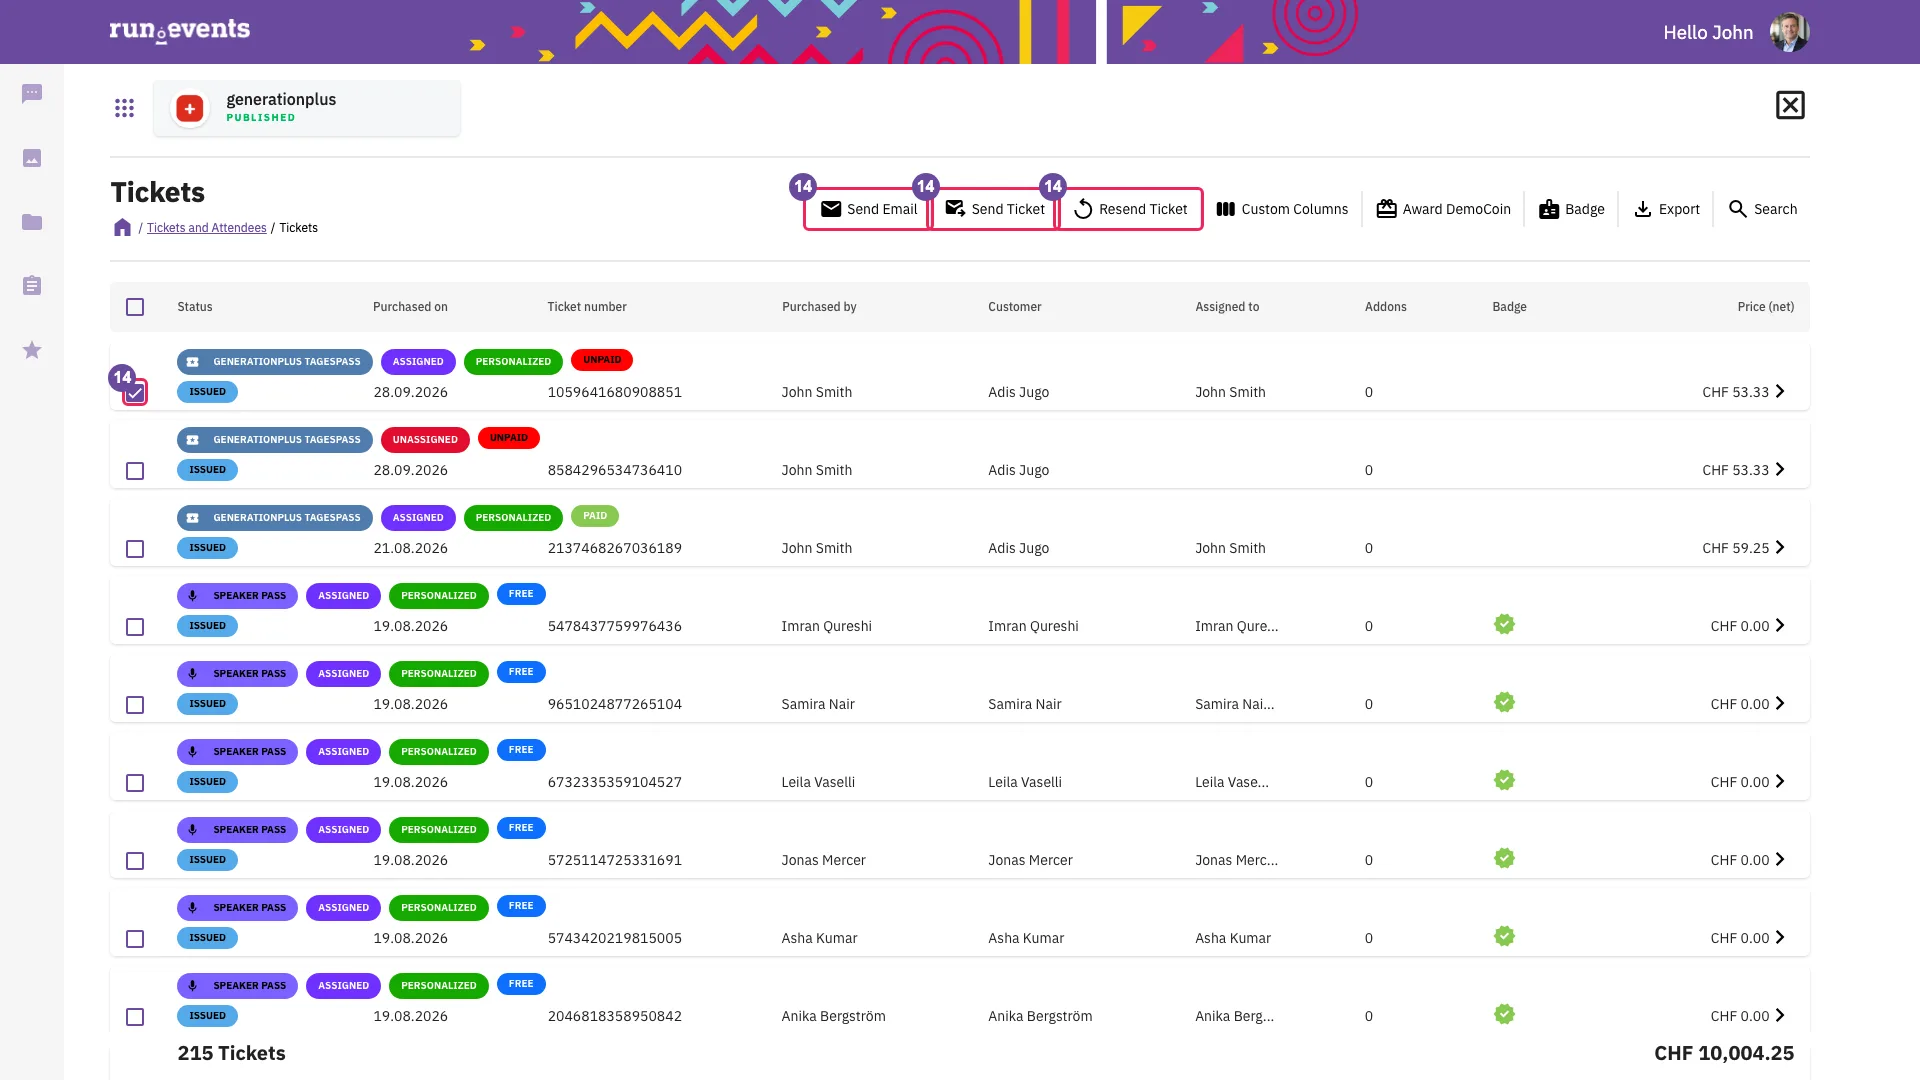
The Tickets list, where info emails start 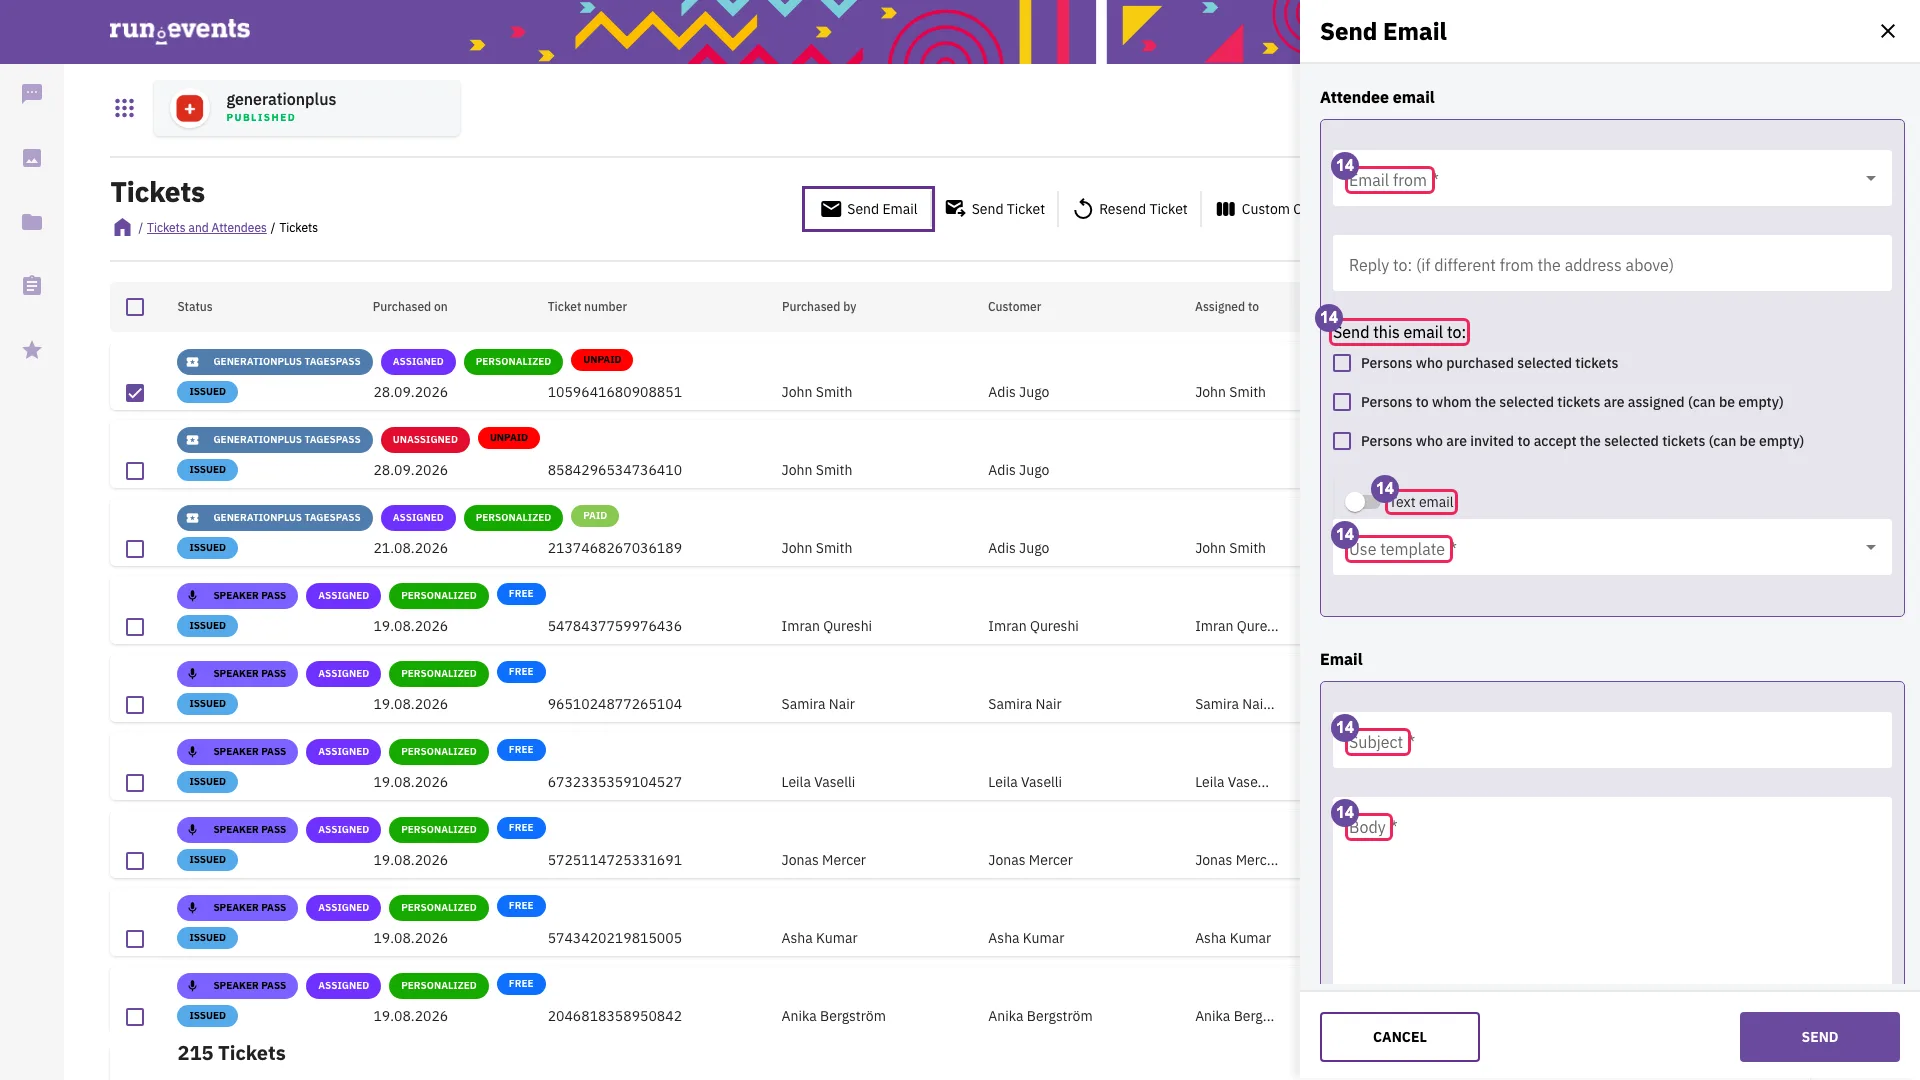
The Send Email flyout for one selected ticket - 15Make a rich email design in EIC
You follow this step in exercise 4. On the event home, choose Intelligence. EIC opens in a new tab at
eic.runevents.net/{organizer}/event/{event}; sign in with your run.events account if EIC asks. On the EIC event dashboard, choose the tile Emails. EIC is always in English.The page shows Your designs, Templates, New with AI and From Template. A design's settings hold its subject and its recipient type. New with AI opens a wizard:
- Email basics: How would you like to create this email? (with Generate with AI preselected), Subject, Description, Preview text (inbox snippet), Recipient type, Language and Design guideline. Next stays disabled until Subject, Description, Recipient type and Language are filled in.
- Select images: optional; Next without images is allowed.
- Designing your email…: the AI writes the design, which takes a while.
- All set: the new design is saved on its own (“Your new email is ready in the editor.”); Close opens it in the editor.
What this means for the rich email:
- The picker in the Send Email flyout lists only designs of this event with the recipient type Ticket owners.
- The Subject in EIC is the design's name; the subject of the email is typed in the Send Email flyout.
- Templates belong to one organizer. A new organizer has none, so its first design is made with New with AI; From Template needs a template of the same organizer.
- The wizard saves the design by itself in its last step. In the editor, Save, Preview (which saves first) and Save as Template all write.
- 16Read the email log
On the event home, choose Communications → Email Messages (
…/communications/email-messages).The log shows the columns Time Stamp, Email Template Type (technical names such as
TicketWithoutAddonsClaim,SendEmailFromEventorUserCreatedEmail), Email provider:, To, Subject and Success. The Search panel matches Subject and To from their first character, case-sensitively, and filters by success or failure. A row opens the tabs Info (send log, sender info, recipient info) and Email body (the stored email, shown without its images, so without logo and QR code image). Resend appears only for failed messages.The log shows the emails of this event only; organizer-team emails are not in it. Admin, Event Manager and Communication Manager can open it. A row with an empty recipient, for example a refund team copy when nobody holds a finance role, is never sent.
Exercises
You work on your own organizer team and training event from module 1. Exercises 1 and 2 are done in pairs: each of you does the tasks in your own organizer team and plays the partner in the other's. Exercises 3 and 4 are done alone.
Exercise 110 min
Goal
Invite your partner into your organizer team as Finance manager and see what that role opens.
Starting state
Your organizer team and training event from module 1. You created the team, so you are its representative (star) and an Admin.
- Your organizer team and training event from module 1
- Your partner's sign-in email address
Tasks
- 1
Open Team management. Find your own row: the star marks you as the representative. Open your row and check that Status and Delete member are not shown, then leave with Cancel.
- 2
Choose Invite a new team member. Enter your partner's exact sign-in address and a short message. Tick only Finance manager, without ticking any other role on the way, and choose Send.
- 3
Open the Invites tab. Check that the role column shows Finance manager.
- 4
As the invitee: in the side menu, open My teams. Under Team invitations, choose Accept, then Yes.
- 5
As the invitee: if the dialog Our legal documents have changed opens, read the documents, tick each one and choose I Agree. Then note which cards you see on your partner's organizer dashboard, and whether your partner's training event is listed.
Done when
- Your own record showed neither Status nor Delete member.
- As the invitee, you see Payment Settings, but not Team management, CRM, Organizer profile or Integrations, and your partner's training event is not listed.
- As the inviter, you see your partner in Team Members as Active with Finance manager.
Exercise 210 min
Goal
Make your training event visible to your partner and find out which event roles open which areas.
Starting state
Your partner is in your organizer team with Finance manager only, from exercise 1; otherwise invite your partner now as in exercise 1.
- Your partner in your organizer team with Finance manager only
- Your training event
- A sheet or a text file for the role matrix: one row per role combination, with columns for the event home cards, the Badges and Check-In cards, and whether Global Check-Ins opens
Tasks
- 1
In your event, choose Settings → Event team → Add a new event team member. Select your partner, tick no event role and choose Save.
- 2
Partner: reload the organizer dashboard, open the event, and note the event home cards and the cards under Settings.
- 3
Open your partner's row (Edit team member), tick Support Desk and choose Save. Partner: reload, open Badges and Check-In, note the cards, then click Global Check-Ins.
- 4
Tick Ticket Manager as well and choose Save. Partner: reload and open Global Check-Ins again.
- 5
Open your partner's row, untick all roles and choose Save. Look at the Event team list. Partner: reload the organizer dashboard.
Done when
- Your matrix has three rows: no event role; Support Desk; Support Desk and Ticket Manager.
- Each row records the event home cards, the Badges and Check-In cards, and whether Global Check-Ins opens.
- After task 5, your partner is no longer on the event team, and the event has disappeared from your partner's list.
Exercise 36 min
Goal
Change the subject of your event's ticket email in the email language, then return to the system text.
Starting state
Your training event from module 1. No set-up is needed.
Tasks
- 1
Choose Settings → Email Templates and note the language columns. Use Search to find the ticket email without add-ons (the email that carries the ticket's QR code) and open its row.
- 2
In the tab of your event's first language (English, if your event includes English), switch on Use Custom Message Template. Write down three of the placeholders you can use.
- 3
Put
[Training]in front of the Subject and choose Save. Check that the cell shows Custom. - 4
Open the row again, switch the toggle off and choose Save. Check that the cell shows System.
- 5
Using the recipient table in Concepts: who in your organizer team receives the team copy of a refund request today?
Done when
- The cell went from System to Custom and back to System.
- You have written down three placeholders.
- You have answered task 5.
Exercise 417 min
Goal
Set up a sender, send a text info email in your event's branding and a rich info email with your own EIC design to the buyer of a selected ticket, find both in the log, and remove the sender again as the very last task.
Starting state
Your training event from module 1, able to take registrations, and your organizer team with a run.events product enabled by run.events, so that the Intelligence card appears on the event home. Both are arranged by run.events after module 1. Module 4 explains the fields of a ticket type in detail.
- Your training event, able to take registrations
- The Intelligence card on your event home
- One free ticket type and one ticket registered to yourself (task 1 creates them if needed)
- The email provider details your trainer hands out (provider type and key, or SMTP data)
If your event cannot take registrations yet, skip tasks 1, 3, 5 and 6. Do task 2, reload Tickets and check that Send Email now appears (disabled, because there is no ticket to select), then do task 4 and task 7. Your trainer shows tasks 1, 3, 5 and 6 on the trainer's event. You are done when Send Email appeared after task 2 and was gone after task 7, your design is listed under Your designs, and you can say which recipient box reaches the buyer.
Tasks
- 1
Set-up, if not yet done: choose Tickets And Attendees → Configure → Ticket Configuration → Create new → Ticket Type. Enter Ticket name: Training registration; Pricing type: Free ticket; Ticket for the following attendee types: Participant; Total numbers of available tickets of this type: 10; Maximum per order: 2; Sales start date: yesterday. Leave Sales end date: as proposed and choose Add. Then register one ticket for yourself on your event's page in the event portal (Buy Tickets, module 1). (2 min)
- 2
Open Tickets And Attendees → Tickets: is there a Send Email button? Then, on the organizer dashboard, choose Integrations → Email settings → Add new. Enter the provider data from your trainer, a Sender email and a Sender name, and choose Save. Open Integrations → Email addresses and find the address that was created with the provider. (3 min)
- 3
Reload Tickets. Tick your ticket and choose Send Email. Email from: your address. Tick Persons who purchased selected tickets. Leave Text email. Use template: your event's name. Subject: “Information from the training event”. Body: two lines. Choose Send. (2.5 min)
- 4
On the event home, choose Intelligence (EIC opens in a new tab; sign in if asked) → Emails → New with AI. In Email basics, enter Subject: “Training rich email”; Description: one sentence on what the email should say; Recipient type: Ticket owners; Language: English. Choose Next, then Next again without images. Wait until the design is generated and All set appears, then choose Close. (4 min)
If the Intelligence card is missing, run.events has not yet enabled the product for your organizer team. Tell your trainer, skip tasks 4 and 5, and go on with task 6; your trainer shows task 5.
- 5
Back in Tickets, tick your ticket and choose Send Email. Email from: your address. Tick Persons who purchased selected tickets. Switch the toggle to Rich email and click your design once. Subject: “Rich information from the training event”. Choose Send. (2 min)
- 6
Open Communications → Email Messages and find the rows of tasks 3 and 5. Open the row of the text email, read the sender and the provider in Info, then open Email body. (1.5 min)
- 7
Last task: on the organizer dashboard, choose Integrations → Email settings, then the delete icon in your provider's row, then Yes in the dialog “Are you sure that you want to delete this email provider?”. Reload Tickets and check that Send Email has gone. (1 min)
Done when
- “Email sent successfully.” appeared after tasks 3 and 5.
- Email Messages lists a
SendEmailFromEventrow and aUserCreatedEmailrow addressed to your account email. - The Email body of the text email shows your text inside the email layout with the event's name and colours; images are not shown in this view.
- Your design is listed under Your designs in EIC.
- After task 7, Email settings lists no provider, and Tickets shows no Send Email button.
Check questions
- Your colleague holds the organizer role Finance manager and says she cannot find your new event. What do you do?
- A volunteer at the entrance only looks up attendees and prints their badges. Which role do you give?
- Your organizer team has one Admin, who is also the event's Event Manager. An attendee requests a refund. Who is notified?
- You set an organizer Admin to inactive on your event's team. What changes for her on that event?
- You want to send an info email to the holders of some tickets, but the Tickets list shows no Send Email button. What is missing, and who can fix it?
- You start a text info email with “Dear {{firstName}},”. What do recipients see?
Common mistakes
- Ticking and unticking roles on the invitation form.
- Recognize: the screen still shows later roles ticked, but the role column of the Invites tab is empty or incomplete.
- Fix: choose Cancel Invite and send the invitation again, ticking only the roles you want. After acceptance, check the member's roles in Team Members and correct them in User info if needed. The same applies when you confirm a join request.
- Accepting an invitation from the wrong account or place.
- Recognize: nothing is listed under My teams → Team invitations.
- Fix: sign in with the invited address and accept under My teams → Team invitations. Do not forward invitation emails, and do not open their links on shared computers.
- Declining through the email link.
- Recognize: the screen says “Invite has been accepted” and leads to an organizer portal the person cannot open.
- Fix: none needed; the invitation is declined.
- “My Finance manager (or a new member) can't see the event.”
- Fix: add the person to the event team; no event role is needed for visibility.
- “He is Event Manager but has no Badges and Check-In.”
- Fix: add Badge designer manager, Support Desk or Registration Desk.
- Using Partner Manager, Customers Manager or Event CRM Manager for sponsor or CRM work.
- Recognize: nothing changes for the person; these event roles carry no permissions.
- Fix: use Sponsors Manager (event role) or Partner manager (organizer role).
- Offboarding with Delete member only.
- Recognize: the person is still listed on the Event team pages, and EIC still lists the event for a person with an Event Manager row.
- Fix: remove the person from each event team first, then delete the membership.
- Unticking all event roles to keep a member without a role.
- Recognize: the person disappears from the event team. If the person has session ratings or content assignments, the save fails with the general error message.
- Fix: keep at least one role, or switch Active off instead.
- Removing a Content Team Member while reviews are running.
- Recognize: the member's ratings are gone.
- Fix: switch Active off instead.
- Re-inviting a deactivated member.
- Recognize: “Already a team member”.
- Fix: switch Status back on in User info.
- An Admin who is not the representative removes their own Admin role or deactivates themselves.
- Recognize: they lose Team management at once.
- Fix: another Admin restores the role. The representative cannot lock themselves out: their Admin role stays and their Status is hidden.
- Support Desk or Badge designer manager staff click Global Check-Ins and “nothing happens”.
- Fix: add Ticket Manager.
- Finance or ticket roles open Email Templates and see an empty page.
- Fix: templates are edited by an Admin or an Event Manager.
- Saving a custom template with an empty Subject or Body.
- Recognize: the flyout closes, but the cell still shows System.
- Fix: switch the toggle on again, fill in both fields and save.
- Switching custom on “to look” and saving.
- Recognize: the cell shows Custom, and later changes of the system text no longer reach this event.
- Fix: switch the toggle off and save.
- Switching custom off and saving.
- Recognize: the custom text is deleted without confirmation (“Removed”).
- Fix: copy your text somewhere else before you switch off; it cannot be restored.
- Placeholders in the wrong case or from another template.
- Recognize: they are printed as typed. Badge placeholders are capitalized, unlike the others.
- Fix: copy the placeholders exactly from the list in the flyout of the same template.
- No Send Email button, or a disabled one.
- Cause: no sender address, or no ticket selected.
- Fix: create an email provider first, then reload the Tickets list; select at least one ticket.
- Invented or wrong provider credentials.
- Recognize: saving works, Test Email Address fails (“There was a problem with sending test email address”), and sent rows have no success mark.
- Fix: enter the correct credentials, or delete the provider.
- Rich mode shows no designs.
- Recognize: “User created emails cannot be sent before creating templates.” in the Send Email flyout.
- Cause: no design yet, the design's recipient type is not Ticket owners, or the design belongs to another event. Send then reports that no template is chosen.
- Fix: create the design in EIC for this event, or change its Recipient type in the design's settings.
- Support Email left empty in Event setup.
- Recognize: the Event setup card is red, and attendees' support messages are logged but never sent.
- Fix: enter a Support Email in Event setup.
- Searching Email Messages for “ticket”.
- Recognize: no match for “Your Ticket …”, because the search matches from the first character and is case-sensitive.
- Fix: search for the start of the subject, with the exact case.
- “I deleted the API key.”
- Recognize: the row is still listed, with Active off.
- Fix: nothing more is needed; the key stops working. Anyone who switches Active on again in Edit API Key makes it work again.
- Losing the API key after closing the dialog.
- Recognize: the list shows only the first four characters.
- Fix: create a new key and deactivate the old one; a key is shown only once.
- An agreement document does not appear at checkout.
- Cause: it is not active, its Valid From lies ahead or its Valid To has passed (the row is red), or its type is not “Purchasing Tickets”.
- Fix: switch Active on, correct the dates, or choose the type for ticket buyers.
- An agreement document cannot be deleted.
- Cause: a buyer has checked out while the document was offered, ticked or not, so the delete icon is gone.
- Fix: untick Active instead.
3Finances and payments
Learning objectives
- Work out which payment providers an organizer can use (country and run.events permit), switch bank transfer on, and explain why a Stripe payment method can be switched on but still not be offered at checkout.
- Explain the organizer's invoicing flow: what the buyer receives in each flow, why the choice is made once for the whole organizer before the first order, and which Finances cards it produces.
- Configure an event's tax rules (the default rate and a special rule), and explain why a special rule takes effect only when it is selected on a ticket type.
- Configure an event's document numbering, document texts, Payment due days and checkout tax fields, and recognize a pattern conflict or a value that was silently not saved.
- Record a bank-transfer payment on an order, and describe how Stripe payments, refund requests and cancellation requests change the order, its documents and its payments.
- Reconcile an MT940 bank statement against open orders (upload, match, submit, check), and name what e-invoice data every run.events document PDF carries and what it leaves out.
Concepts
Three levels of finance settings
Finance settings in run.events live at three levels. Most questions in this module are answered by knowing which level holds a setting.
| Level | Where | What it holds |
|---|---|---|
| Organizer | Organizer dashboard → Payment Settings; organizer profile → Registration and Tax data | The allowed payment providers, the Stripe account and its payment methods, the bank-transfer instructions, the invoicing flow, the document names, and the seller data printed on documents |
| Event | Event home → Finances → Configure; event home → Settings → Taxes | Tax rules, document numbering and texts, payment due days, checkout tax fields |
| Ticket type | Ticket Configuration → a ticket type → Pricing → Tax rules | Which of the event's tax rules the ticket type uses |
- The organizer level is open to the organizer roles Admin and Finance manager. Event roles never reach it.
- The event level is open to the same organizer roles and to the event roles Event Manager and Finance Manager.
- The organizer's country is the country of the address entered when the organizer team was created (module 1). It cannot be changed afterwards. The country decides which payment providers and which Stripe payment methods are available, and whether fiscalization is supported.
- Registration and Tax data becomes the seller block on every document PDF. The red notification on the organizer profile clears only when the legal name, the CEO, a VAT or other tax number, the registration authority, the registration number and an address are all present; the form itself accepts the registration authority and number empty. Submit sends the data to run.events for a manual check and does not change the organizer's approval status.
Payment providers and payment methods
- Organizers do not choose their payment providers. A provider is offered only when the organizer's country is listed for it. Bank transfer also needs a permit that run.events grants; Stripe needs none.
- The first click on Setup Stripe creates the organizer's single Stripe account and sends the browser to Stripe's own onboarding pages. Later clicks open Stripe's update form. The account counts as configured from the moment it is created, even while the onboarding is unfinished.
- Stripe payment methods are requested one by one from the methods Stripe offers for the organizer's country. Checkout offers only methods that are active and need no further setup; they show the green icon under Enabled. The order of the rows is the order at checkout.
- Bank transfer (called "Bank Transfer Payment" in run.events) has a single switch: the Payment instructions text. Saving a non-empty text switches bank transfer on for every event of the organizer; saving an empty text switches it off. The text is emailed to every buyer who chooses bank transfer. The order is created unpaid, and the organizer records the money later.
- Stripe also offers a method called "Bank transfer payments" (virtual account numbers, confirmed by Stripe). It is not the same as bank transfer in run.events.
- Stripe payouts follow Payout intervall: Daily, Weekly or Monthly, each with a 7-day delay, or Manual payouts, which the organizer then triggers from Manual payout, up to the available balance.
The invoicing flow
The invoicing flow decides what the buyer receives at checkout and when the invoice is created. It is chosen in the Payment Flow flyout, once for the whole organizer, and gives three possible flows:
- Invoices are created as a basis for payment (the default). The invoice is issued and emailed when the order is completed. Free orders create no invoice.
- Invoices are created after a successful payment, with Issue invoices on. An order or pro-forma document is created at checkout and is not emailed. When the order is fully paid, the invoice number is drawn and the invoice is emailed.
- Invoices are created after a successful payment, with Issue invoices off. The order document is emailed at checkout, and no invoice follows; the organizer invoices from another system.
Further rules:
- For organizers in Croatia, the second option with Issue invoices on also supports fiscalization. This course does not configure it.
- Document names are free text in one language. They are printed as the title of the PDF and used as the labels of the Finances cards.
- Once the second option is saved, the organizer cannot switch back to the first.
- The whole flyout locks as soon as any event of the organizer has an order, free orders included. Decide the flow before the first registration of any event, even a free test.
Taxes
- The Payment data step of the event wizard creates the event's default tax, for free and paid events alike. Selling needs a default tax.
- An event has exactly one default. Marking another rule as default turns the old default into a special rule, placed last. The default itself cannot be deleted.
- A special rule applies to corporate purchases, purchases by individuals or both; to customers from all countries or from selected countries; and to ticket sales, sponsor invoices or both.
- Which tax a ticket gets: when the ticket type has its own list of tax rules, the matching rule of that list applies, and the default is checked last. Without such a list, the default applies. A special rule therefore takes effect only when it is selected on the ticket type.
- Free ticket types receive the default when they are created. Paid ticket types receive it the first time their Pricing tab is opened. A later change of the event default does not update ticket types that already have a list.
- Tax Scheme and Tax Category are written into the e-invoice data only. They do not change the calculation, and the tax dialog does not set 0 % for Reverse Charge, Zero rate or Exempt: enter the percentage yourself. (The event wizard does set it.)
Document settings per event
- Each document type has its own number settings and texts. Which document types appear (order, invoice, cancellation, correction) depends on the invoicing flow.
- Number settings: Pattern with
{number}and optionally{year}, Starting number, Increment and Reset number on the year break. - Texts: a default block, plus overrides for customers from particular countries.
- Number settings: Pattern with
- The first number is the starting number plus the increment: with the defaults 10000 and 1, the first document is number 10001.
{year}prints two digits. - The number fields lock once a document of that kind exists for the event.
- A pattern must not repeat one used by another event of the same organizer. With
{year}, it conflicts only when the events' years overlap; without{year}, it always conflicts. Unless someone changes the pattern, every event starts with the same default numbers. - Document texts and footers are printed on the PDF. Bank details appear on a document only if they are written into its text or footer.
- Payment due days: the due date is the issue date plus these days. The flyout shows 15 until a value is saved, but until then 0 applies.
- The checkout tax fields change only the form for buyers who purchase as a company.
E-invoice output
- Every order or pro-forma, invoice, correction and cancellation PDF is a PDF/A-3 file with EN 16931 invoice data embedded in the PDF, as an attached file named
factur-x.xml. There is nothing to switch on. - The embedded data holds the document number and date, the currency, the seller and the buyer (name, address, country, VAT and registration numbers), the totals, the tax breakdown, one line per ticket, and a payment reference equal to the document number. It holds no bank details.
- PDFs are generated again at every download or email; run.events stores no copy. Archive the documents you send.
Payments, document status and requests
- The status of an order or invoice is calculated from its payments and is never set by hand: Issued, Partly paid, Completely paid, Overpaid or Cancelled.
- Stripe payments are recorded automatically, and the buyer receives a receipt email.
- Bank transfers are recorded by the organizer, with Create payment or by reconciliation. A second manual payment with the same amount on the same document is refused. Only manual payments can be edited or deleted.
- Cancel and refund on a ticket creates requests. Tickets on fully paid or overpaid documents go into a refund request, the others into a cancellation request.
- Approving a refund request creates an invoice correction, marks the tickets Refunded and unassigns them. Stripe money is refunded automatically; bank-transfer money is paid back outside run.events and recorded by hand.
- Approving a cancellation request creates a cancellation document, and the invoice becomes Cancelled.
- Declining a request returns the tickets to valid. A decline cannot be undone.
- After a refund, the order stays Completely paid; the correction document records the refund.
Bank statement reconciliation
- Reconciliation works at organizer level: organizer dashboard → Payment Settings → Bank Statements Reconciliation. The card appears only where Stripe is an allowed provider.
- Only MT940 bank statements in text form are read (the SWIFT, the Swiss and a standard layout), one statement per file.
- run.events reads the file's content, not its name. The page accepts files named
.csv,.xmlor.zip, but CSV, CAMT/XML or ZIP content fails. - The candidates are the open orders of all events of the organizer: status Issued or Partly paid, with more than 0.01 outstanding.
- Every credit line is matched by hand (Click to find matches → select the order → Confirm Match), even when its amount and reference fit an order exactly.
- Submit Reconciliation creates one manual payment per matched credit line, for the full line amount, dated with the line's value date. It sends no email.
Guided walkthrough
Organizer level
- 1Open the organizer's payment settings
On the organizer dashboard, select the card Payment Settings. The page Payment settings opens.
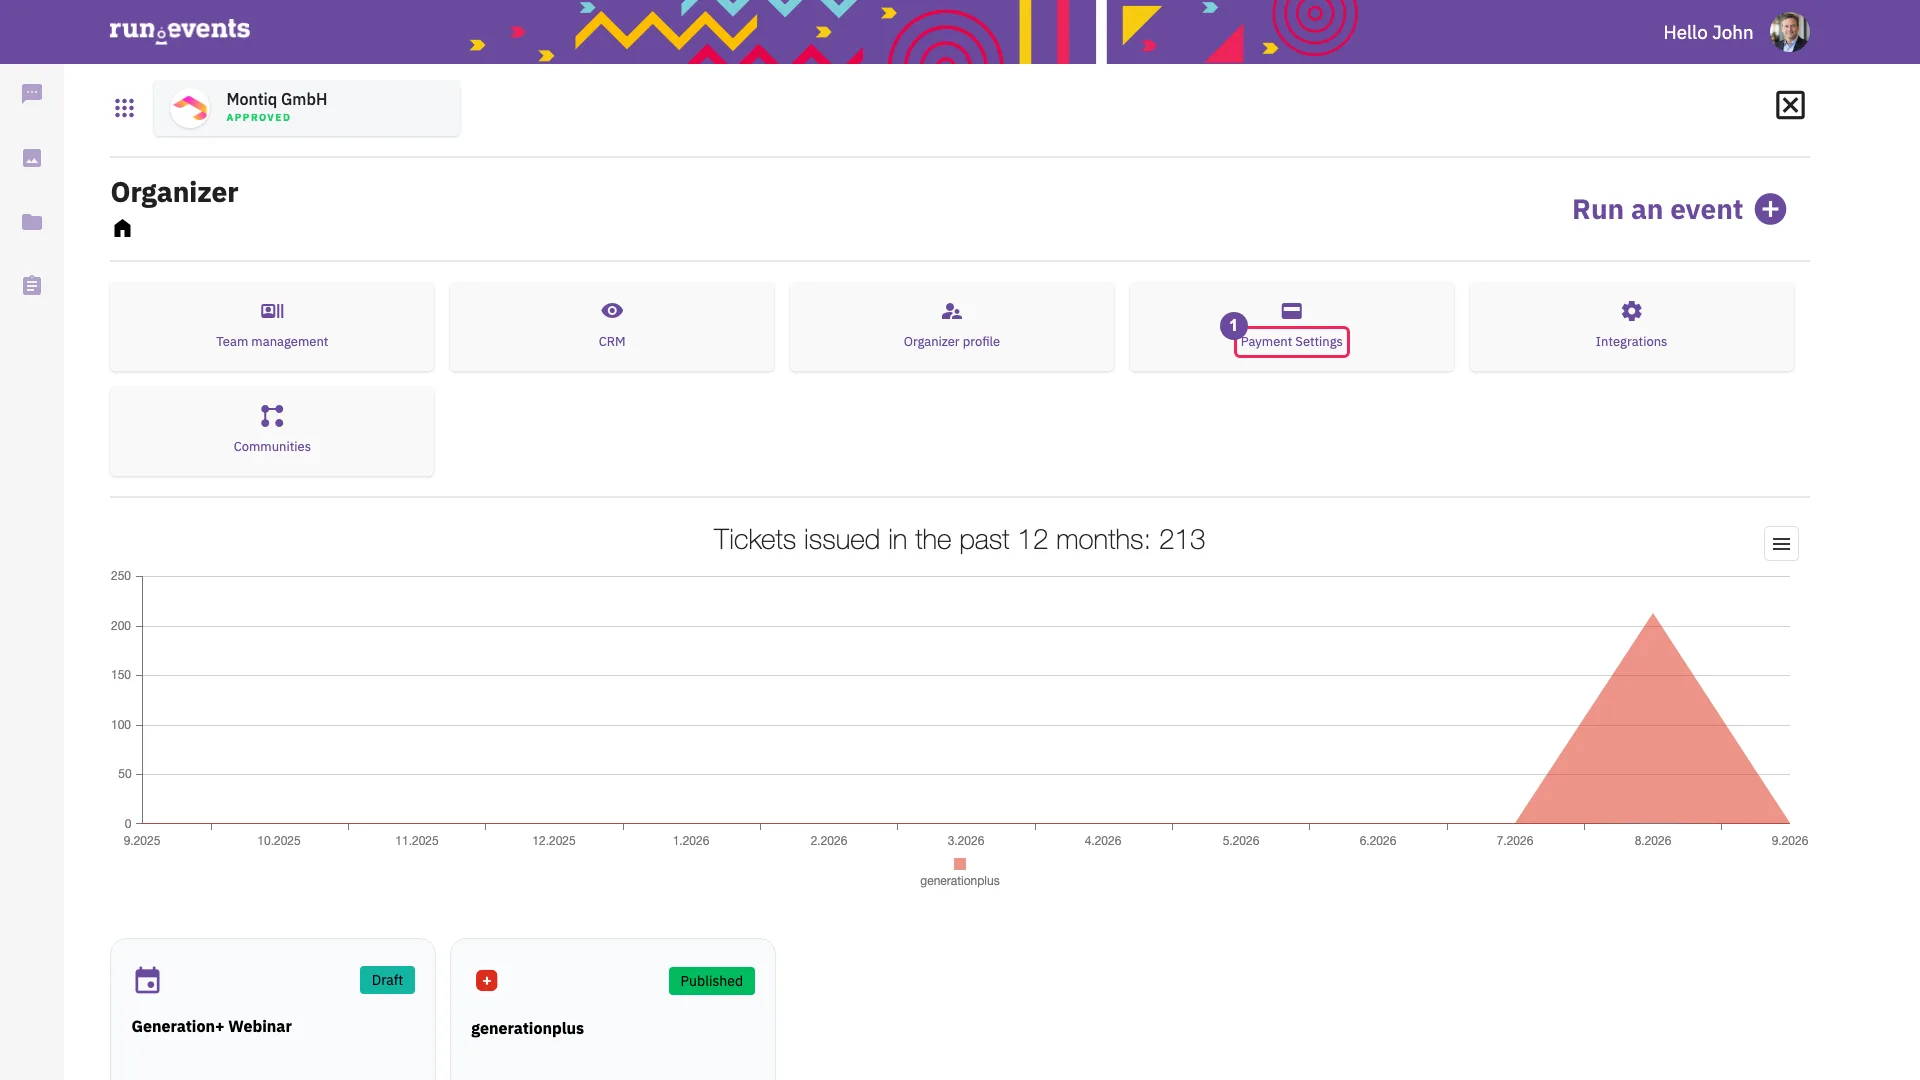
The organizer dashboard: the Payment Settings card The page shows the cards Payment flow Configuration, Bank transfer Settings, Stripe Settings and Bank Statements Reconciliation. Organizers in Croatia also see Fiscalisation Settings.
The organizer's Payment settings page - Every setting on this page applies to every event of the organizer.
- Only the organizer roles Admin and Finance manager see the card; event roles never do.
- The dashboard card is red until the organizer has a Stripe account or saved bank-transfer instructions.
- Which provider cards appear depends on the organizer's country and, for bank transfer, on the run.events permit. Bank Statements Reconciliation appears only where Stripe is allowed.
- 2Read the invoicing flow
Select the card Payment flow Configuration. The flyout Payment Flow opens.
The Payment Flow flyout Under Choose the payment Flow, the flyout offers Invoices are created as a basis for payment and Invoices are created after a successful payment. With the second option it also shows Order / Pro-forma Invoice Settings with Pro-forma Invoice / Order document name and Order Cancellation Document Name, the switch Issue invoices, Invoice Document Name and Invoice Correction Document Name. A red banner, "Once you have issued orders, the payment flow cannot be changed anymore…", shows that the flow is locked.
- This is the organizer-wide decision about what the buyer receives at checkout and when the invoice is created; see the diagram of the invoicing flows.
- The second option cannot be switched back, and the flyout locks at the first order of any event.
Never save the second option to try it. It cannot be switched back and changes the documents of every event of the organizer.
- 3Switch bank transfer on
Select the card Bank transfer Settings. The page lists bank-transfer payments across all events, with the columns Date, Customer, Event, Document, Recieved (spelled this way on screen) and Paid.
Bank transfer: payments across all events Select Payment instructions. The flyout Bank transfer payment instructions opens with the field Payment instructions.
The payment instructions: the switch for bank transfer - A saved text switches bank transfer on for all events of the organizer; an empty text switches it off.
- The text is emailed to every buyer who chooses bank transfer.
- The card exists only when run.events has granted the bank-transfer permit.
- 4Look at the Stripe account
Select the card Stripe Settings. The page Stripe opens.
The Stripe page of an organizer with a Stripe account Once Stripe is configured, the page shows Setup Stripe, the cards Stripe options, Payment Methods, Stripe Balance and Manual payout, and a balance table with Currency, Available and Delayed. Without a Stripe account, only Setup Stripe is shown.
The first click on Setup Stripe creates the organizer's only Stripe account and leaves run.events for Stripe's onboarding. Do not select it just to look.
- 5Stripe payment methods and payouts
Select the card Payment Methods. The page Stripe payment methods lists the methods with a toggle, Enabled, Name, Action required and Sync.
Stripe payment methods - The list comes from the organizer's country.
- Checkout offers a method only when the green icon shows under Enabled. "true" under Action required means that Stripe still needs data.
- The order of the rows, changed by dragging, is the order at checkout.
Go back and select the card Stripe options. The page Stripe options shows Payout intervall (spelled this way on screen) with Daily, Weekly, Monthly and Manual payouts, and Payment descriptor for bank statements with the field Descriptor.
Stripe options: payouts and the bank statement descriptor - The payout schedules carry a 7-day delay. With Manual payouts, the organizer pays out through Manual payout.
Event level
- 6The event's tax rules
On the event home, select Settings, then the card Taxes. The page Tax rates and rules opens.
The event's tax rates and rules The page has two tables: Tax rates and rules for ticket sales, with the columns Tax name, Default rule, Tax note, Percentage, Private Purchases, Corporate Purchases and Specific Countries, and Tax rates and rules for sponsorship invoices.
- The event wizard created the default rule. There is exactly one default, and it has no delete icon.
- The description on the page says that rules are checked from top to bottom. This describes how the rules selected on a ticket type are checked (step 8), not how the table as a whole is applied.
- 7Add a tax rule
Select Add tax rate. The dialog Add new tax rate and rule opens. Selecting an existing special rule opens the same form as Edit tax rate and rule.
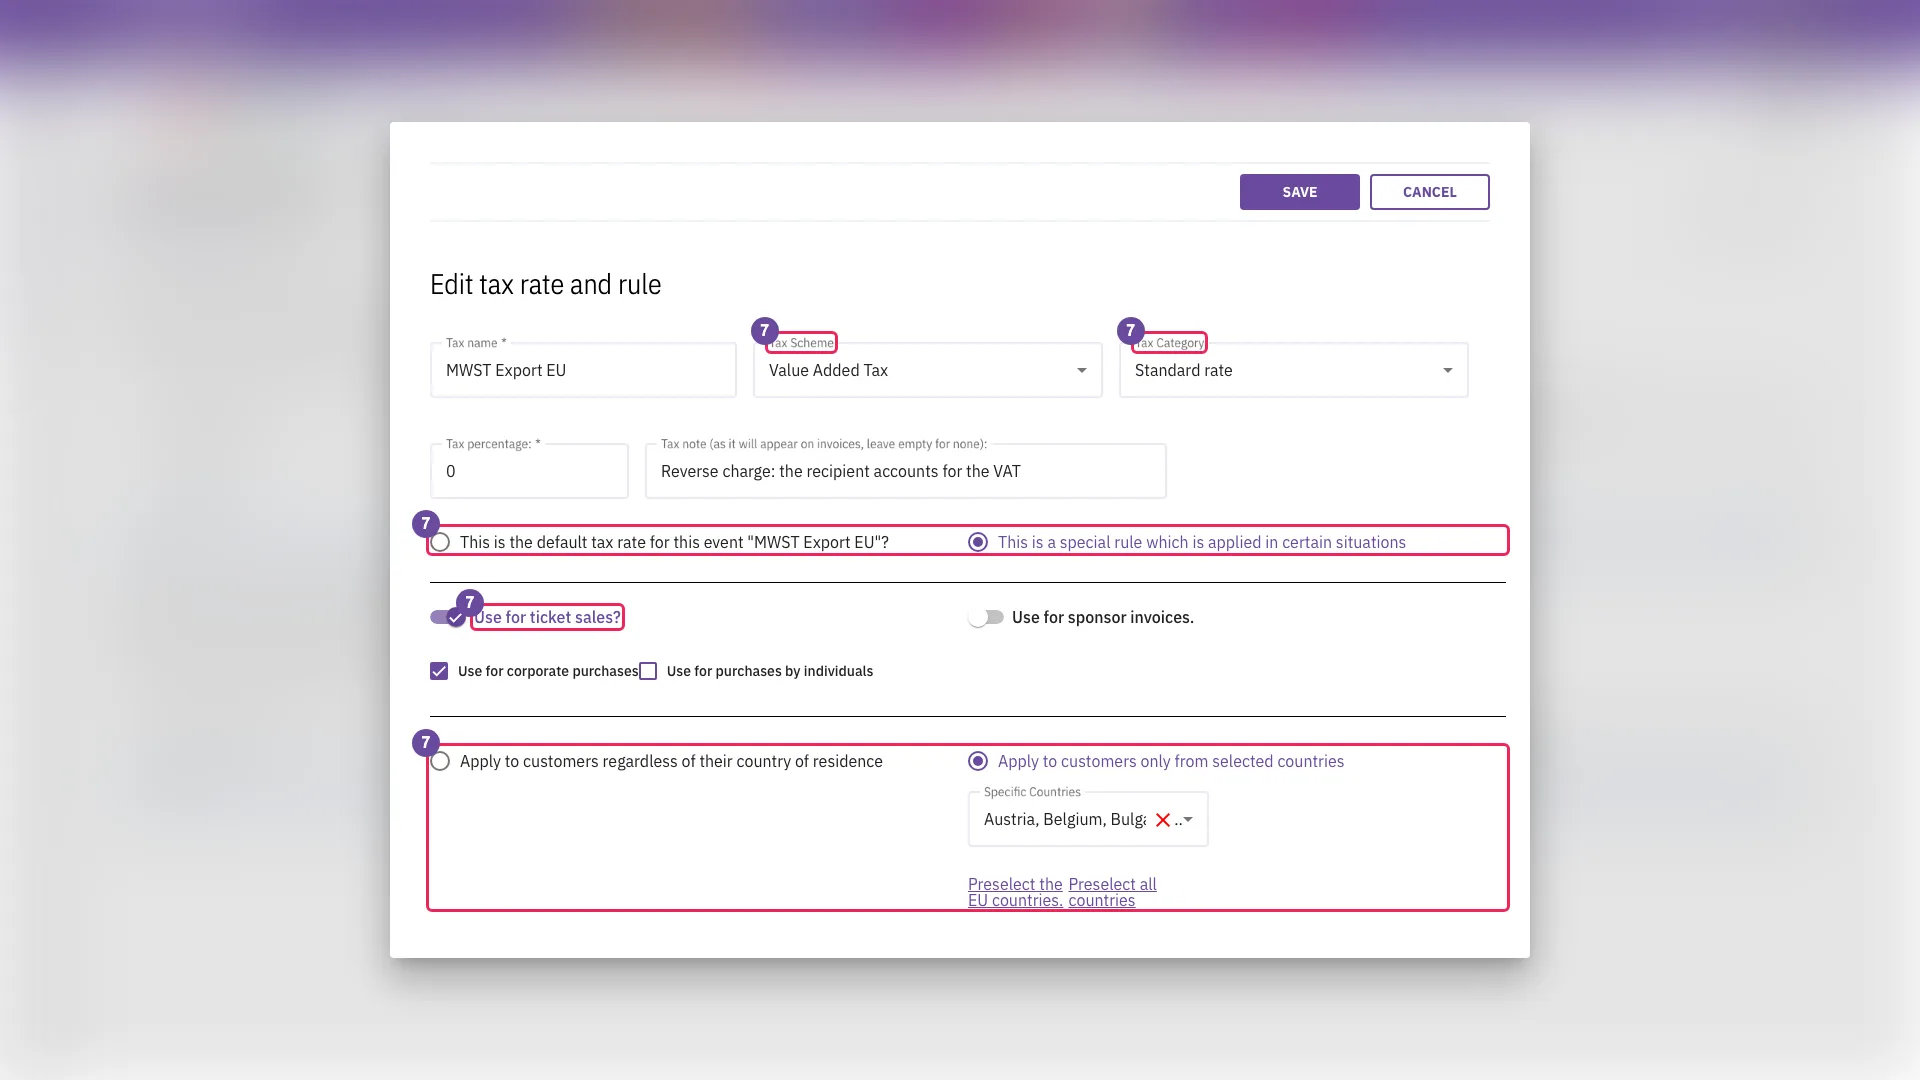
Edit tax rate and rule: an existing special rule The form holds Tax name, Tax Scheme, Tax Category, Tax percentage: and Tax note (as it will appear on invoices, leave empty for none):. Two options set the kind of rule: This is the default tax rate for this event? and This is a special rule which is applied in certain situations; on an existing rule, the first option also names the rule. Below them: Use for ticket sales? with Use for corporate purchases and Use for purchases by individuals; Use for sponsor invoices.; and Apply to customers regardless of their country of residence or Apply to customers only from selected countries, with Preselect the EU countries. and Preselect all countries.
- Tax Scheme and Tax Category feed the e-invoice data only.
- Reverse Charge does not set 0 % here; enter it yourself.
- Marking a rule as default turns the old default into a special rule.
- A special rule with neither ticket sales nor sponsor invoices switched on disappears from both tables.
- 8Select tax rules on a ticket type
Go to Tickets And Attendees → Configure → Ticket Configuration, open a paid ticket type with Edit, then the tab Pricing and its section Tax rules.
The section shows Manage Tax Rules for this event, Select Tax Rules for this Ticket Type, and the selected rules as cards (for example "VAT 19%") with Default and Remove.
- A special rule applies to this ticket type only when it is selected here.
- The default is attached the first time the tab is opened. Later changes of the event default do not reach ticket types that already have a list.
- A rule card shows the percentage, not the rule's name.
- 9The event's Finances area
On the event home, select Finances.
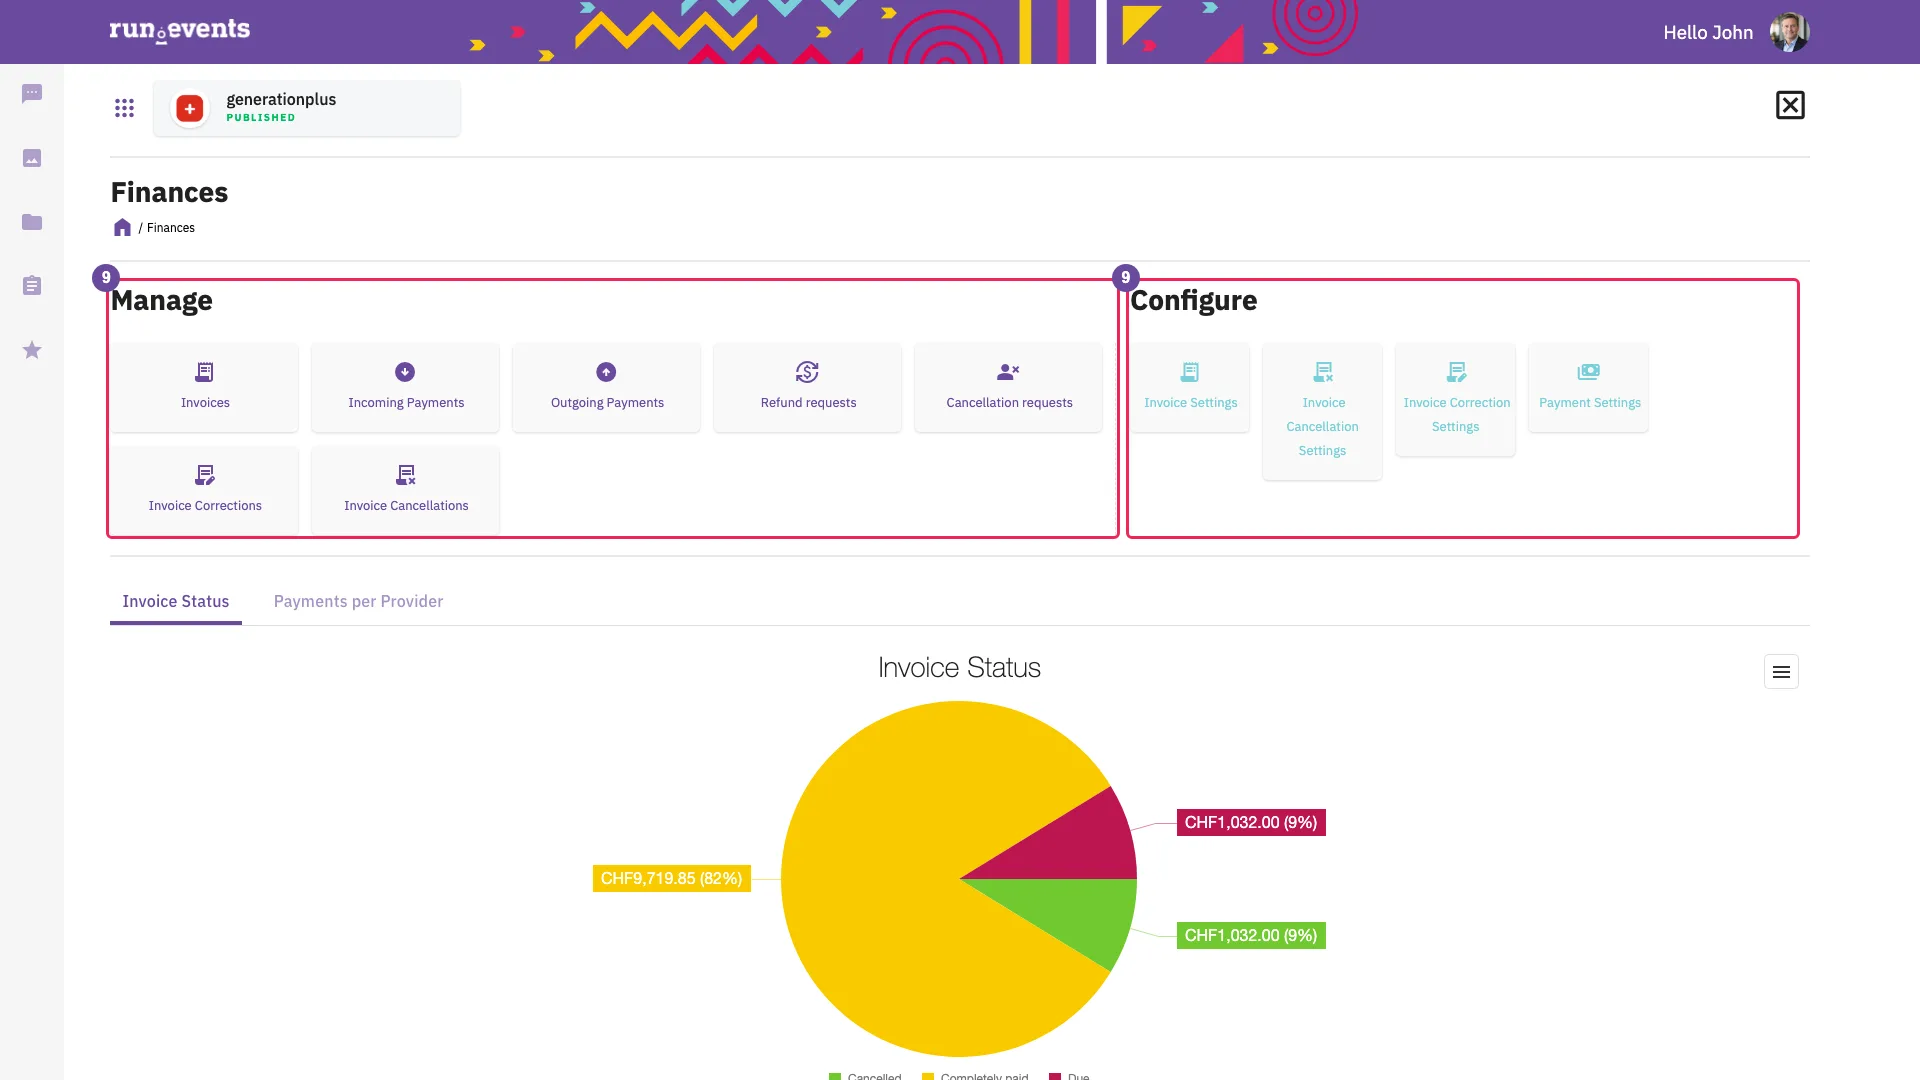
The event's Finances area Manage holds the orders or invoices card, Incoming Payments, Outgoing Payments, Refund requests, Cancellation requests, Invoice Corrections and Invoice Cancellations. Configure holds the document settings cards and Payment Settings. The charts Invoice Status and Payments per Provider complete the page.
- The cards that appear, and their labels, follow the organizer's invoicing flow and document names.
- In the default flow there is no orders card. With Issue invoices off there are no Invoices or Invoice Corrections cards.
- 10Document numbering and texts
Under Configure, select Invoice Settings. In the other flows the card is named after the document, for example "{document name} Settings". The flyout has the tabs Invoice number settings and Invoice Texts.
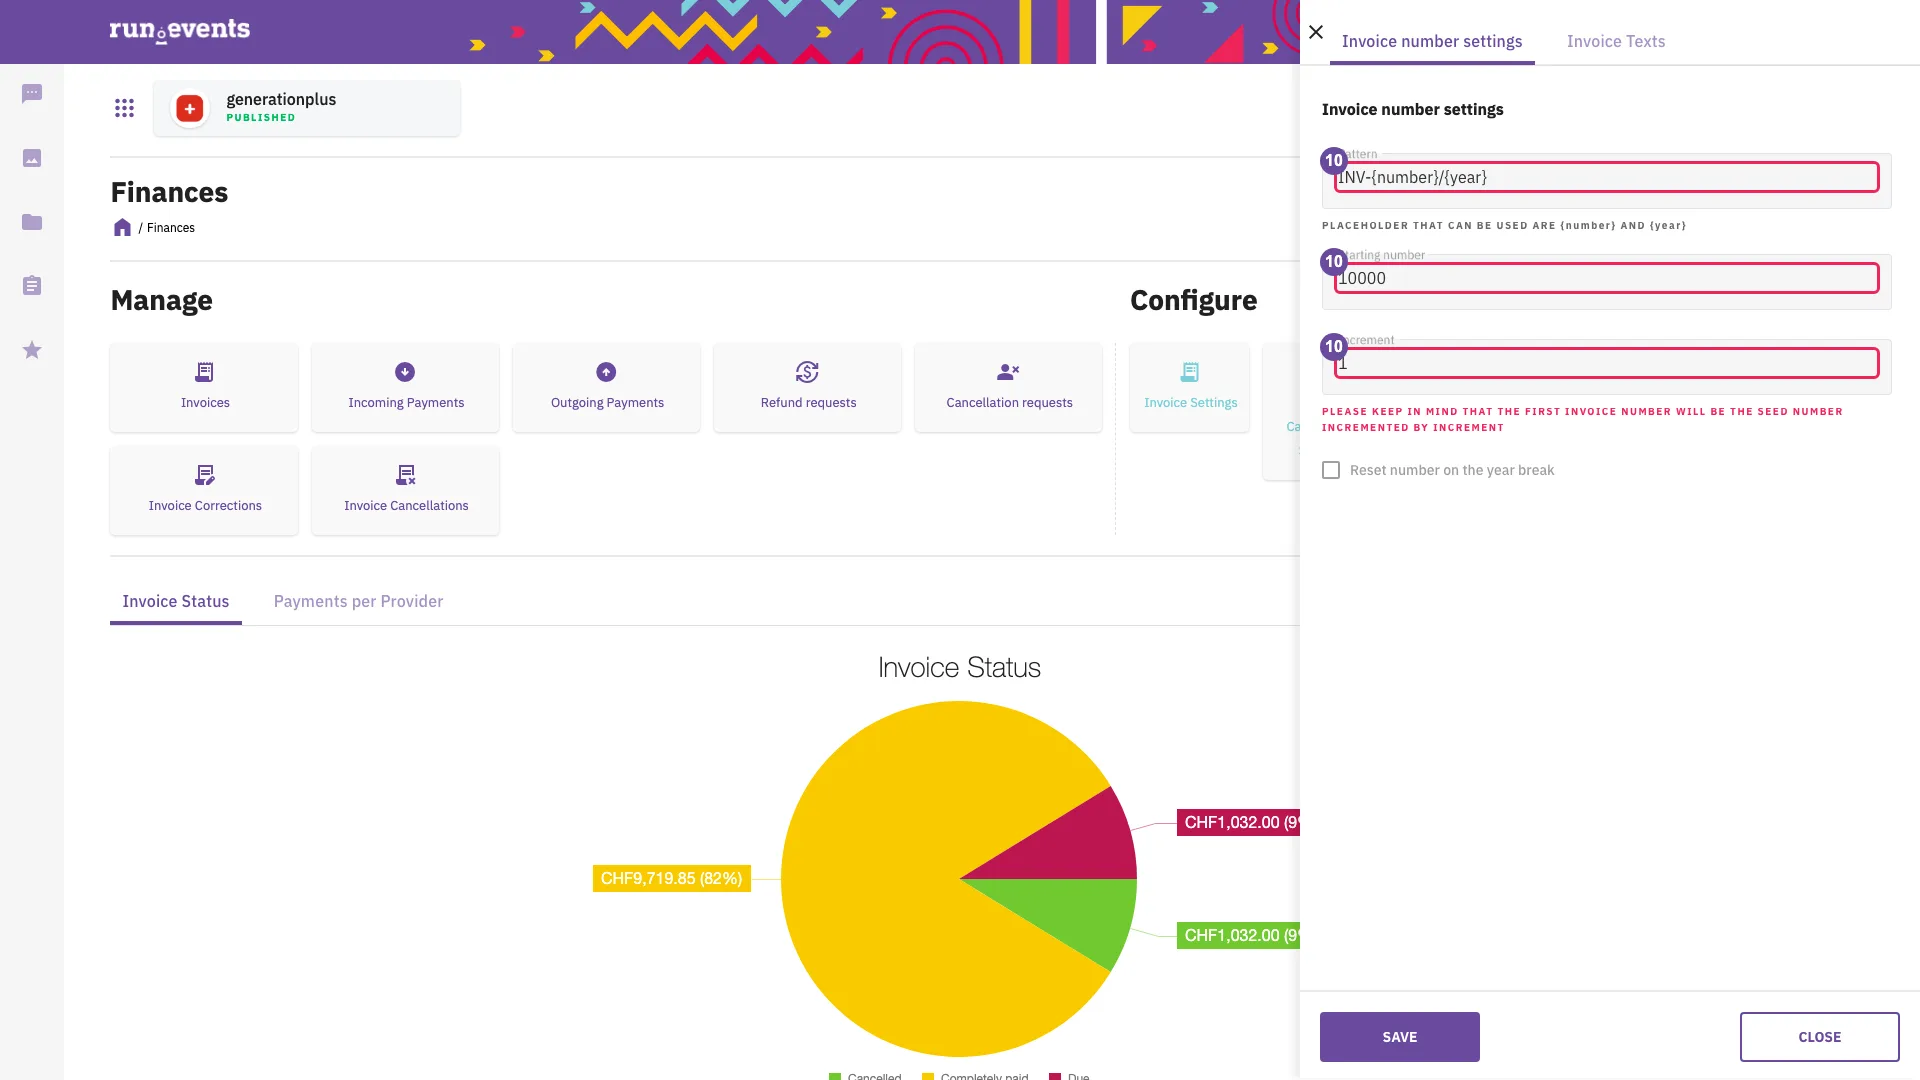
Invoice number settings The number tab holds Pattern, Starting number, Increment and Reset number on the year break.
{number}is required in the pattern. The first number is the starting number plus the increment.- The fields lock once the event has a document of this kind.
- A pattern used by another event of the organizer in the same year opens a Warning dialog.
- Other invalid values are dropped, although "Saved." appears. Reopen the flyout to check.
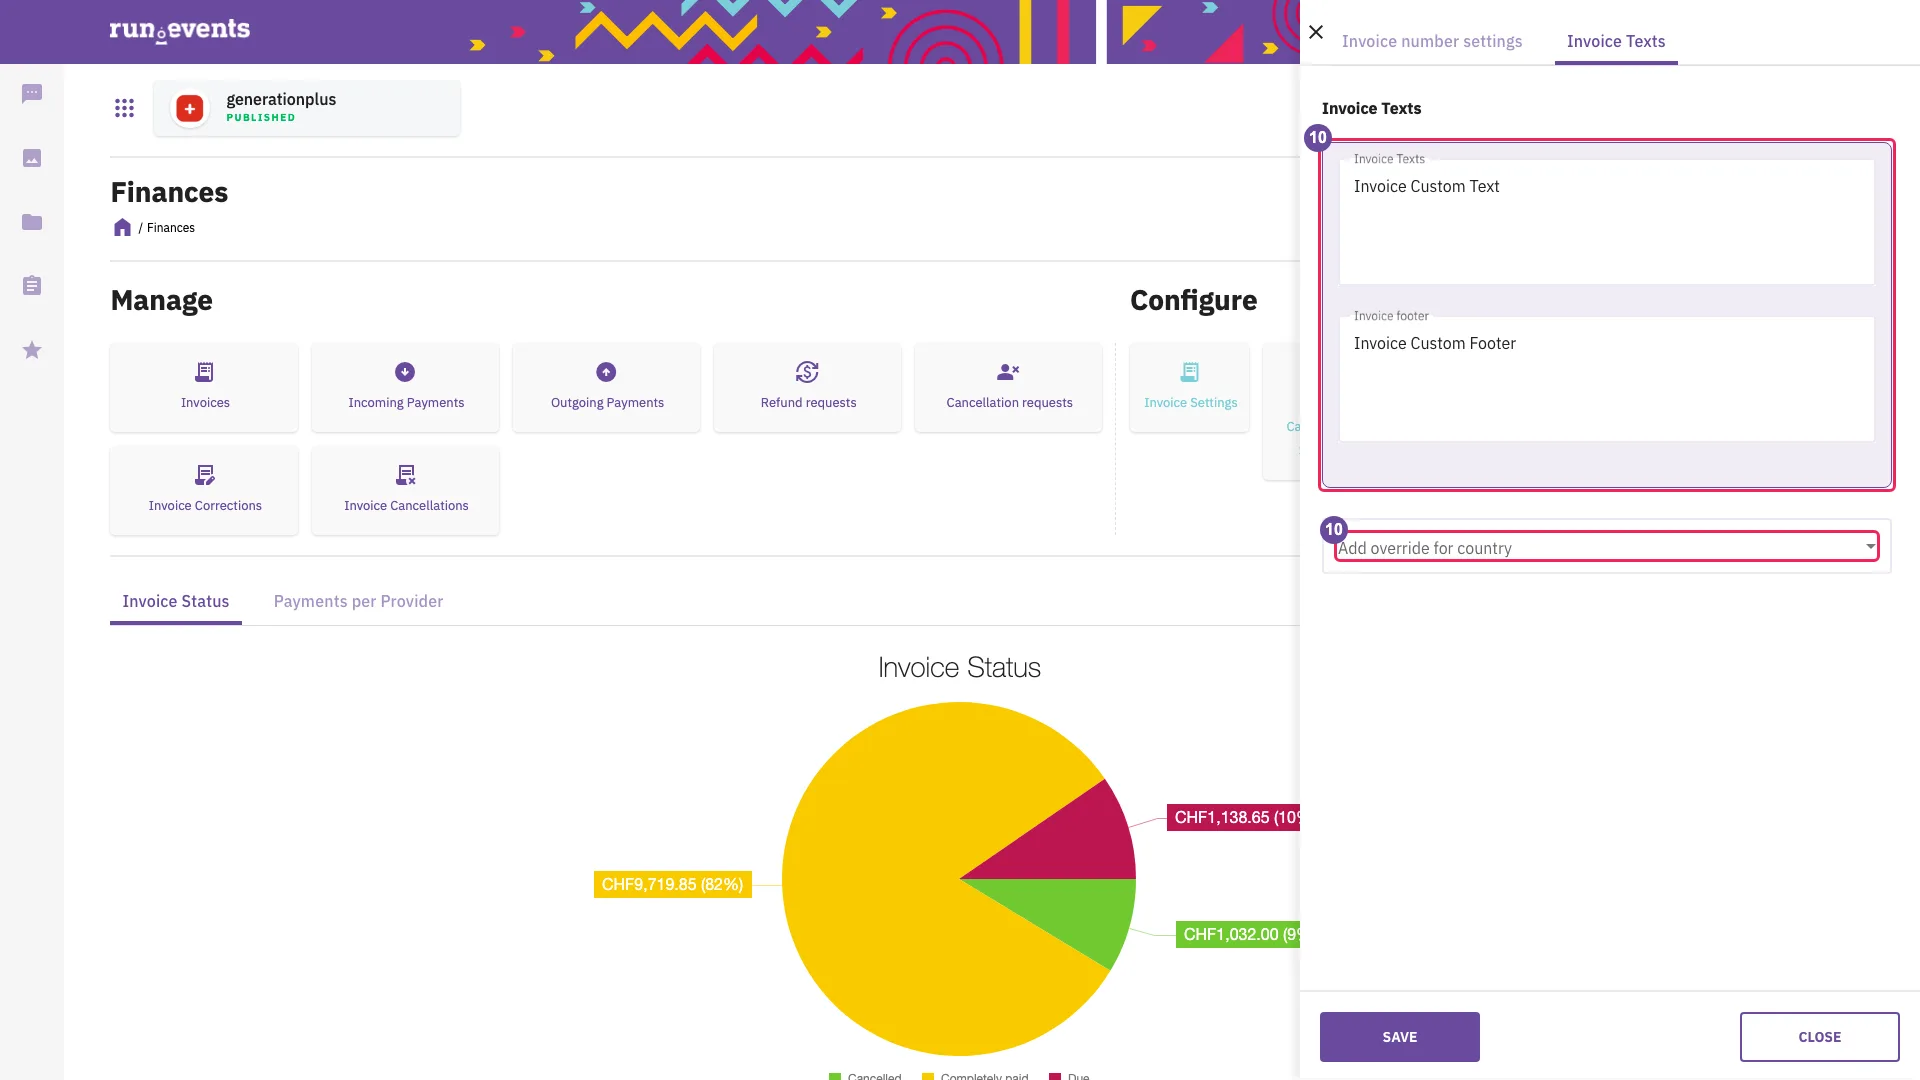
Invoice texts with a country override The texts tab holds the default block, Add override for country with For customers from:, the text field and Invoice footer.
- The texts are printed on the PDF, chosen by the buyer's country. Bank details belong here.
- 11Payment due days and checkout tax fields
Under Configure, select Payment Settings. The flyout Payment Setting opens.
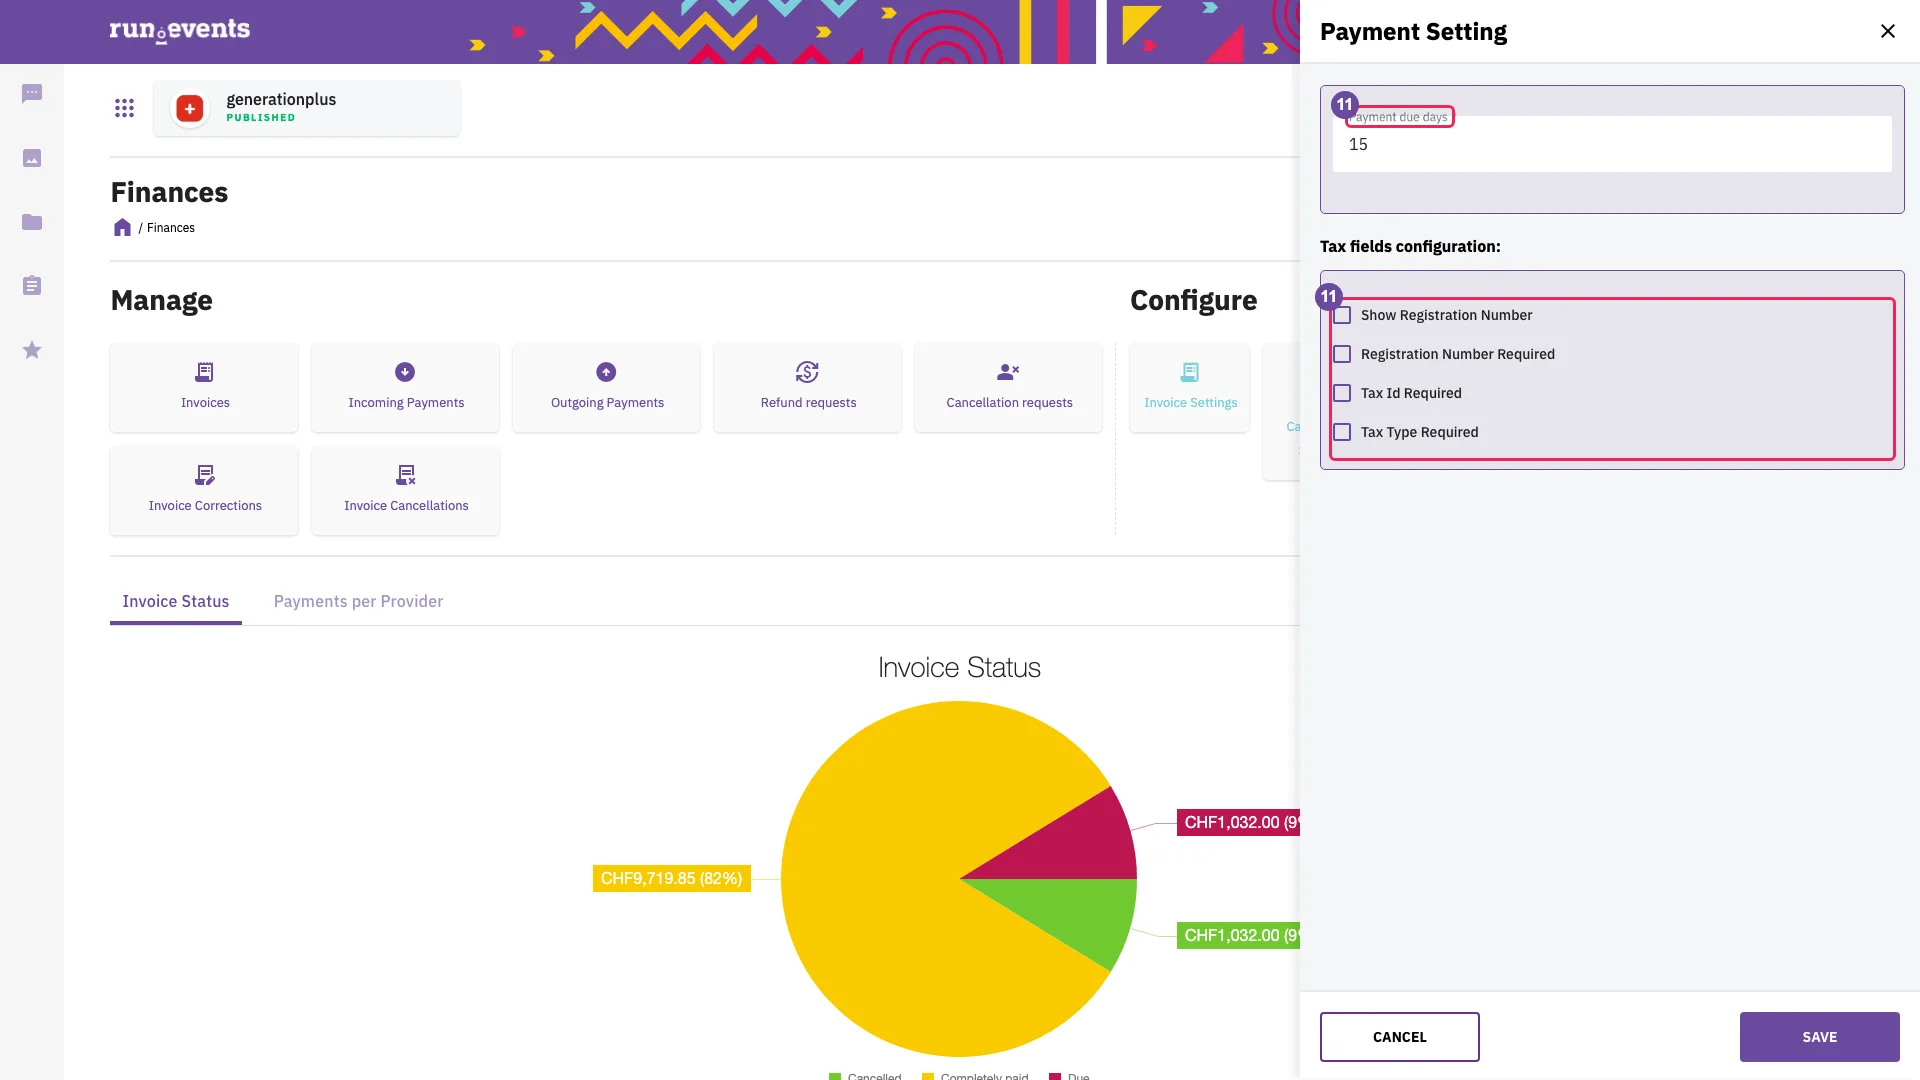
The event's Payment Setting flyout The flyout holds Payment due days and Tax fields configuration: with Show Registration Number, Registration Number Required, Tax Id Required and Tax Type Required.
- The due date is the issue date plus the days. Until a value is saved, 0 applies, although the field shows 15.
- The checkboxes change the form for company buyers at checkout. Registration Number Required works only together with Show Registration Number.
Payments and requests
- 12Documents and the e-invoice
Under Manage, select Invoices (in the other flows, the orders card). The list shows Status, the document number, Date, Customer type, Customer name, Purchased by, Number of tickets/addons and Price (net).
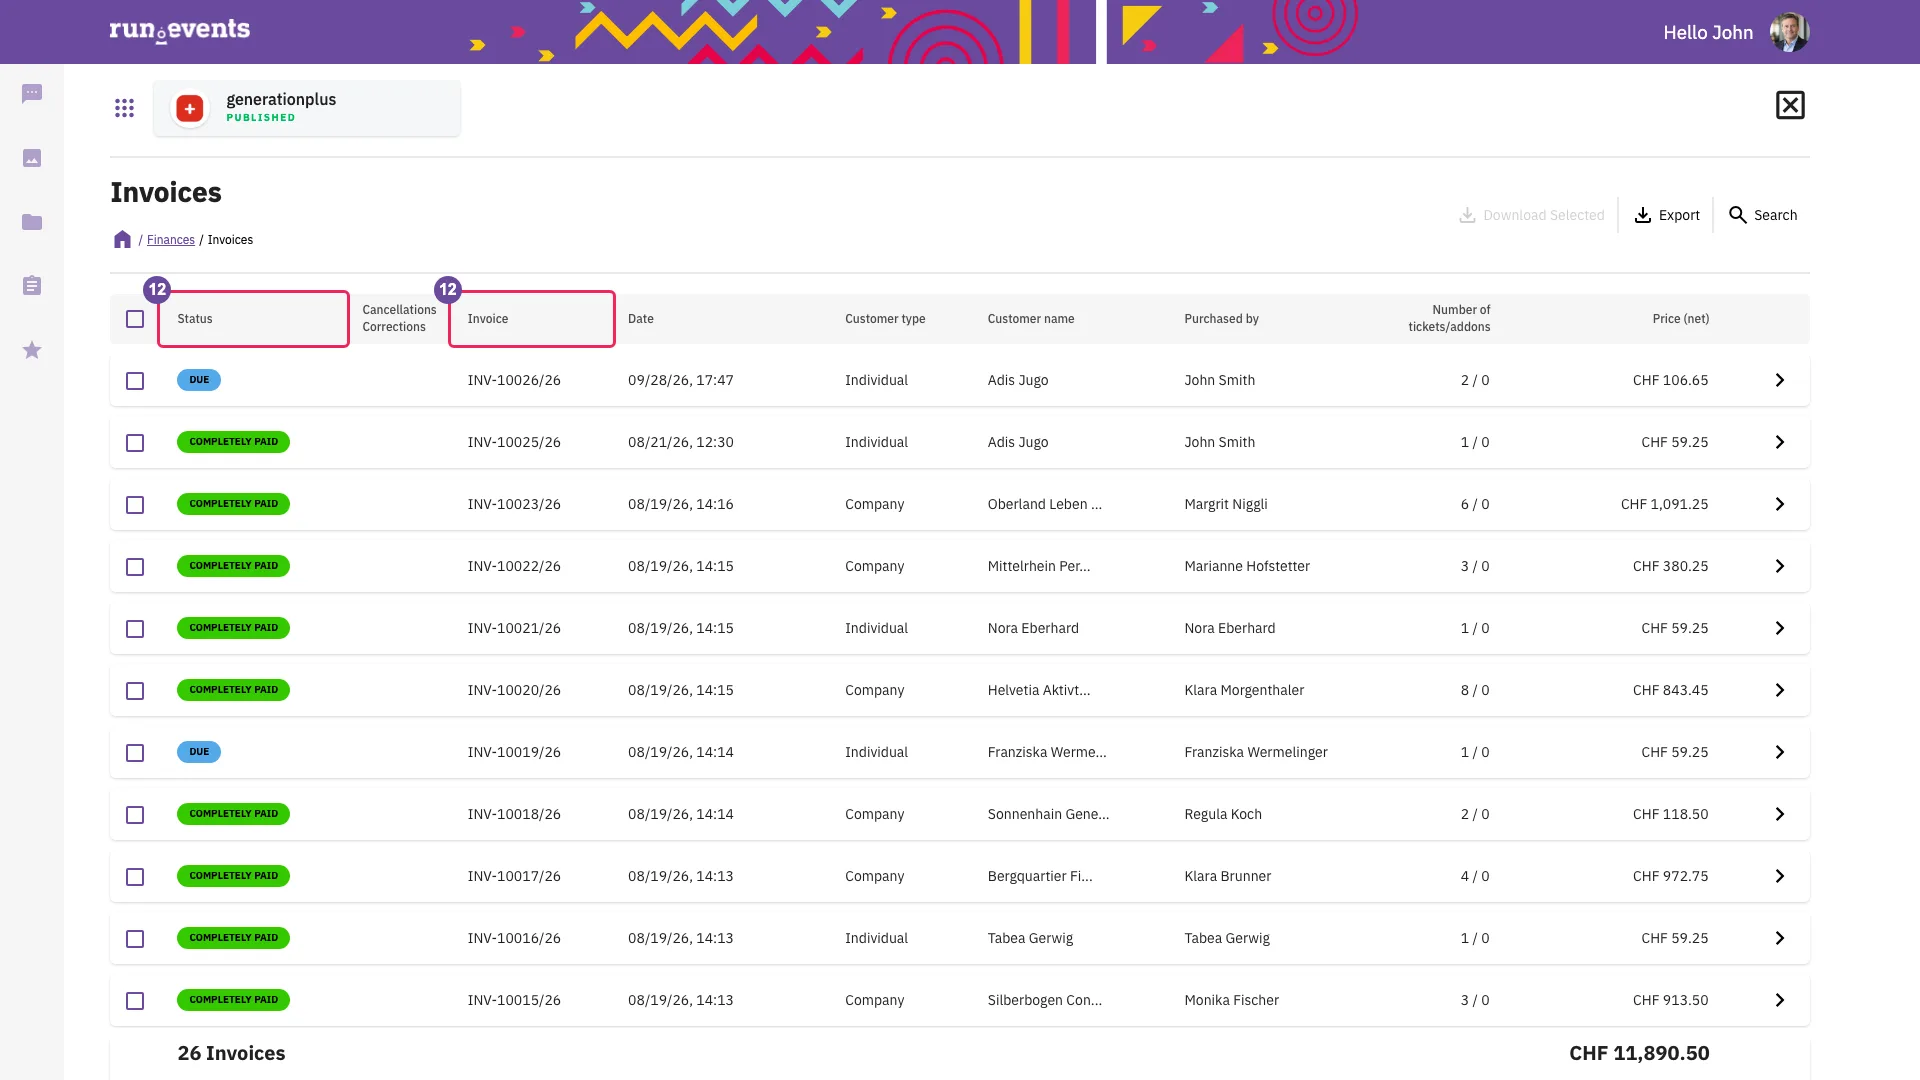
The event's invoices Select a row. The flyout Ticket Invoice (or Ticket Order) opens with the tabs Tickets, Cancellations and Payments, the buttons Create payment, Download as PDF and Re-send as email, and the fields Invoice date:, Due date: and Total amount:.
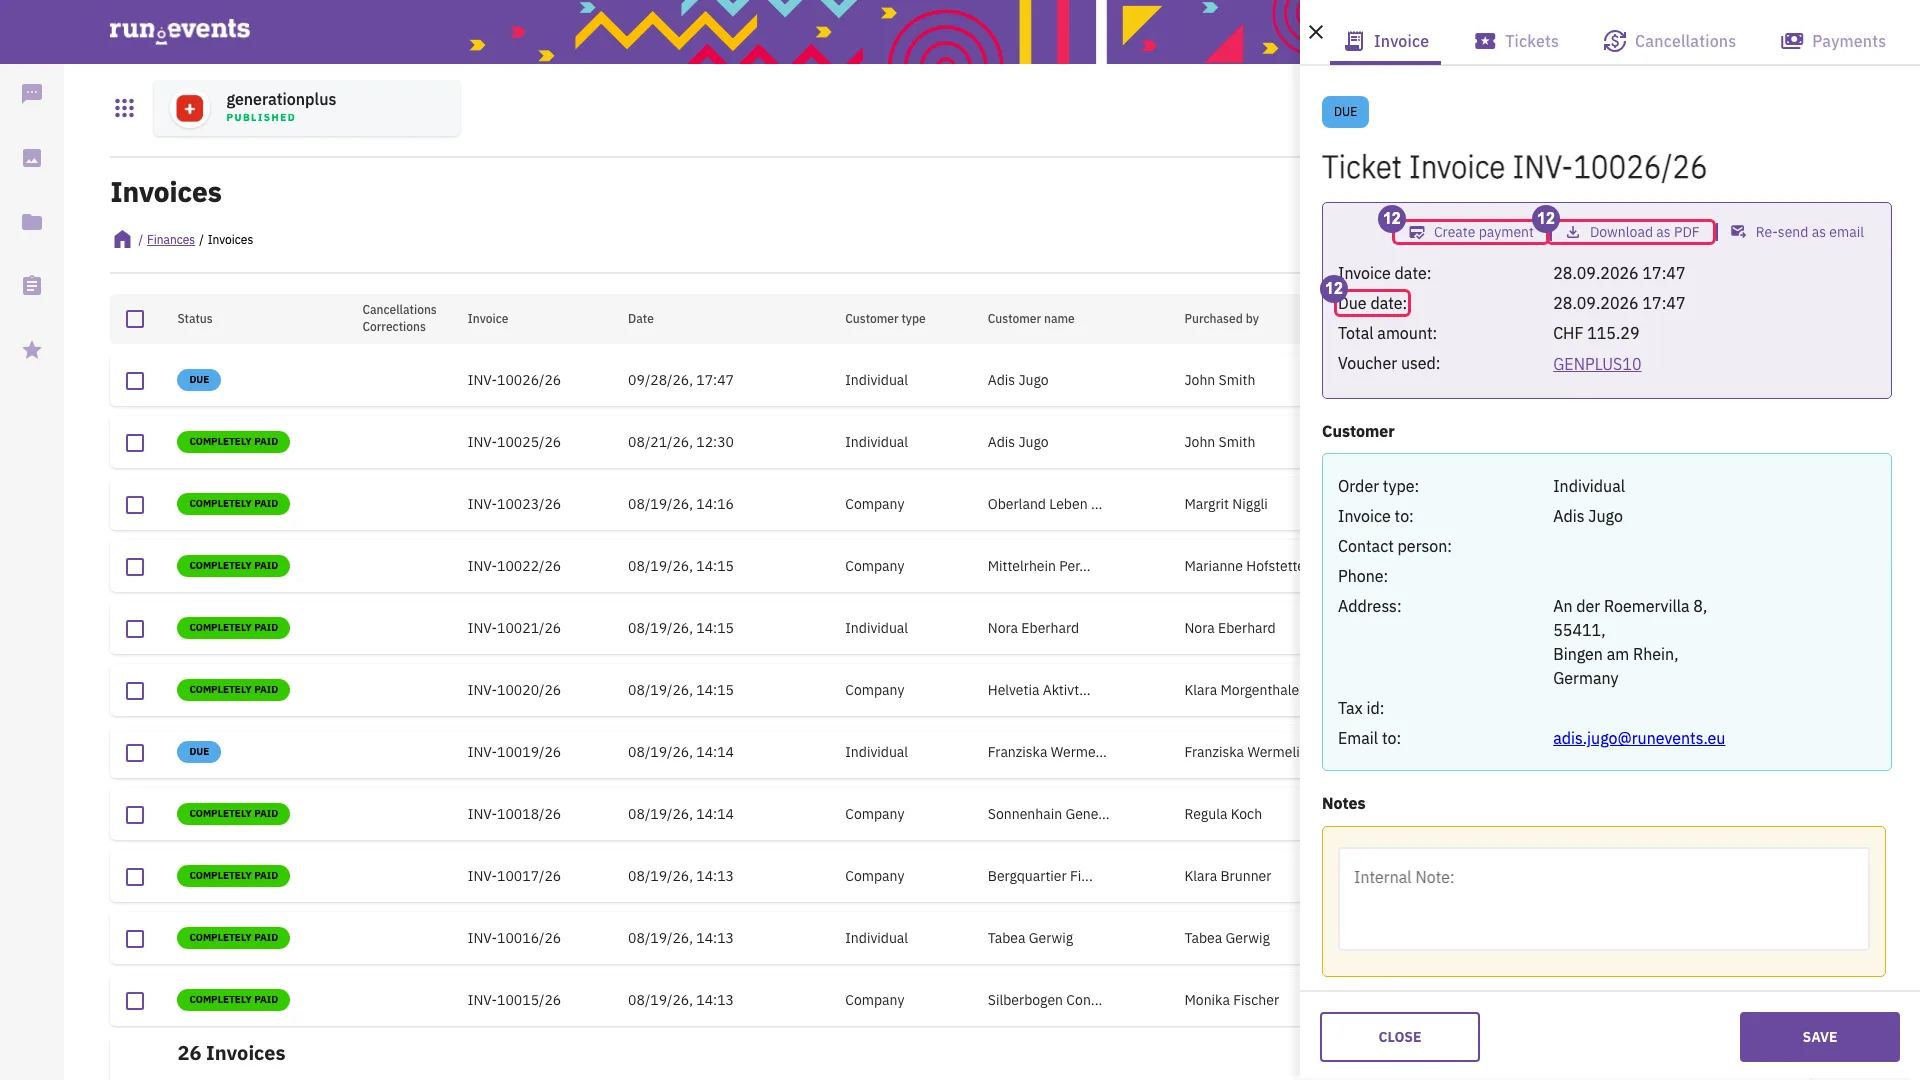
A bank-transfer order in the Ticket Invoice flyout - The status is calculated from the payments.
- Download as PDF produces the document with its embedded EN 16931 invoice data. It is generated at each download; see the diagram of the e-invoice.
- The Ticket Order flyout always gives the order document, never the invoice.
- 13Record a bank transfer
In the flyout, select Create payment. The flyout Create Payment opens with Reference number, Payment Date, Payment ID external, Amount and Comment.
Then go to Manage → Incoming Payments. The page Incoming Ticket Payments lists every payment with its provider. Selecting a row opens the tabs Payment Logs and Edit Payment.
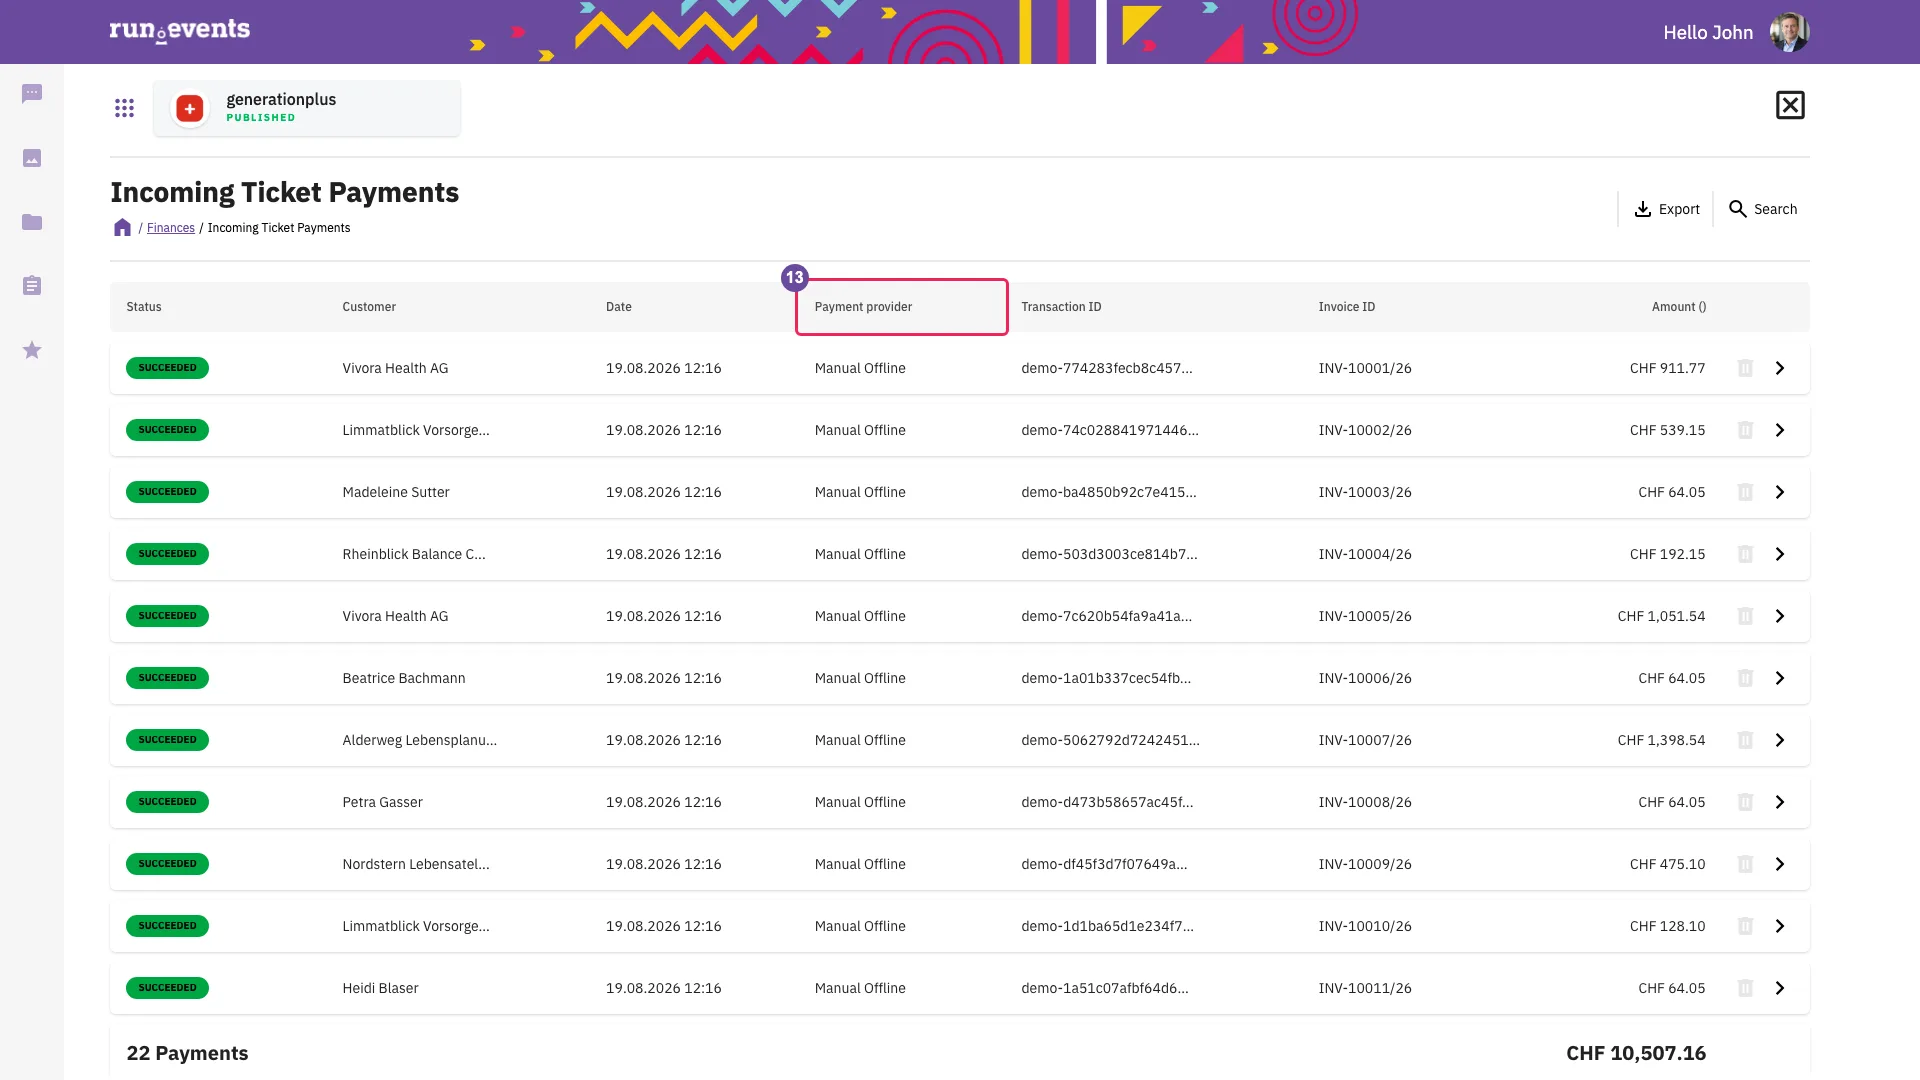
Incoming payments: manual and Stripe - Saving records a successful manual payment, and the status is recalculated.
- The same amount twice on one document is refused.
- No receipt email is sent for manual payments.
- Only manual payments have a delete icon.
- When invoices are created after payment, the invoice is issued when a Create payment brings the order exactly to Completely paid, in one payment or with the last of several. Overpaying, editing a payment and reconciling do not issue it.
- 14Refund and cancellation requests
Go to Tickets And Attendees → Tickets, open a ticket and select Cancel and refund. The flyout Request ticket cancellation opens: select the tickets, then Send request.
Then go to Finances → Refund requests and select a row. The request has the tabs Refund request, Documents and Tickets, and the buttons Decline request and Start approval.
Start approval opens the flyout Approve refund request with Amount and New Total for each ticket.
- run.events splits the selected tickets: paid tickets go into a refund request, unpaid tickets into a cancellation request.
- Approving creates an invoice correction (refund) or a cancellation document. Stripe money is refunded automatically; a bank-transfer refund is recorded by hand.
- A partial amount still invalidates the ticket.
- Declining cannot be undone.
- The request emails go to holders of the finance manager roles, not to Admins. See the diagram of payments and requests.
- 15Bank statement reconciliation
Go back to the organizer's Payment Settings and select Bank Statements Reconciliation. The page Bank Statement Reconciliation opens with its upload area.
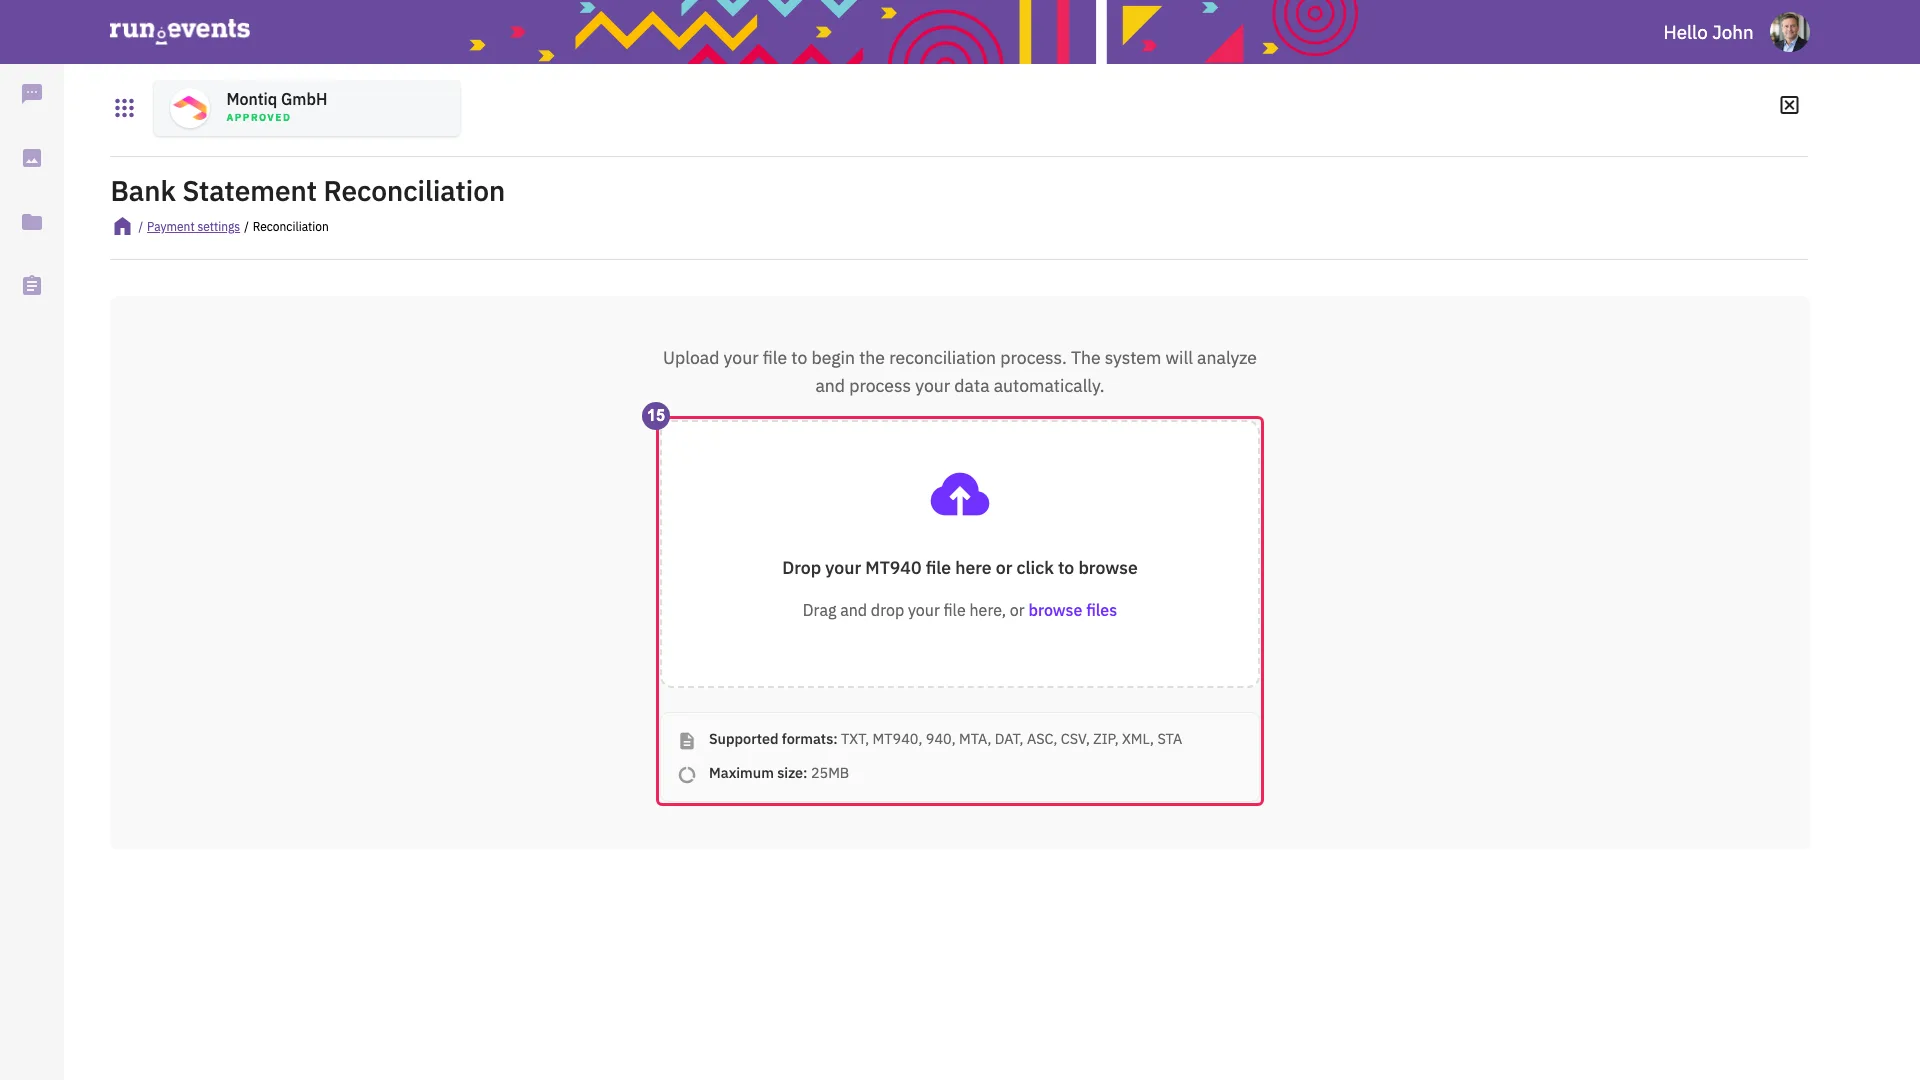
Bank Statement Reconciliation: the upload area After Start Reconciliation, the page shows the lines of the statement with INVOICE MATCHES, Click to find matches on each credit line, the counters and Submit Reconciliation. Click to find matches opens the flyout Manual Transaction Match with Select Invoice to Match and Confirm Match.
- Only MT940 statements are read.
- The candidates come from all events of the organizer.
- Every credit line is matched by hand.
- Each matched credit becomes a manual payment for the full line amount, and no email is sent. See the diagram of the reconciliation path.
Exercises
Both exercises work on your training event from module 1, on the organizer team you created in module 1. As its representative you hold the Admin role, which opens the organizer's payment settings. Your organizer uses the default flow, Invoices are created as a basis for payment, and its country is one where Stripe is allowed.
Exercise 112 min
Goal
Give your event a reverse-charge rule for EU companies, your own document numbering and texts, a payment term and required tax fields; read your organizer's invoicing flow; and switch bank transfer on for your organizer.
Starting state
Your training event from module 1.
- The event's default tax, created by the Payment data step of the event wizard
- The bank-transfer permit on your organizer, granted by run.events
Tasks
- 1Find the default rule
Event home → Settings → Taxes. Find the rule marked under Default rule and note its percentage.
- 2Add a reverse-charge rule
Select Add tax rate and fill in the form:
- Tax name "Reverse charge EU"; Tax Category Reverse Charge; Tax percentage: 0.
- Tax note (as it will appear on invoices, leave empty for none): "Reverse charge: VAT to be accounted for by the recipient."
- Choose This is a special rule which is applied in certain situations.
- Switch on Use for ticket sales?, then untick Use for purchases by individuals.
- Choose Apply to customers only from selected countries, select Preselect the EU countries., remove your organizer's own country, then select Save.
- 3Try to delete the default rule
On the same page, look for a way to delete the default rule.
- 4Set your document numbering
Event home → Finances → Configure → Invoice Settings → tab Invoice number settings:
- Pattern "{your initials}-{number}/{year}", for example "AB-{number}/{year}".
- Starting number 5000; Increment 1.
- Save.
- 5Add document texts
Tab Invoice Texts: in the default block, enter the text "Thank you for your registration." and in Invoice footer "Training Bank · IBAN DE00 0000 0000 0000 0000 00", then select Save.
- 6Set the payment term and the tax fields
Configure → Payment Settings: Payment due days 14; tick Show Registration Number, Registration Number Required and Tax Id Required; Save.
- 7Read your invoicing flow
Organizer dashboard → Payment Settings → Payment flow Configuration. Note which option is selected and whether the red banner says that the flow can no longer be changed. Close the flyout without saving.
Do not select Save in this flyout. The second option cannot be switched back and would apply to every event of your organizer.
- 8Switch bank transfer on
On the same page, select Bank transfer Settings → Payment instructions. Enter "Please transfer the order total to Training Bank, IBAN DE00 0000 0000 0000 0000 00, and give your order number as the payment reference." and select Save. This switches bank transfer on for every event of your organizer.
Done when
- "Reverse charge EU" is listed under Tax rates and rules for ticket sales with Corporate Purchases ticked, Private Purchases not ticked and a country count under Specific Countries.
- The default rule has no delete icon.
- Reopening Invoice Settings and Payment Setting shows your values.
- You can say which flow your organizer uses and whether it is locked.
- After a page reload, Payment instructions shows your text, and the Payment Settings card on the organizer dashboard is no longer red.
Exercise 216 min
Goal
Record a customer's bank transfer by hand, then settle a second order from a bank statement, and check both in Incoming Payments.
Starting state
Your training event from module 1, and the input file Bank statement (MT940). You edit two of its lines in task 5. The only setup is one paid ticket type, created in task 1; module 4 explains its fields.
- Your training event can sell tickets (run.events approved your organizer team and set the event to Demo after module 1) and sells in euro (module 1).
- Bank transfer is switched on for your organizer (exercise 1, task 8).
- Your own number pattern from exercise 1. If you skipped it, set it first (exercise 1, task 4).
- A plain-text editor, such as Notepad, TextEdit in plain-text mode or VS Code.
Tasks
- 1Create a paid ticket type (3 min)
Tickets And Attendees → Configure → Ticket Configuration → Create new → Ticket Type:
- Ticket name: Finance test. Pricing type: Paid ticket. Regular price without tax: 100.00. With the 19 % default tax from module 1, each order totals 119.00.
- Ticket for the following attendee types: Participant.
- Total numbers of available tickets of this type: 10. Maximum per order: 2. Sales start date: yesterday.
- Add.
- 2Buy two tickets by bank transfer (3 min)
On your event's checkout page (module 1, task 5), buy one "Finance test" ticket as a private person and choose bank transfer. Repeat, so that you have two orders: A (the first) and B (the second).
- 3Open order A (1 min)
Finances → Invoices. Open order A. Note its number, its Total amount: and its status. If Total amount: is not a whole number, tell your trainer.
- 4Record the transfer in instalments (2 min)
Select Create payment: Amount 50.00, Reference number "BANK-A1" → Save. Repeat with 50.00 and read the message. Then select Create payment with the remaining amount (69.00) → Save.
- 5Prepare the bank statement (2 min)
Open order B and note its number. Open the statement file in a plain-text editor.
- In line 5, replace
000101with today's date in the form YYMMDD, and the0101that follows it with today's date in the form MMDD. Leave119,as it is. - In line 6, replace
ORDER-NUMBERwith order B's number, exactly as shown. - Save the file as plain text.
Do not open or save the file in a spreadsheet or word processor, and add nothing after the last line. The statement must stay plain MT940 text.
- In line 5, replace
- 6Upload the statement (2 min)
Organizer dashboard → Payment Settings → Bank Statements Reconciliation. Drop the file on the upload area, then select Start Reconciliation.
- 7Match and submit (2 min)
On the line with your order number, choose Click to find matches. Search for your order number, select your order and choose Confirm Match. Leave the line of 45 unmatched. Select Submit Reconciliation.
- 8Check the payments (1 min)
Finances → Incoming Payments: find your three payments.
Done when
- Order A shows the status Completely paid, with two manual payments (50.00 and 69.00).
- Order B shows the status Completely paid, with one payment whose comment begins "Auto-created from reconciliation".
- The line of 45 was left unmatched.
Check questions
- An organizer in Germany wants customers to pay by bank transfer. Payment Settings shows no Bank transfer Settings card. After run.events has acted, the card appears, but customers still cannot choose bank transfer at checkout. Explain both.
- A colleague once placed one free test registration in last year's event. The finance team now wants invoices only after payment, for all future events. What happens in the Payment Flow flyout, and what do you do?
- You created a 0 % "Reverse charge EU" rule for corporate purchases from EU countries. A company from Austria buys a ticket and is charged the default rate. Why?
- A customer pays a 238.00 order in two bank transfers of 119.00. The first Create payment succeeds; the second is refused. Why, and how do you record the money?
- A customer transferred the exact total of order AB-5002/{yy} ({yy} is the two-digit year in the document number) and wrote the number in the transfer text. After Start Reconciliation, the line shows Click to find matches and the status reads "0 matched". A colleague thinks the file is faulty. What do you tell them, and how is the payment recorded?
- An accountant asks where to switch on e-invoices and how to get the organizer's IBAN into them. What do you answer?
Common mistakes
- Confusing the two "Payment Settings".
- The organizer's page Payment settings (organizer dashboard → Payment Settings) holds the provider cards: Payment flow Configuration, Bank transfer Settings, Stripe Settings and Bank Statements Reconciliation.
- The event's flyout Payment Setting (event home → Finances → Configure → card Payment Settings) holds Payment due days and the checkout tax fields.
- Recognize them by place and content, not by title. In the German interface, the page, the event card and the flyout are all called Zahlungseinstellungen.
- Waiting for bank transfer to appear by itself. The card needs the run.events permit; after that, bank transfer stays off until instructions are saved. Clearing the text switches it off for every event of the organizer.
- Selecting Setup Stripe "just to look". This creates the organizer's only Stripe account and leaves an unfinished onboarding. Fix: finish the onboarding through Setup Stripe; a second account cannot be created.
- Switching a Stripe method on once and assuming it is live. Without the green icon, and with "true" under Action required, checkout does not offer it. If the toggle snapped back, switch it on again; select Sync after completing Stripe's requests.
- Saving "invoices after payment" to try it, or letting a test order happen first. The second option cannot be switched back, it applies to every event, and the first order anywhere locks the flyout. Recognize it by the message "Switching back to this payment flow is not supported" or by the red banner. Fix: run.events support.
- A special tax rule created but never selected on the ticket type, or the event default changed after ticket types were opened. Recognize it: the invoice shows the default or the old rate. Fix: select the rule under Pricing → Tax rules, and check each ticket type after changing the default.
- Reverse Charge, Zero rate or Exempt with a non-zero percentage. The tax dialog does not set 0 % (the event wizard does). Recognize it in the Percentage column.
- A pattern without
{number}, or a starting number that is not a number. "Saved." appears, but the value is dropped. Recognize it: reopening shows the old value. - Keeping the default numbers on several events. Every event starts with the same default numbers. A pattern already used in the same year raises the Warning dialog on save; a pattern without
{year}always does. Fix: a distinct prefix for each event. - Trusting the 15 in Payment due days. Until a value is saved, documents are due on their issue date.
- Recording two instalments of the same amount. The second is refused with an untranslated sentence. Fix: combine the amounts, or record amounts that differ.
- With invoices after payment: overpaying, editing a payment up to the total, or reconciling.
- The status reaches Completely paid (or Overpaid), but no invoice is issued.
- The invoice is issued only when a Create payment brings the order exactly to Completely paid, in one payment or with the last of several.
- Recognize it: the order is paid but missing from Invoices.
- Expecting a bank-transfer refund to happen by itself. Only Stripe money is refunded automatically. Pay back outside run.events and record it with Create payment on the correction (flyout Create Overpayment). Recognize it: the correction keeps its clock icon.
- Declining a request by mistake. A decline cannot be undone; the customer must request again.
- Uploading a file that is not MT940 text, or MT940 with anything after the closing line.
- The page accepts CSV, XML and ZIP files by their extension, but run.events reads only the content.
- These all fail with "This MT940 file uses a format we don't currently support…": CSV, CAMT/XML or ZIP content; a statement opened and saved in a spreadsheet or saved as rich text; text after the first
:62F:or:62M:line. - Fix: upload the bank's original MT940 text file.
- Waiting for refund-request emails as organizer Admin. They go only to the finance manager roles. Watch the red Refund requests card instead.
- Downloading from the Ticket Order flyout and expecting the invoice. The order flyout always gives the order document; the invoice PDF is under Invoices.
4Attendance management
Learning objectives
- Configure a ticket type, a ticket add-on and a ticket option, and link them so that the add-on and the option are offered with the intended ticket type.
- Set up a price period and a quantity discount on a ticket type, and work out the net and gross price a buyer pays on a given day, with and without a voucher.
- Configure a voucher that discounts selected ticket types, and a voucher that shows a hidden ticket type only to holders of the code. Explain why a reveal voucher can also hide public ticket types and add-ons, and state when a code's uses are spent.
- Create a batch of single-use voucher codes, and state what the batch form cannot do.
- Find an order's ticket, attendee and customer in the lists of Tickets And Attendees, and explain why a ticket can appear in one list but not in another.
- Name the actions that lock or silently delete configuration (the first sale, switching a ticket type to free, saving a voucher with a switch off, newly requiring personalization), and avoid them.
Concepts
Attendance management covers what an event sells and to whom: the ticket types, the add-ons and options sold with them, their prices, the vouchers that change prices or visibility, and the lists that show what was sold.
Where attendance is managed
On the event home, the card Tickets And Attendees opens the area for everything in this module. It has three groups:
- Manage holds the lists: Tickets, Reserved Tickets (only in some events, see "Reserved tickets" below), Attendees, Customers, Options and Addons.
- Report holds charts. They only display data.
- Configure holds Ticket Configuration and Vouchers.
Working in the area needs the ticket permission. The organizer role Admin and the event roles Event Manager and Ticket Manager carry it; the finance manager roles do not. A user with only a finance role still sees the Vouchers card, but the page does not load and returns to the previous page. Whoever creates an event becomes its Event Manager, so you can work on your own training event.
Ticket types and ticket add-ons
A ticket add-on is sold only together with a main ticket it is linked to: a workshop day, a dinner, a parking space. Ticket types and add-ons are the same kind of object with largely the same settings; an add-on is simply marked as one. An add-on linked to no ticket type is never offered.
- A link can be marked mandatory. The add-on is then put into the cart automatically with the ticket and cannot be removed, and orders without it are refused.
- If a mandatory add-on is sold out, inactive or outside its sales window, it is skipped, and the main ticket still sells.
- The add-on's Maximum per order: is a maximum per main ticket, although the label says "order".
Ticket options
A ticket option is a choice without a price, for example which of two workshops a buyer attends. Options belong to the event and are linked to ticket types and add-ons.
- An option's Maximum: is one shared pool for everything the option is linked to. The checkout refuses orders beyond it.
- A ticket type or add-on can require an option. The checkout then preselects the first option that is still available and refuses orders without one. When every linked option is sold out, the requirement is dropped.
- The option form has no session field, so options set up here do not control access to sessions. Session access by option is set on the session itself, in Content and Speakers (Day 2).
- Options are not available in an event that is connected to a master event, a setting only run.events can make.
What a buyer is offered
The checkout offers:
- ticket types that are active, inside their sales window, and publicly visible or revealed by a voucher;
- add-ons that are active, inside their sales window, linked to the chosen ticket type, and publicly visible or revealed by a voucher. An add-on has its own visibility checkbox, These add-ons are publicly visible and available for purchase through check-out widgets and on the tickets purchase page, ticked by default;
- options that are active and inside their availability window.
All three are listed in the order of the cards on Ticket Configuration. A sold-out ticket type stays listed, with its counter disabled.
The status on a ticket type card follows from the same rules. It reads Sold out when the capacity minus the tickets sold is 0 or less. Otherwise it reads Deactivated when the ticket type is inactive or outside its sales window, and Active in all other cases. Tickets sold means valid tickets plus pending cancellation or refund requests.
A ticket type whose sales end has passed is no longer offered. It does not need to be deactivated.
Paid event or free event
Whether an event charges for tickets is chosen once, in the first step of the event creation wizard (Charging for tickets or Not charging for tickets). No screen changes it later.
- In a free event, Pricing type: is hidden and every ticket is free. The ticket type Pricing tab is disabled, and the add-on Pricing tab is hidden.
- There are two pricing types, Paid ticket and Free ticket. There is no donation or pay-what-you-want type.
- Prices are entered without tax (net). The buyer sees prices including tax.
- After the first sale of a ticket type, its Pricing type: is locked, and the ticket type can no longer be deleted.
- Switching an existing paid ticket type to Free ticket deletes all its price periods and tax rules. Switching back does not restore them.
Pricing
The Pricing tab of a paid ticket type has three blocks: Prices, Quantity Discounts and Tax rules.
- Prices holds price periods, for example an early bird. A period must lie inside the sales window. Periods must not overlap or touch, because both boundaries count: a period that ends at 23:59 and one that starts at 23:59 on the same day are refused. Outside every period, the regular price applies.
- Quantity Discounts reduce the price from a minimum number of tickets in one order. When several apply, the highest threshold the order reaches wins. There is one discount per minimum quantity.
- Tax rules decide the tax. The ticket type's rules are matched against the buyer's country and whether the buyer is a private person or a company. If none matches, the event's default tax applies.
How the price is calculated
The checkout and the server calculate the price in the same way, in this order:
- Base price: the price of the running price period, otherwise the regular price.
- Voucher discount: a percentage, or a fixed amount taken off the net price. The price does not go below 0.
- Quantity discount on top. It is skipped when a voucher discount applied and the quantity discount's Can be combined with vouchers is off.
- Tax, added last.
Vouchers are allowed at two levels. While a price period runs, the period's Allow Vouchers decides, and the ticket type's checkbox Allow vouchers for this ticket type (discounts etc). is ignored. Outside price periods, the ticket type's checkbox decides. A period with Allow Vouchers off also switches quantity discounts off while it runs.
Attendee type describes; it does not restrict
Ticket for the following attendee types says who a ticket is meant for. It does not filter the public checkout: a publicly visible ticket with the attendee type Speaker can be bought by anyone. What the attendee type does drive:
- Sponsor: the link to sponsor packages and the sponsor lead role.
- Expo Delegation and Member states: the delegation quotas of assemblies.
To restrict a ticket to certain people, hide it and hand out a reveal voucher (see "Vouchers").
Vouchers
A voucher is a code, unique within the event; upper and lower case do not matter. Buyers see only the code.
- Internal Note stays in the organizer portal.
- Description is not shown at the checkout, but it is sent to the buyer's browser with the voucher data. Put nothing confidential in it.
What a saved voucher does depends on its two switches:
- Use for discounts: the voucher changes prices through its discounts, at most one per ticket type, each a percentage or a fixed amount. Without a discount, or while vouchers are not allowed on the ticket type, the code is accepted and nothing changes.
- Reveal or hide tickets: the voucher replaces the list the code holder sees. The checkout then shows the ticket types and add-ons toggled on the voucher's Reveals tab, hidden or public, plus the public ticket types this voucher discounts that currently allow vouchers. Every other ticket type and add-on disappears.
- With neither switch on, the voucher changes nothing.
In this handbook, a voucher with Reveal or hide tickets on is called a reveal voucher. Two consequences follow:
- A reveal voucher without toggles empties the list, unless it discounts a public ticket type while vouchers are allowed. Switching a toggle off removes it, so no toggle means nothing is revealed.
- A discount alone never unhides a hidden ticket type.
Maximum uses counts every ticket and add-on bought with the code whose type has a discount or a reveal toggle on this voucher. It counts even when no discount applied, for example during a price period with Allow Vouchers off. It does not count orders or buyers, and reserved tickets count too.
- While a code is applied, the counter of every ticket type at the checkout stops at the code's remaining uses, not only for the ticket types it discounts.
- A discount applies to the whole order or not at all: if an order holds more discounted items than uses remain, no item is discounted.
- Uses of issued tickets are never given back, even when a ticket is cancelled.
Other rules:
- Saving a voucher with a switch off permanently deletes its discounts or its reveal toggles.
- A voucher can be deleted only while its Total uses is 0.
- Create multiple vouchers creates many codes at once, all with the same single discount on main ticket types. It cannot target add-ons and cannot reveal.
The lists
The lists under Manage fill once orders exist. Each answers a different question:
- Tickets lists tickets. It opens filtered to the status Issued, so cancelled or refunded tickets appear only after the filter is cleared.
- Attendees lists the people assigned to an issued main ticket. An unassigned or cancelled ticket produces no attendee.
- Customers lists the invoiced parties, with their totals of orders, tickets and amount.
- Addons lists every sold add-on, whatever its status.
- Options lists every ticket or add-on with a chosen option.
Reserved tickets
In an event that does not issue tickets before payment, an order creates reserved tickets. They are issued when the invoice is paid in full, or by hand with Approve Ticket. The card Reserved Tickets appears only in such events.
New events issue tickets before payment, and no screen changes that. An organizer who needs tickets issued only after payment asks run.events.
Guided walkthrough
The walkthrough uses the organizer portal, o.runevents.net/{organizer}/event/{event}, where {event} is the event's slug. The last step uses the event portal, e.runevents.net/{event}/checkout. The screenshots show a prepared event with more data than your training event.
The area and ticket types
- 1Open the Tickets And Attendees area
On the event home, click the card Tickets And Attendees. The address ends in
/tickets-attendees.Look at the groups Manage, Report and Configure. All attendance work starts here: the lists are under Manage, the setup under Configure (Ticket Configuration and Vouchers). Until the event has at least one ticket type or add-on, the Ticket Configuration card is red, and the task bell lists "Create your first tickets".
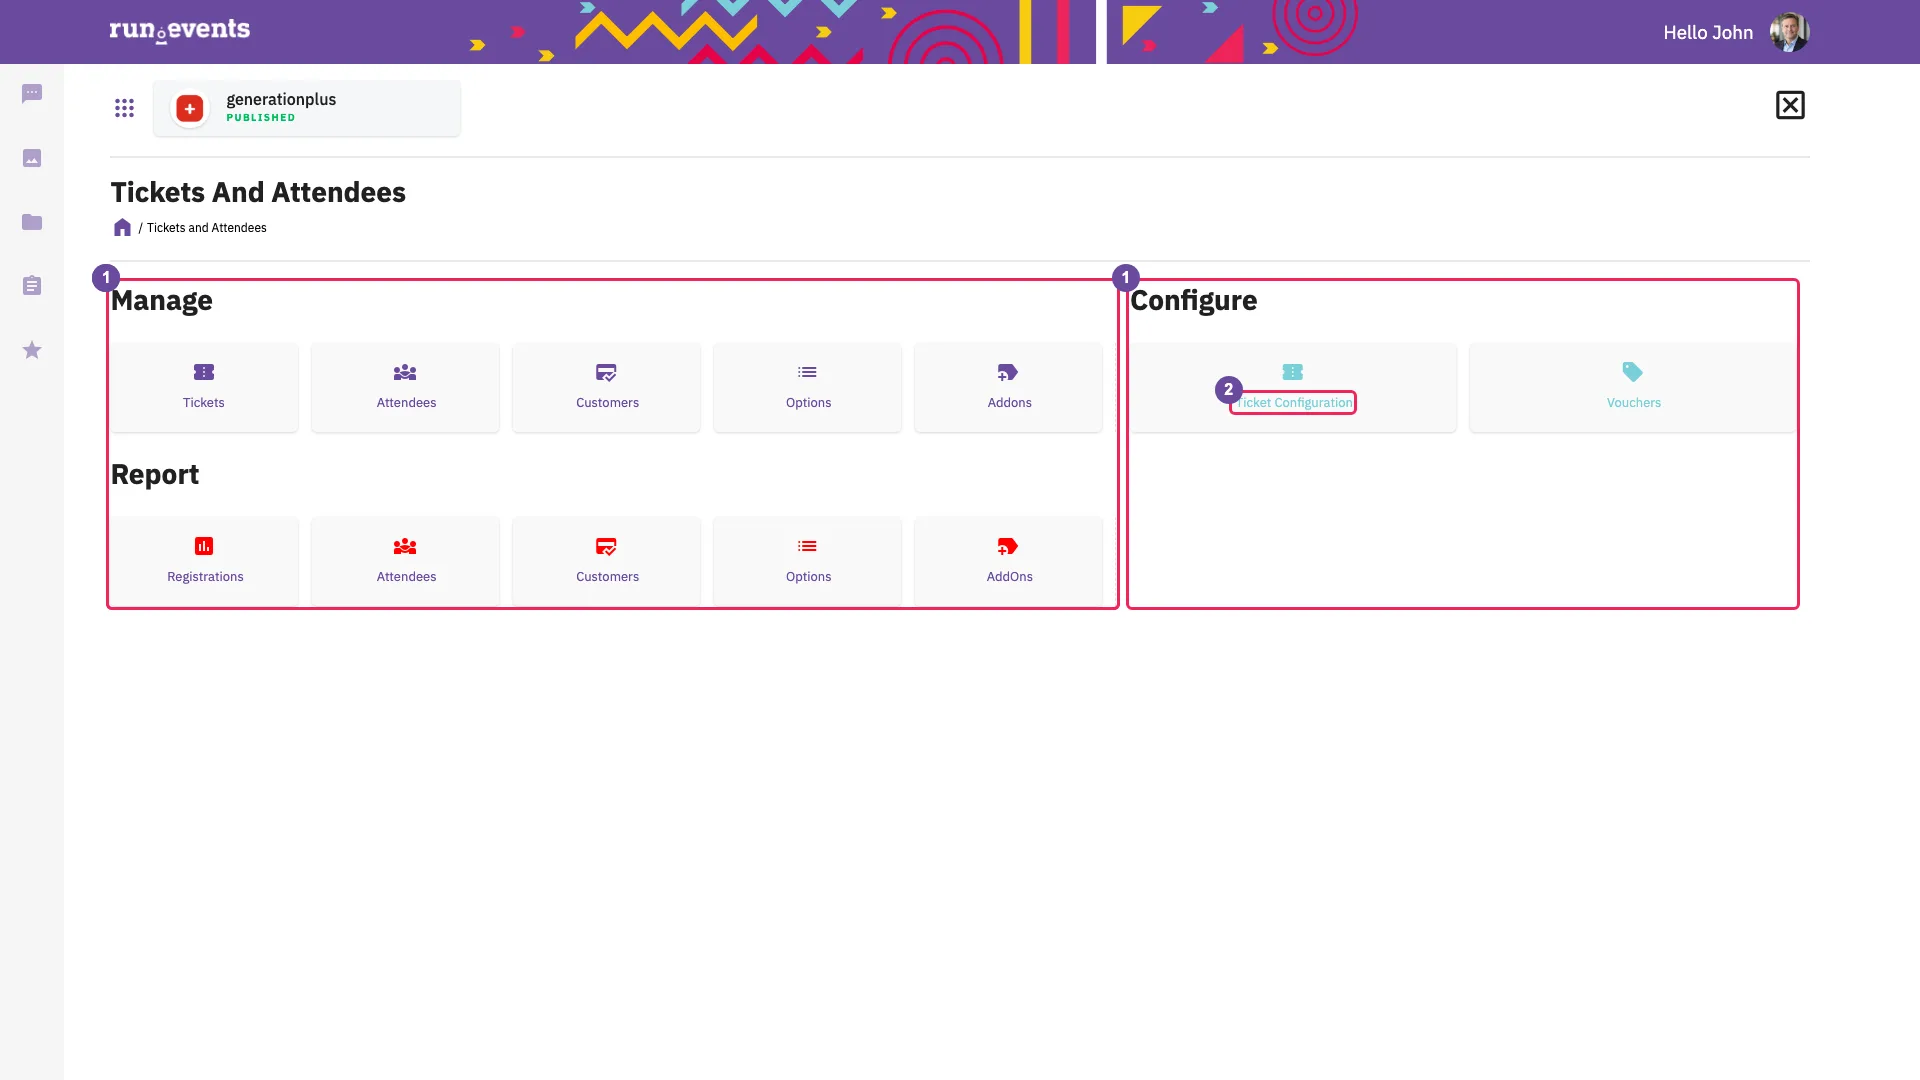
Tickets And Attendees - 2Open Ticket Configuration
Under Configure, click Ticket Configuration.
The page holds three lists: Ticket Types, Ticket Add-Ons and Ticket Options. On screens 1920 pixels wide or wider they stand side by side; on smaller screens, such as a laptop, Ticket Add-Ons and Ticket Options are stacked in the right-hand column. Each card shows the status (Active, Deactivated or Sold out), the pricing type, the attendee type, the counts "{n} Add-Ons" and "{n} Options", the regular price without tax and the number sold.
Dragging the cards changes the order in which the checkout lists them. The new order is saved at once.
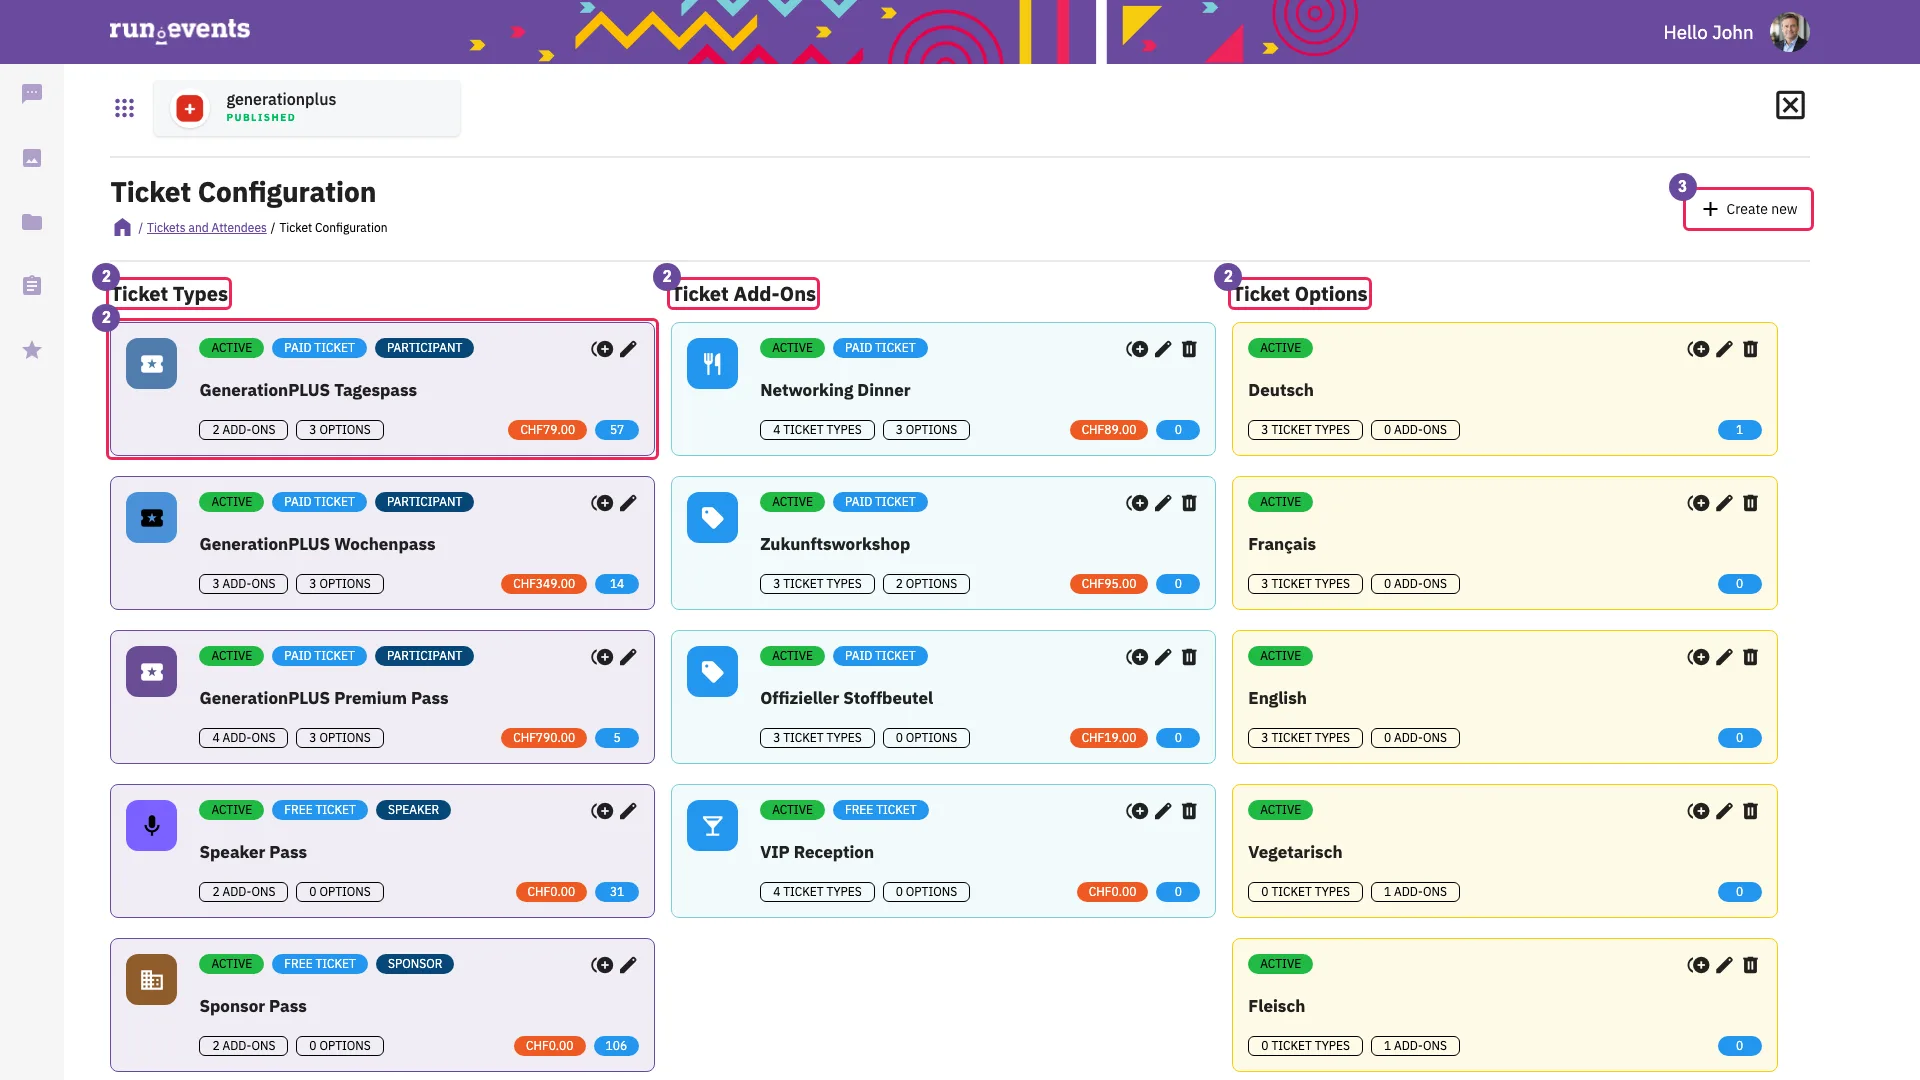
Ticket Configuration - 3The Create new menu
Click Create new.
One menu creates all three kinds: Ticket Type, Ticket Add-On and Ticket Option. Ticket Option is missing in an event connected to a master event.
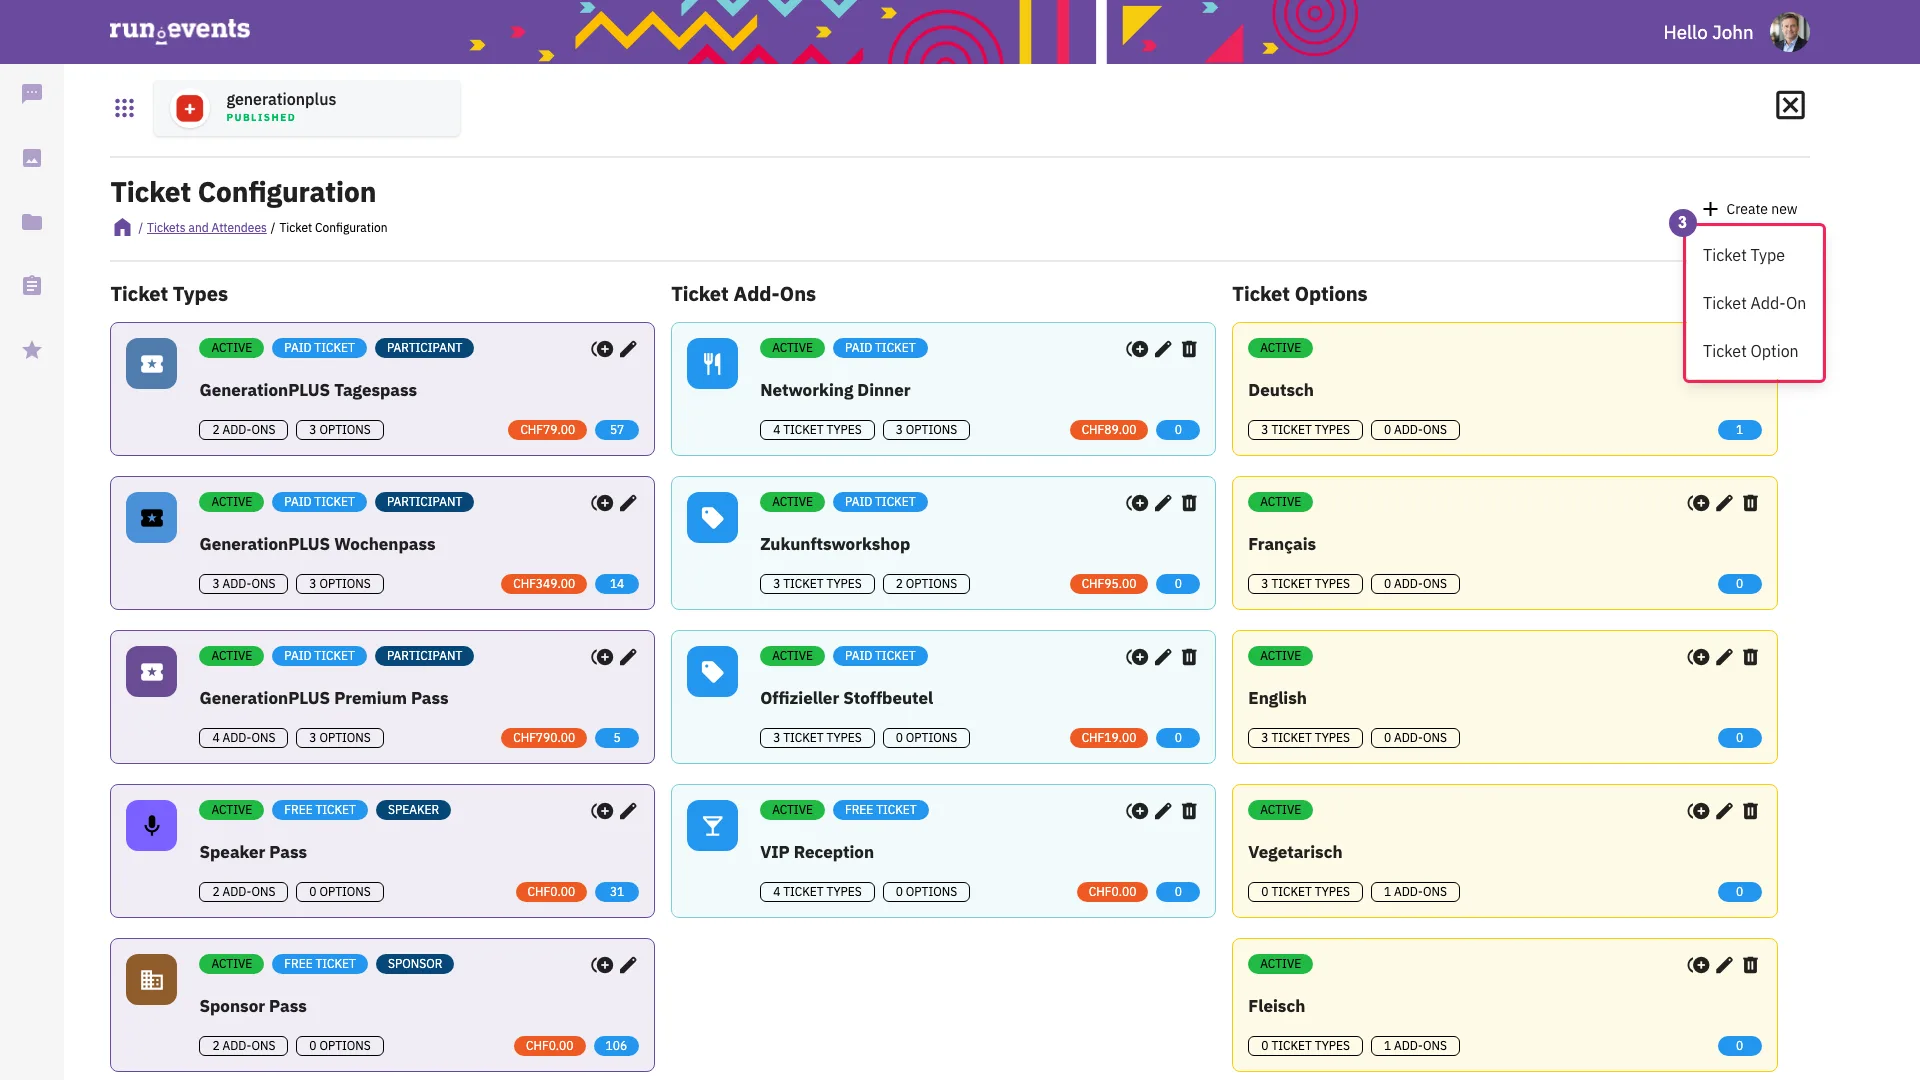
The Create new menu - 4A new ticket type
Choose Create new → Ticket Type.
The form opens with the header Create a new ticket type and a single tab, Main Info. The other tabs, Custom Fields, Pricing, Add-Ons & Options and Badges, appear only after the first save with Add.
A new ticket type - 5Ticket type info
Click the edit icon (a pencil, tooltip Edit) on an existing ticket type card. On Main Info, look at the section Ticket type info.
It holds Ticket name:, Description, Pricing type: (Paid ticket or Free ticket), Regular price without tax ({currency}):, shown once Paid ticket is chosen, with the event's currency in the brackets, and Ticket for the following attendee types. Two checkboxes follow: Attendees who purchase this ticket will be required to enter their work information and When this ticket is configured for someone else, personalization (custom fields) must be filled in at the same time.
- The price is net: tax is added at the checkout.
- Pricing type: is locked after the first sale.
- The attendee type does not restrict who can buy the ticket.
- With the work-information checkbox ticked, company and job role become required when registration data is filled in.
- With the personalization checkbox ticked, registration data must be filled in when a ticket is configured for someone else.
Ticket type info - 6Availability
In the same form, scroll to the section Availability.
It holds Total numbers of available tickets of this type, Maximum per order:, Minimum per order:, Sales start date: and Sales end date:. Both dates are in the event's time zone.
- The total is the capacity of the ticket type.
- Maximum per order: is required. The checkout and the server both enforce it.
- Minimum per order: only makes the buyer's first "+" jump to the minimum. It is not checked when the order is placed.
- The sales end defaults to the event end.
Availability - 7Appearance and Advanced
Scroll further, to the sections Appearance and Advanced.
Appearance holds Color and Select an Icon. Advanced holds Active and four checkboxes: These tickets are publicly visible and available for purchase through check-out widgets and on the tickets purchase page, Allow vouchers for this ticket type (discounts etc)., Attendees can unassign these tickets from themselves and assign them to someone else and Cancellation and refund can be requested for these tickets.
- A new ticket type starts active, publicly visible and with vouchers allowed.
- Unticking public visibility hides the ticket type from the checkout, unless a reveal voucher shows it. It also ticks and locks the voucher checkbox.
- The reassign checkbox decides whether the buyer can pass a ticket on to someone else.
- With the cancellation checkbox unticked, cancellation and refund requests for these tickets can neither be made nor approved.
Appearance and Advanced - 8The Pricing tab
On a paid ticket type, open the tab Pricing.
It holds three blocks, Prices, Quantity Discounts and Tax rules, and the link Manage Tax Rules for this event.
- Price periods override the regular price while they run.
- Quantity discounts apply from a minimum number of tickets.
- Tax rules pick the tax. The event's default tax is always selected and cannot be removed.
- The tab is disabled for free ticket types.
The Pricing tab - 9A price period
In Prices, click Add price.
The form holds Price rule name, Price Start Date: and Price End Date: (with the hints "Earliest price start date" and "Latest price end date"), Price without tax ({currency}), Internal note and Allow Vouchers, which is on by default.
- While the period runs, its Allow Vouchers overrides the ticket type's voucher checkbox. Switching it off also stops quantity discounts during the period.
- The name, both dates and the price are required. Save does nothing until they are filled in.
- Periods must not touch. A period ending at 23:59 and a next period starting at 23:59 on the same day are refused with "Dates can not be overlapping."
A new price period - 10Add-ons and options of a ticket type
Open the tab Add-Ons & Options.
Assign Ticket Add-Ons lists the linked add-ons (Select Add-Ons for this Ticket Type), each with the switch This add-on is mandatory with this ticket type. Assign Ticket Options lists the linked options (Select additional Options for this Ticket Type), with the switch For this ticket / add-on the option selection is required.
Saving a checkbox list replaces the whole set of links.
Both switches save the moment they are changed. There is no Save button for them.
Add-Ons & Options - 11Custom Fields and Badges
Open the tabs Custom Fields and Badges.
Custom Fields shows Select additional Custom Fields for this Ticket Type and Create a new Custom Field. The create form offers Add this custom field only to this Ticket Type or Add this custom field to all Ticket Type.
Custom fields are the registration data asked for each ticket, and personalization makes them mandatory. Badges links badge designs to the ticket type. It stays empty until a badge design exists; module 5 covers badges.
Custom Fields
Add-ons and options
- 12A ticket add-on
Choose Create new → Ticket Add-On (header Create a new Add-On), then open an existing add-on with its edit icon.
Look at Ticket add-on name, Add-on for following ticket types: and Maximum per order:, and in Advanced the checkboxes These add-ons are publicly visible and available for purchase through check-out widgets and on the tickets purchase page and Allow vouchers for this Add-On (discounts etc). An existing add-on has the tabs Main Info, Pricing and Ticket Types & Options.
- The add-on is offered only with the ticket types selected here, and only while it is publicly visible or revealed by the buyer's voucher. A reveal voucher hides every add-on it does not toggle.
- Maximum per order: is per main ticket, although the label says "order".
A new ticket add-on 
Add-on visibility - 13A ticket option
Choose Create new → Ticket Option (header Create a new ticket option), then open an existing option with its edit icon.
Look at Ticket option name:, Associated with ticket types (hint "Option available with following ticket types and add-ons"), Active, Maximum:, Availability start date: and Availability end date:.
An option has no price. Its maximum is shared by everything it is linked to.
A new ticket option 
An existing ticket option
Vouchers
- 14The voucher list
Under Configure, click Vouchers.
The toolbar holds Create a new voucher, Create multiple vouchers, Export and Search. The columns are Voucher, Description, Start Date, End Date, Max uses, Total uses, Discounts and Reveals.
- Max uses turns red when the code is used up.
- The ticks under Discounts and Reveals show only whether the switches are on, not whether a discount or a toggle exists.
- The delete icon is missing once the voucher has been used.
- In Search, the status In use means "currently usable", not "has been used".
Vouchers - 15A voucher
Click Create a new voucher: the empty form has only the tab Voucher. Then open an existing voucher with a click on its row.
The tab holds Voucher (the code), Description, Maximum uses, Start date:, End date:, Internal Note, and the switches Use for discounts and Reveal or hide tickets.
- Voucher, Description and Maximum uses are required. An empty Description turns red without a message.
- After the first save, the tabs Discounts and Reveals appear, and the form moves by itself to the tab of the switch that is on. A tab whose switch is off stays greyed out.
- The end date cannot be later than the event end. After the event end, the voucher can no longer be edited.
A new voucher 
An existing voucher - 16Discounts
On the tab Discounts, click Create a new discount.
Choose Percentage or Fixed amount ({currency}), select the ticket types in Select ticket types to which discount will be applied (or Select all ticket types), and enter the Amount. A saved discount shows as a card with its ticket types as chips.
Each ticket type gets at most one discount per voucher. Add-ons can be selected here too.
Discounts - 17Reveals
Open the tab Reveals.
The heading Reveal tickets is followed by the text "When this voucher is used, show only the following ticket types during the checkout." and one toggle per ticket type and add-on.
- Each toggle saves immediately.
- With no toggle on, code holders see only the public ticket types this voucher discounts while vouchers are allowed. Otherwise they see nothing.
The text on the tab is literal. Ticket types and add-ons that are not toggled disappear for holders of the code, public ones included.
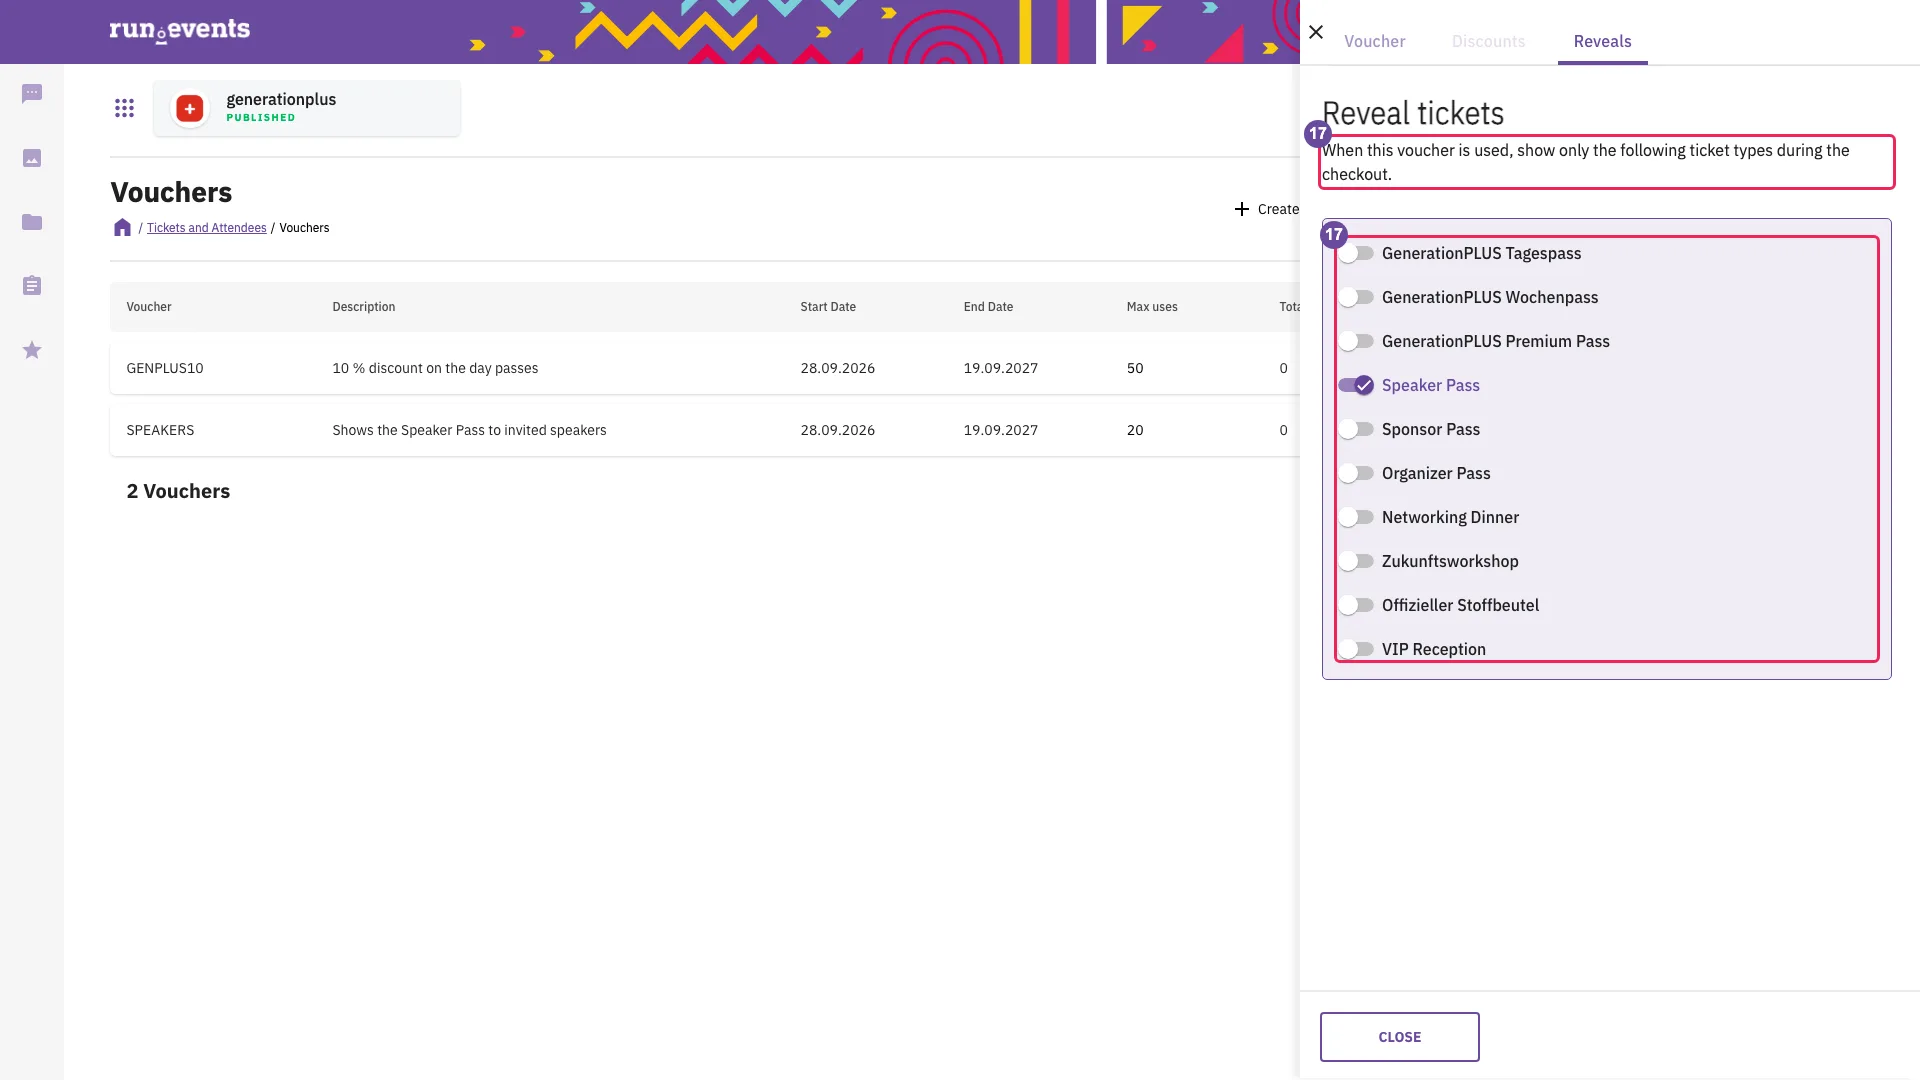
Reveals - 18Create multiple vouchers
In the voucher list, click Create multiple vouchers.
The form offers Random voucher naming or Specify voucher names, Amount of vouchers, Voucher Length, Maximum uses (1 by default), the dates, Percentage or Fixed amount, the ticket-type selection and Discount.
It creates many codes in one step, all with the same discount on main ticket types. Either all codes are created or none. There is no reveal and no add-on.
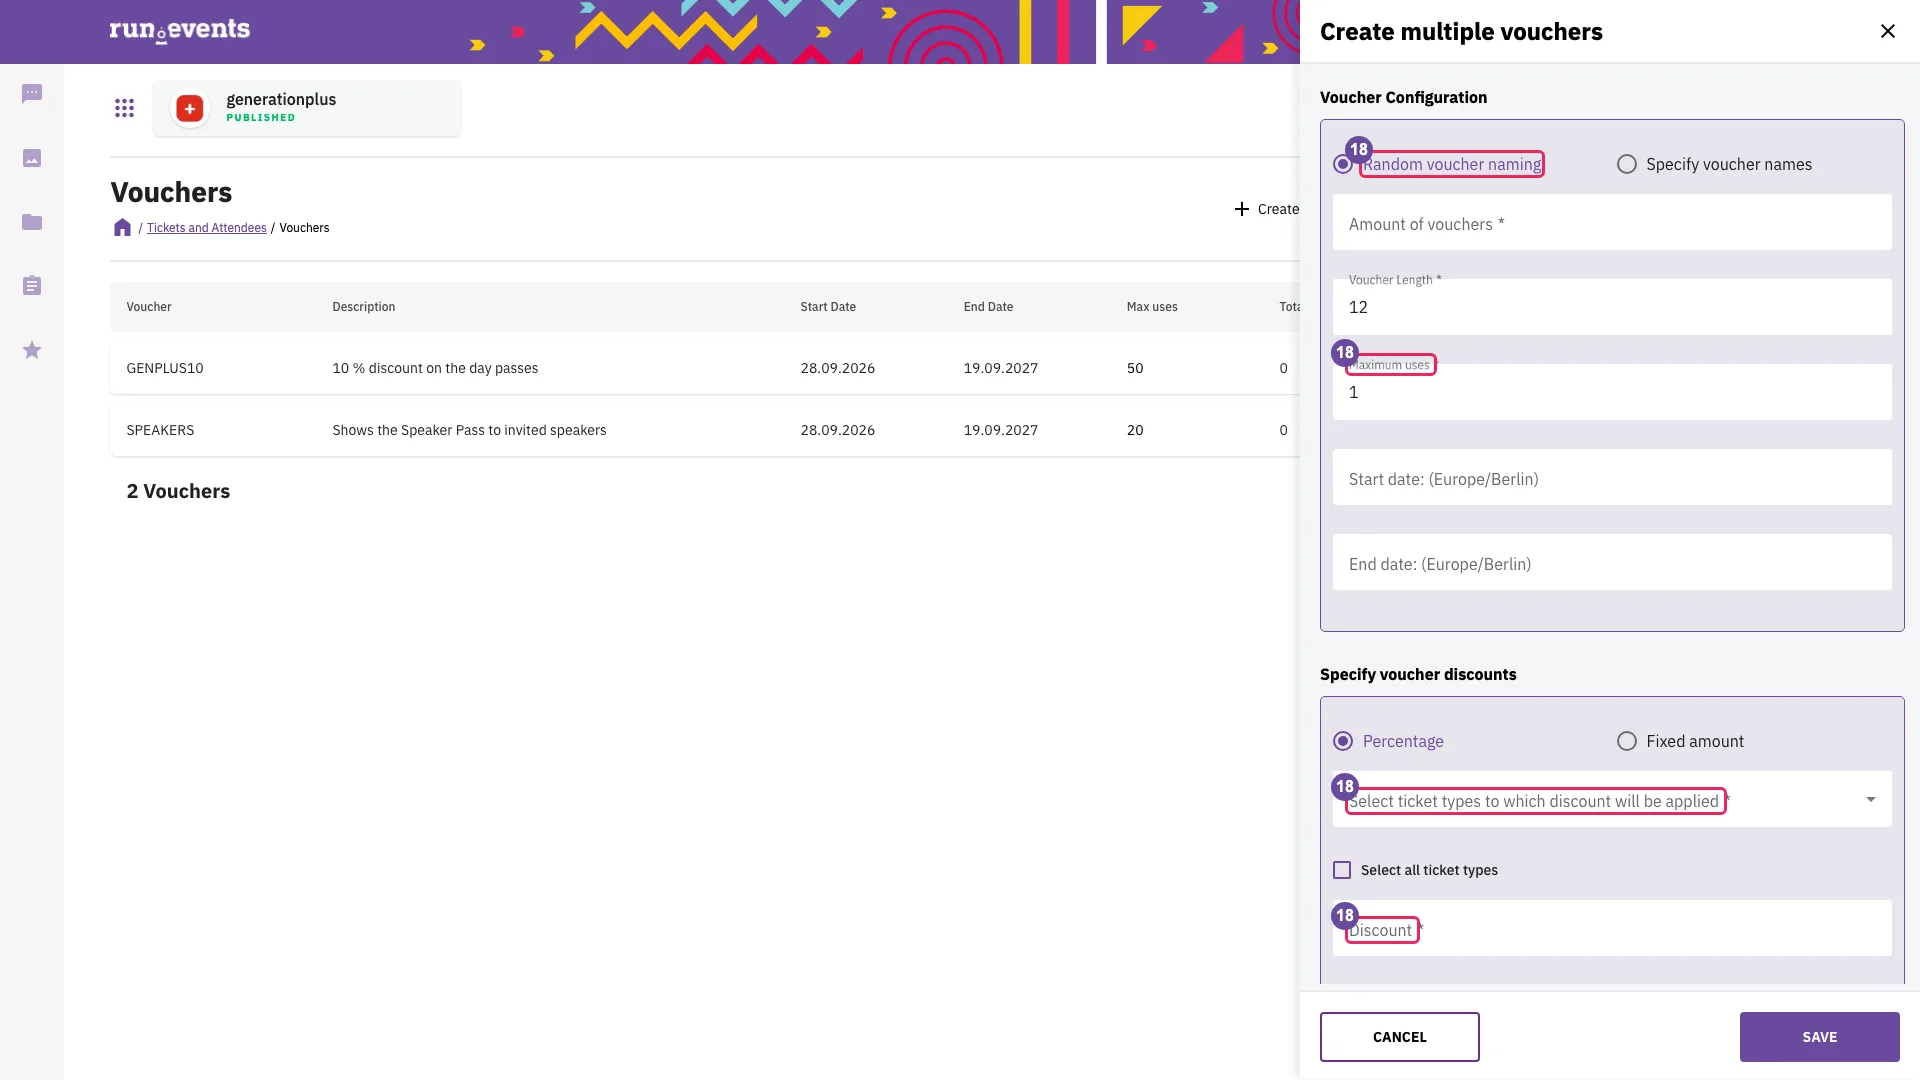
Create multiple vouchers
Lists and the buyer's view
- 19The Tickets list
Under Manage, click Tickets, then Search.
Each row shows a status block (assigned or unassigned; free, paid or unpaid), Purchased on, Ticket number, Purchased by, Customer, Assigned to, Addons, Badge and Price (net). The search offers, among other filters, Ticket Status and Vouchers.
The list opens on issued tickets only. Clear the status filter to see cancelled or refunded tickets.
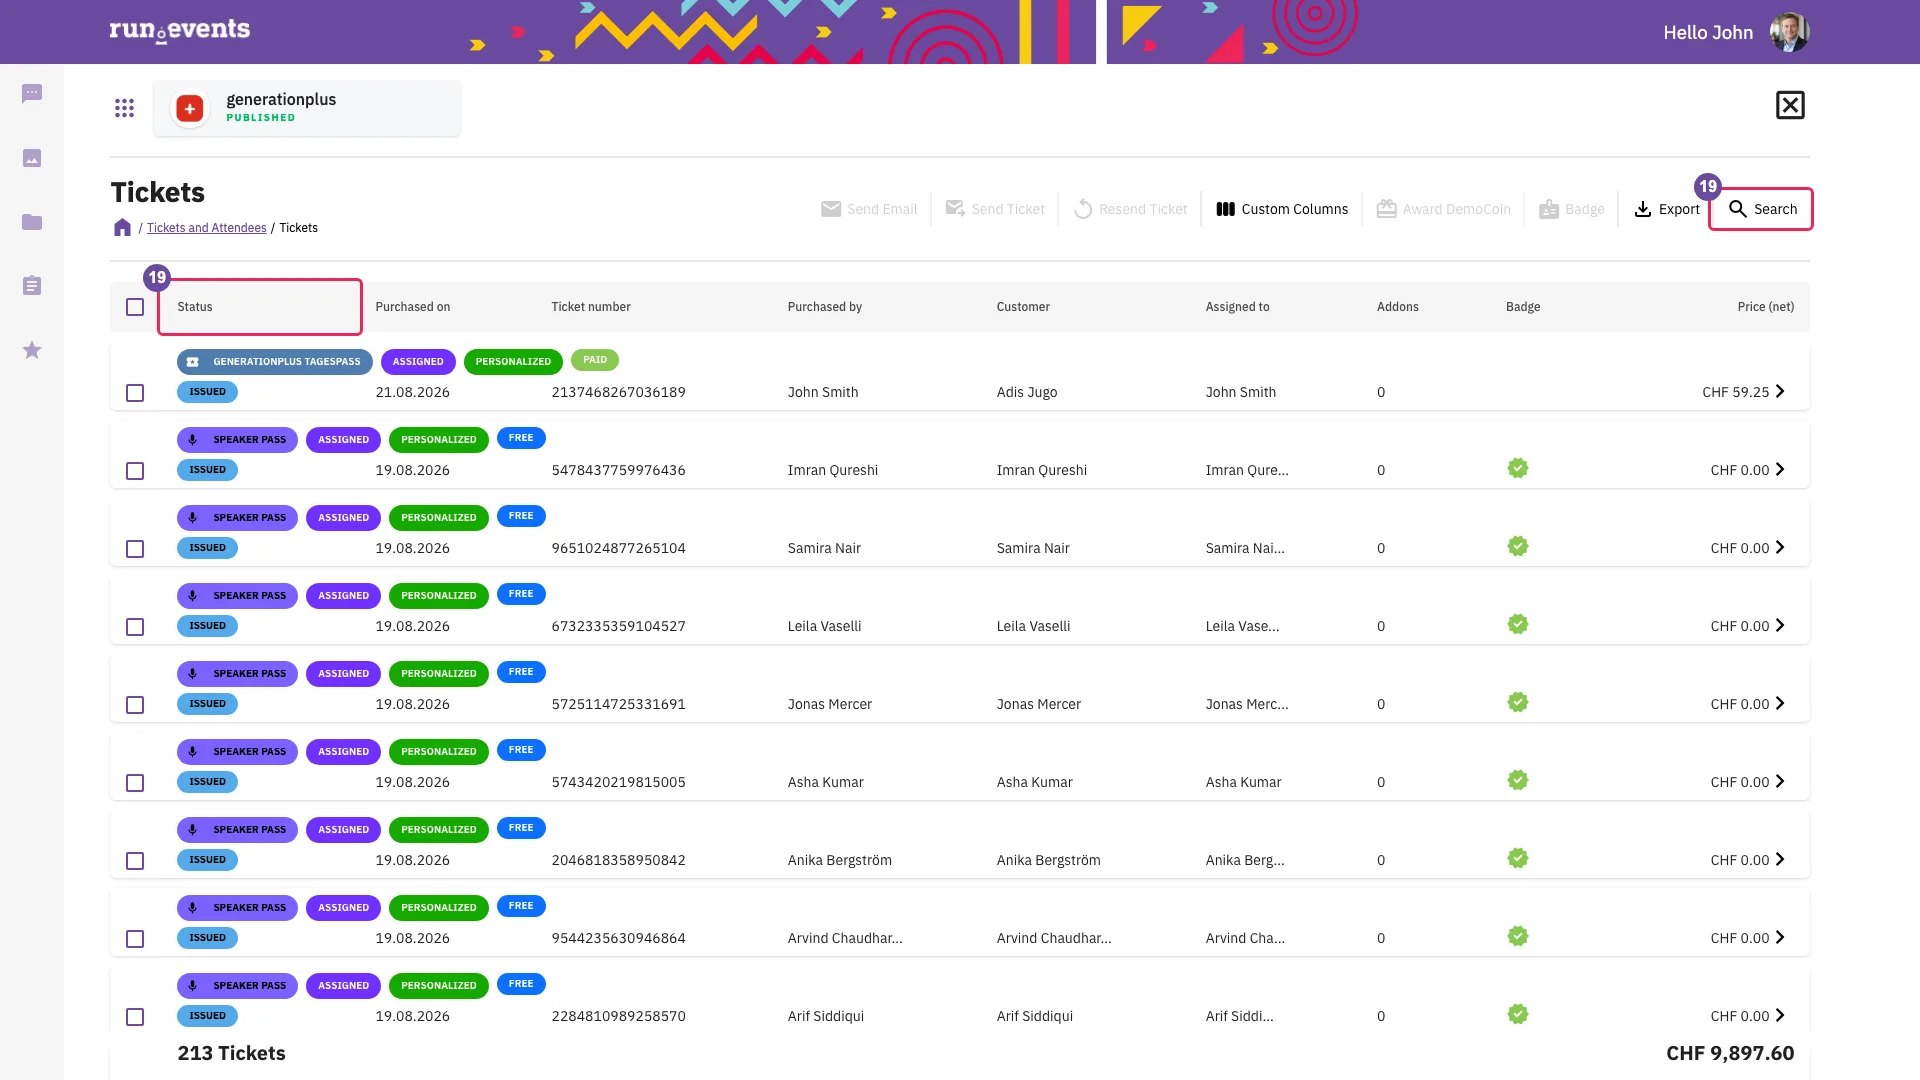
Tickets 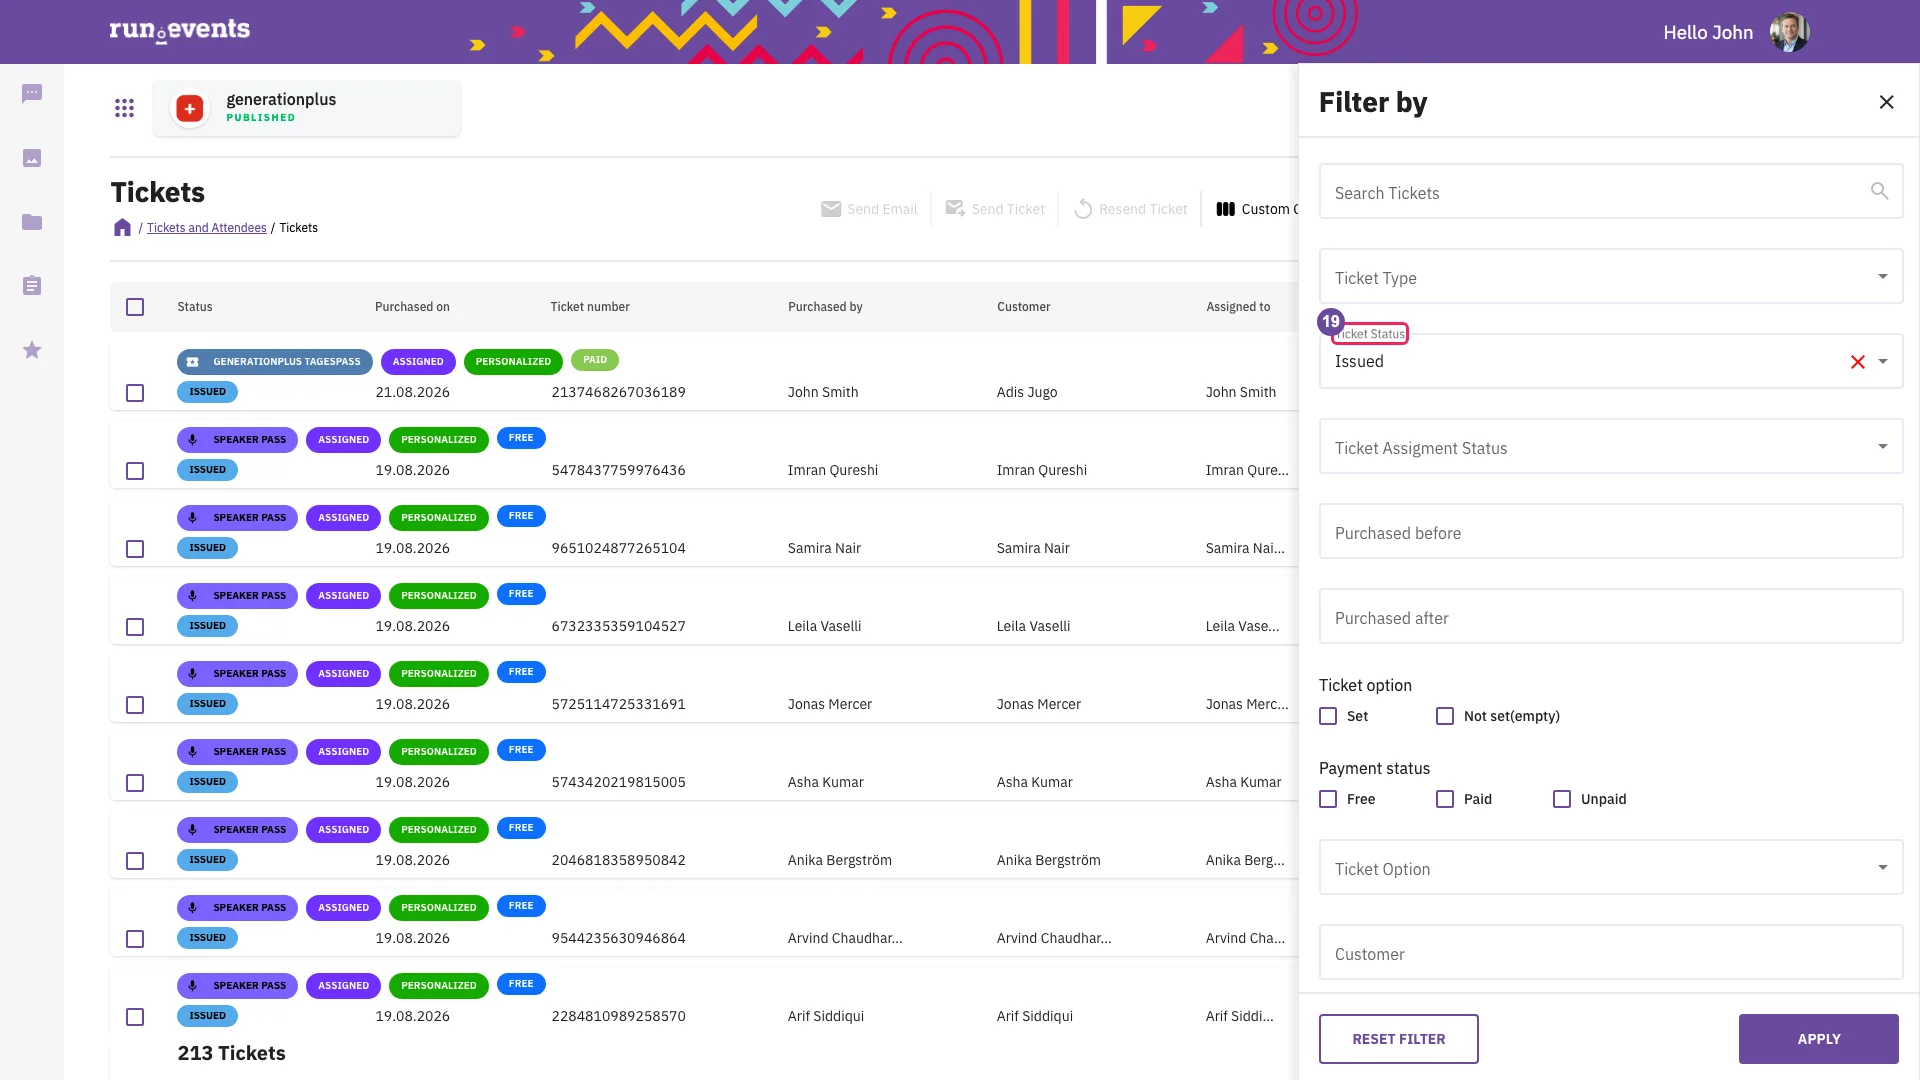
Searching tickets - 20A ticket
Click a ticket row.
The ticket opens with the tabs Ticket, Add-Ons, Documents, Badges and Orders. Look at Vouchers used: and at the net price, the tax and the gross price.
One ticket shows its buyer, its assignee, its add-ons, options and documents. Badges is shown only to users with the badge permission.
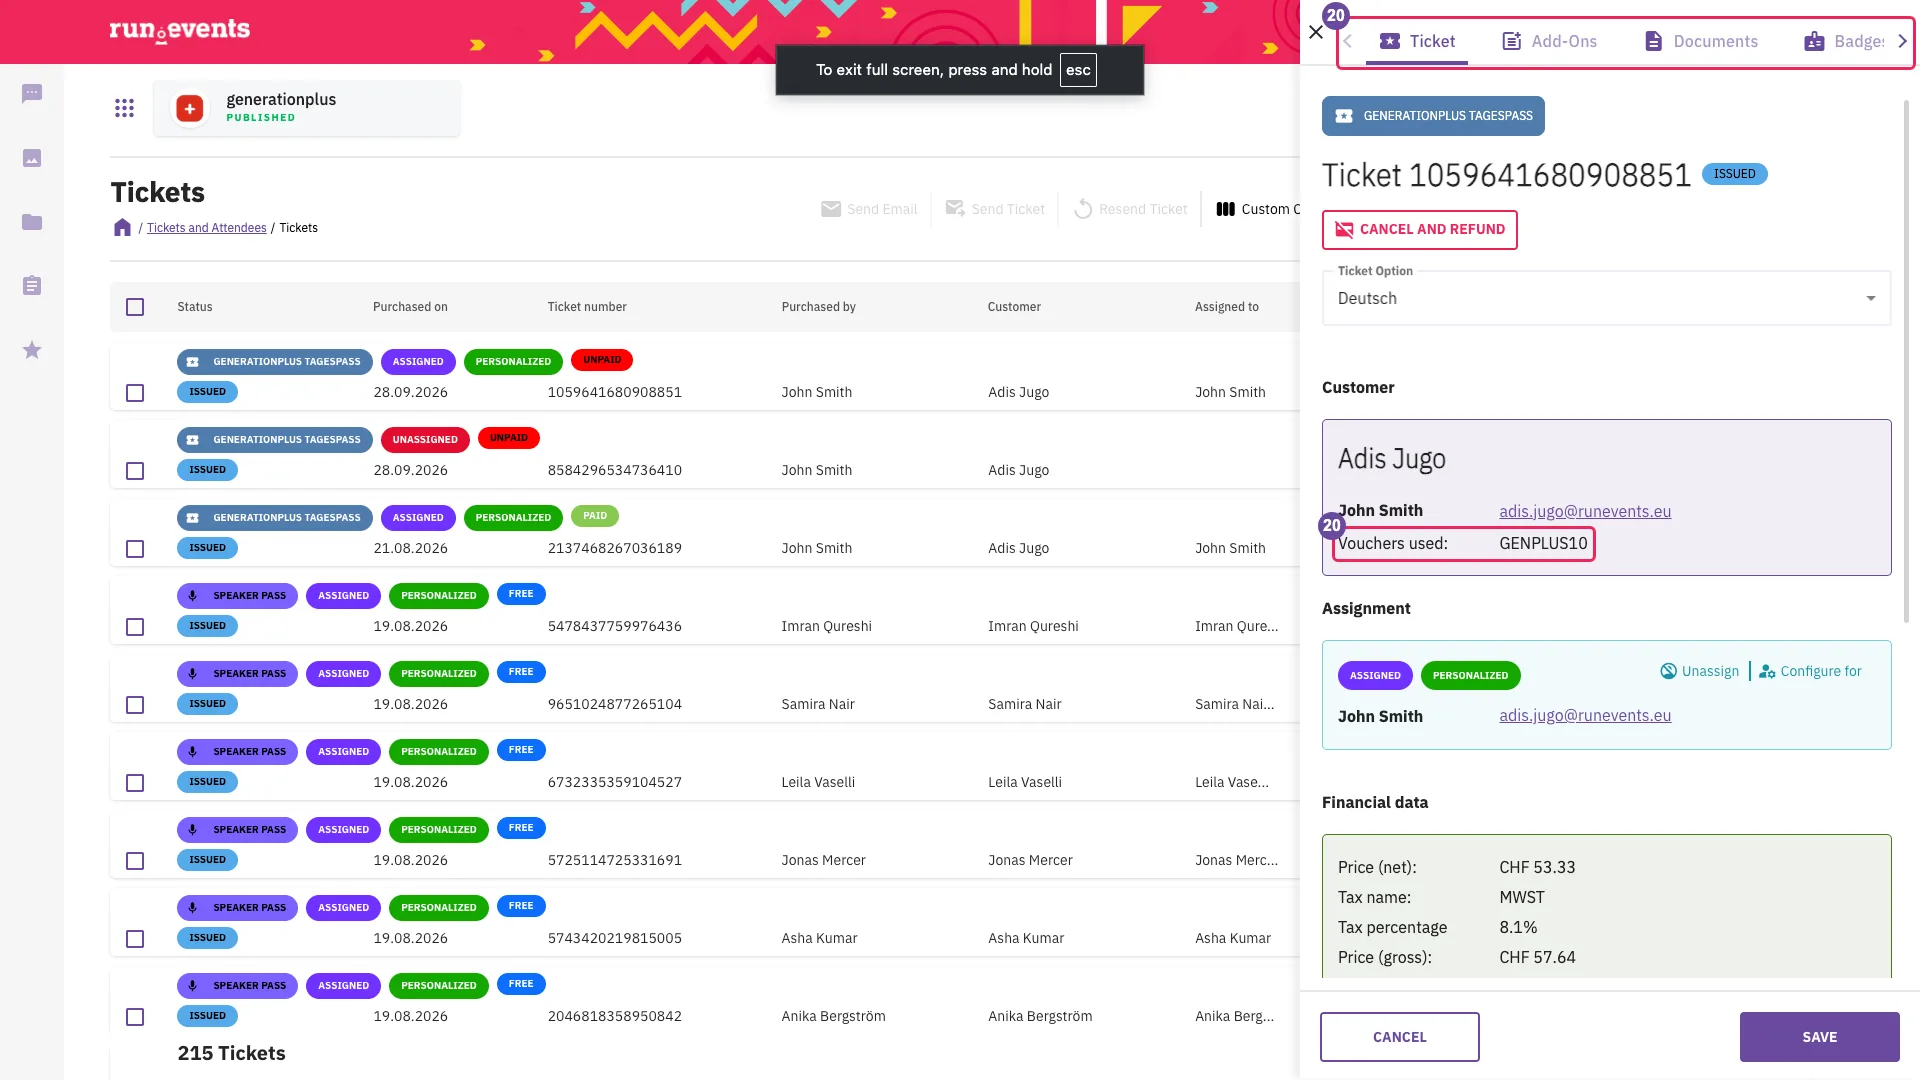
A ticket - 21Attendees, Customers, Options and Addons
Under Manage, open Attendees, Customers, Options and Addons in turn.
- Attendees shows one panel per person, with company, tickets and Insights.
- Customers shows Type, Name, Orders, Tickets and Amount.
- Options and Addons show one row per chosen option or sold add-on, with its Ticket Number.
Each list answers a different question. A person appears in Attendees only once a ticket is assigned to them.
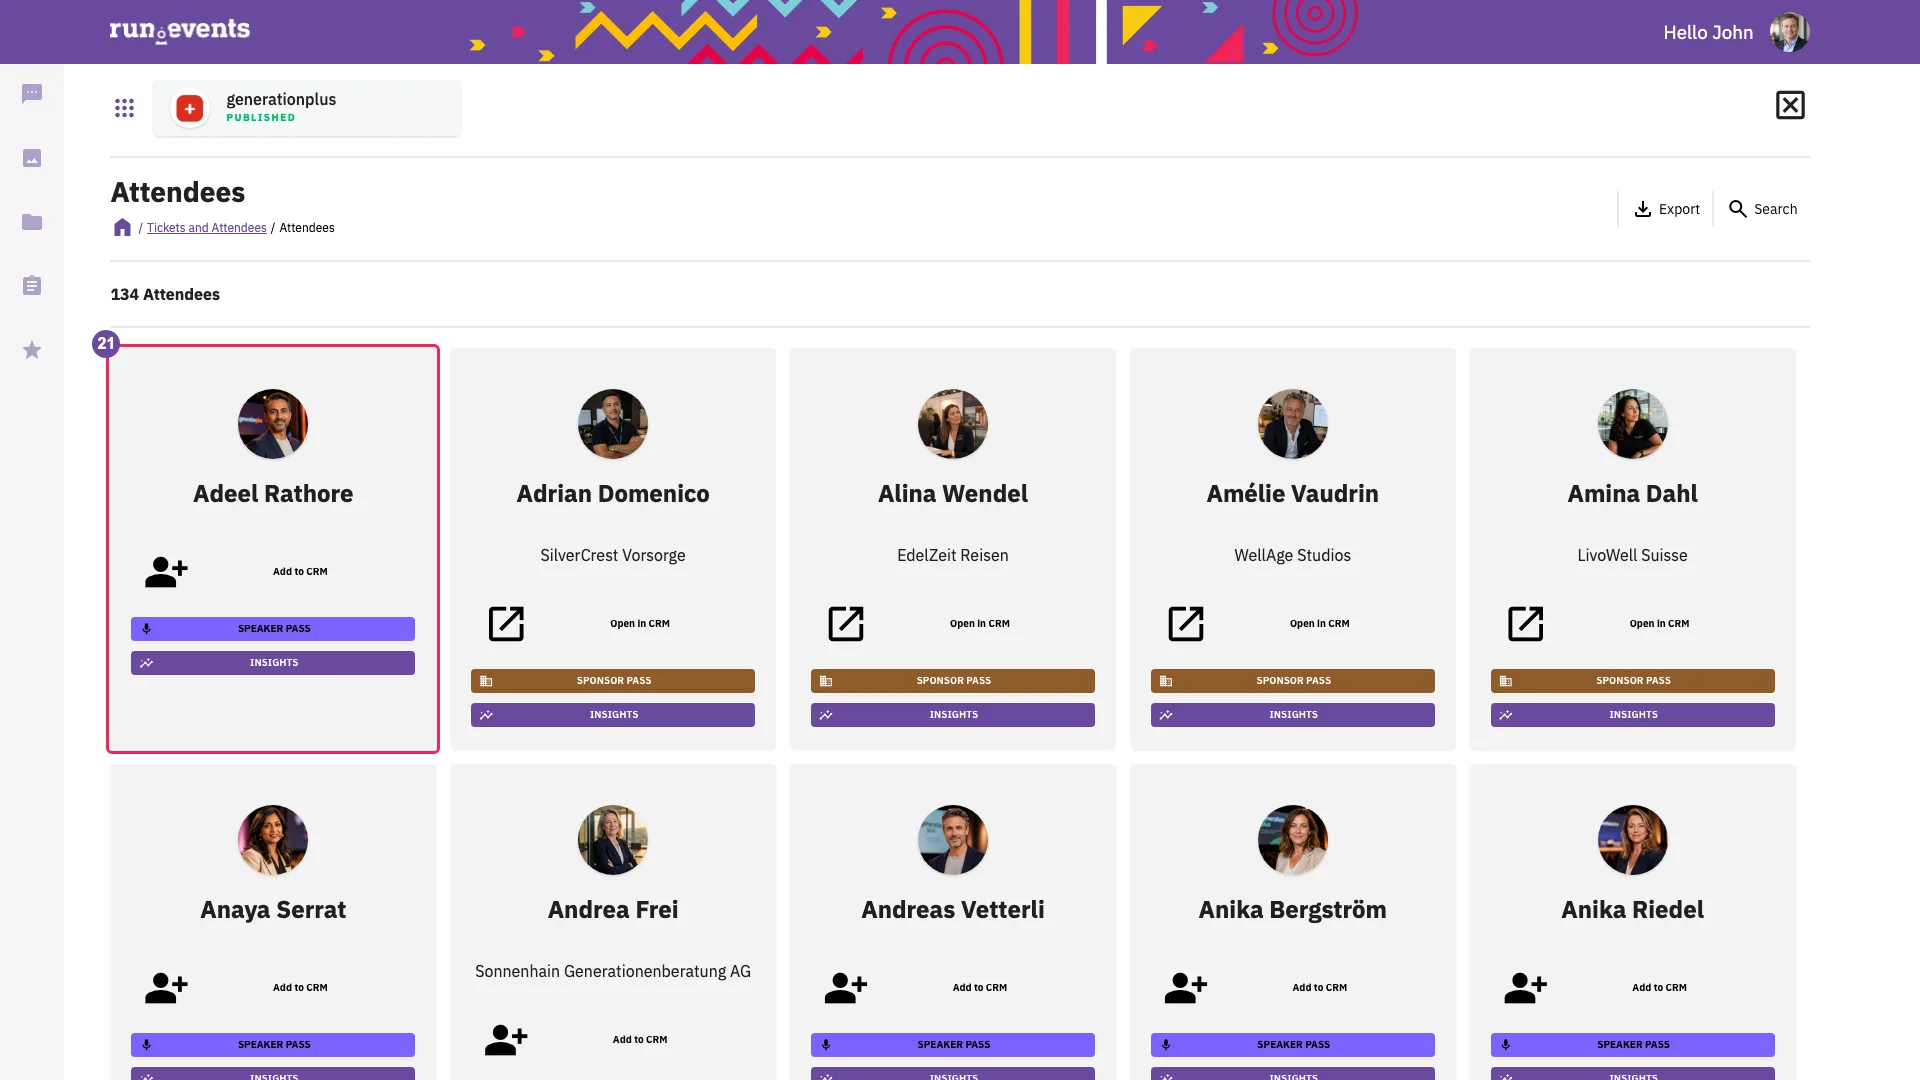
Attendees 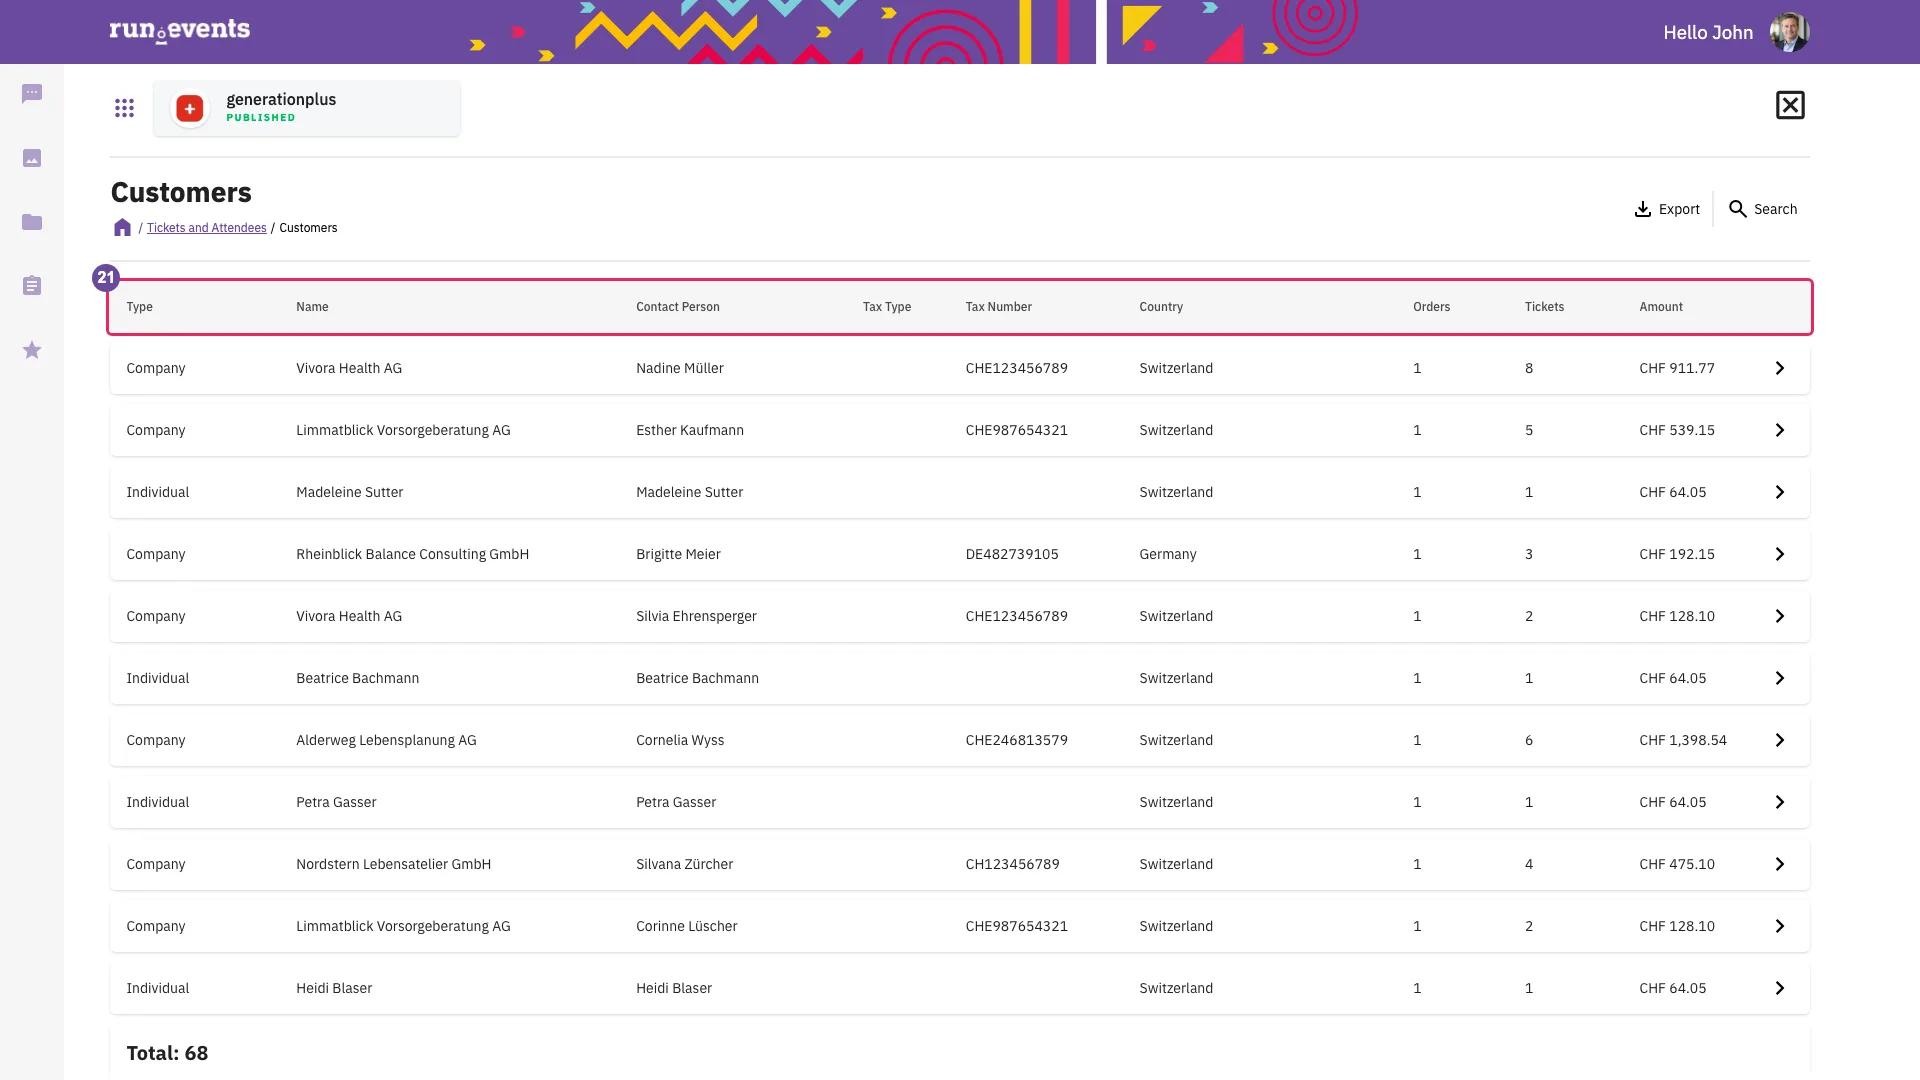
Customers 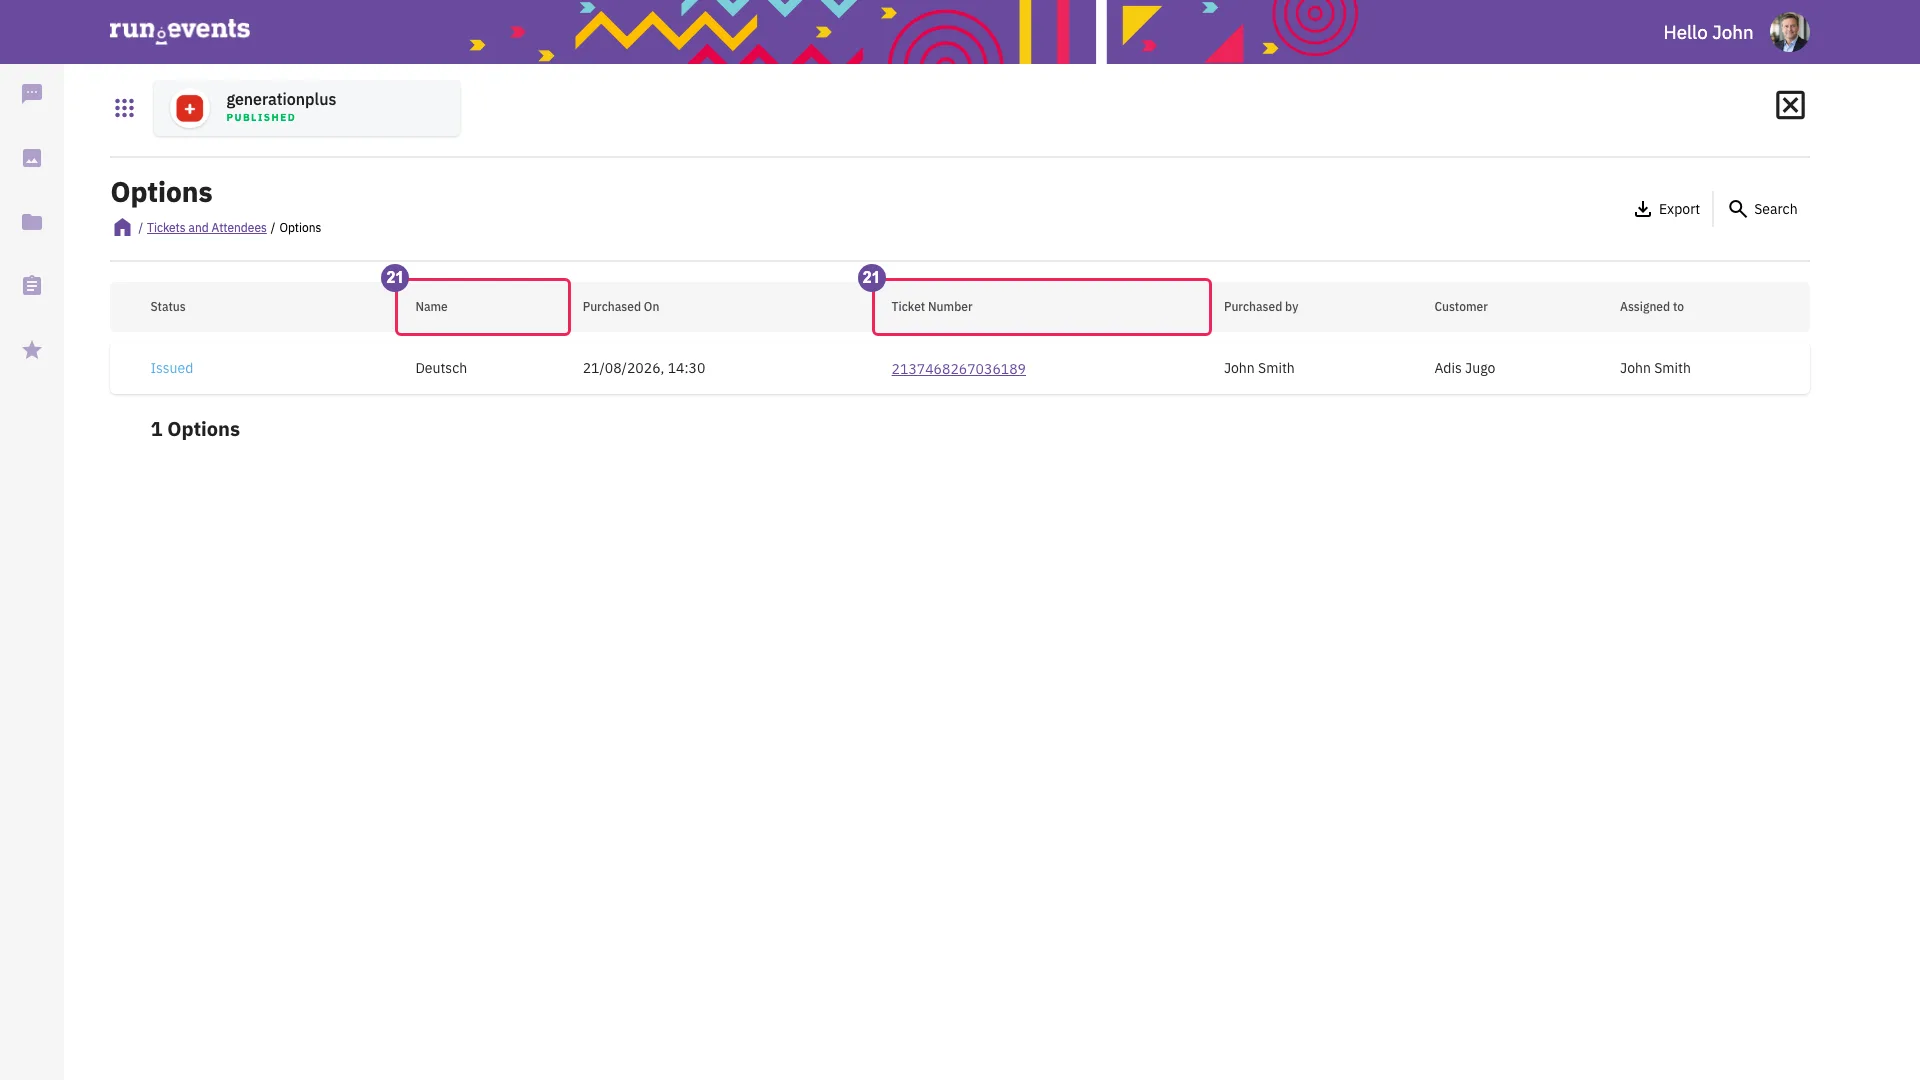
Options - 22The buyer's view
In the event portal, open
e.runevents.net/{event}/checkout.The side panel Add Tickets holds Apply voucher:, the ticket entries with their prices including tax and a counter each, and Add Selected Tickets.
A code is applied only by clicking the check icon next to the field. Enter does nothing.
- An unknown or expired code clears the field without a message, but the checkout keeps the typed code as its active code. If the buyer continues, Place Order fails with "We are sorry, but the voucher is not valid anymore, and it has not been applied.", and the checkout returns to the first step. Apply the correct code, or clear the code with the cancel icon next to the field or by reloading the page.
- While a code is applied, each ticket counter stops at the code's remaining uses.
- Adding
?voucher=CODEto the address applies a code directly. - An event that cannot sell shows "THIS EVENT IS NOT SELLING TICKETS".
The buyer's view
Exercises
All exercises use your training event from module 1. It must have been created with Charging for tickets in the first step of the wizard, with the default tax from the wizard, and end at least two weeks from today. As its creator, you are its Event Manager.
Your event already holds the ticket type Finance test from module 3, and usually also Training registration from module 2. Both are still on sale, so exercise 1 deactivates them first; the checkout then lists only what this module creates. If you skip exercise 1, do it before any other exercise.
Exercises 2 to 5 are four registration scenarios. Exercises 2, 3, 4 and 6 use Conference Pass from exercise 1; exercise 6 also uses the early bird from exercise 2.
Set every start date to yesterday. The ticket list in the organizer portal compares sales dates with UTC, and during summer time the checkout compares them with the time zone's standard time. A start of "now" can therefore show Deactivated, or be missing from the checkout, for up to two hours.
Exercise 18 min
Goal
Clear the checkout of earlier test ticket types, configure a paid ticket type, and see the tabs that appear after the first save.
Starting state
Your training event from module 1. The ticket types it received in modules 2 and 3 are still on sale.
Tasks
- 1
Open Tickets And Attendees → Configure → Ticket Configuration. For each ticket type from earlier modules that your event has (Training registration, Finance test), click its edit icon, untick Active and click Save. Do not delete them.
- 2
Choose Create new → Ticket Type.
- 3
Ticket name: Conference Pass. Description: Two conference days. Pricing type: Paid ticket. Regular price without tax: 200. Ticket for the following attendee types: Participant.
- 4
Total numbers of available tickets of this type: 100. Maximum per order: 5. Sales start date: yesterday. Leave Sales end date: as proposed.
- 5
Choose a colour and an icon, then click Add.
Done when
- The Ticket Types list shows Conference Pass with Active, Paid ticket, Participant, 200 and 0 sold, and the earlier ticket types show Deactivated.
- The form of Conference Pass shows the tabs Custom Fields, Pricing, Add-Ons & Options and Badges.
Exercise 210 min
Goal
Configure an early-bird price that vouchers cannot reduce, and a 20 % voucher that applies after the early bird.
Starting state
Conference Pass from exercise 1 (regular price 200, sales start yesterday).
Tasks
- 1
Open Conference Pass → Pricing → Add price. Price rule name: Early bird. Price Start Date: the earliest date the hint offers. Price End Date: seven days from today. Price without tax: 150. Untick Allow Vouchers. Click Save.
- 2
Click Add price again. Price rule name: Late. Price Start Date: exactly the early bird's end. Price End Date: the latest date the hint offers. Any price. Click Save, read the message, then click Cancel.
- 3
Open Configure → Vouchers → Create a new voucher. Voucher: SAVE20. Description: Newsletter. Maximum uses: 50. Start date: yesterday. Switch on Use for discounts only, then click Save. The form moves to Discounts by itself.
- 4
Click Create a new discount. Choose Percentage, select Conference Pass and enter Amount 20. Click Save.
- 5
Write down the net price a buyer with SAVE20 pays for one Conference Pass today, and in eight days.
Done when
- Prices shows Early bird at 150 with its dates.
- The Late period was refused.
- SAVE20 has one discount card with Conference Pass.
- Both prices are written down.
Exercise 314 min
Goal
Sell a free ticket only to holders of a code, and find the order in the lists.
Starting state
Your training event with Conference Pass from exercise 1.
Tasks
- 1
Choose Create new → Ticket Type. Ticket name: Community. Pricing type: Free ticket. Ticket for the following attendee types: Participant. Total numbers of available tickets of this type: 20. Maximum per order: 1. Sales start date: yesterday. Untick These tickets are publicly visible… and watch the voucher checkbox. Click Add.
- 2
Open Vouchers → Create a new voucher. Voucher: COMMUNITY. Description: Community partners. Maximum uses: 20. Start date: yesterday. Switch on Reveal or hide tickets, then click Save. The form moves to Reveals by itself.
- 3
In Reveals, switch on Community and Conference Pass.
If your event cannot sell yet, stop after this task (about 5 minutes) and follow your trainer's demonstration of tasks 4 to 7. You are done when Community is saved with its visibility checkbox unticked, and COMMUNITY has its Community and Conference Pass toggles on in Reveals.
- 4
Open your event's checkout in the event portal and note which tickets are listed. Type COMMUNITY into Apply voucher:, click the check icon, and note the list again.
- 5
Add one Community ticket only, click Add Selected Tickets and Place Order, and complete the buyer details.
- 6
If the ticket is not assigned yet, assign it to yourself on your event's tickets page (module 1).
- 7
In the organizer portal:
- Open Tickets → Search, choose COMMUNITY under Vouchers, and open the ticket.
- Look at Vouchers used: and at the tab Orders.
- Open Customers and Attendees.
- Open Vouchers and look at the COMMUNITY row.
Done when
- Without the code, Community is not listed. With COMMUNITY applied, only Community and Conference Pass are listed.
- The order needed no payment.
- The ticket shows "Vouchers used: COMMUNITY", and its Orders tab lists the Community order.
- After assignment, your panel in Attendees shows the Community ticket.
- COMMUNITY shows Total uses 1 and no delete icon.
Exercise 412 min
Goal
Sell a workshop day as an add-on on Conference Pass, with a required choice between two workshops.
Starting state
Conference Pass from exercise 1.
Tasks
- 1
Choose Create new → Ticket Option. Ticket option name: Workshop A – Morning. Maximum: 15. Availability start date: yesterday. Active on. Click Add. Repeat for Workshop B – Afternoon.
- 2
Choose Create new → Ticket Add-On. Ticket add-on name: Workshop day. Pricing type: Paid ticket. Regular price without tax: 80. Add-on for following ticket types: Conference Pass. Total numbers of available tickets of this type: 30. Maximum per order: 1. Sales start date: yesterday. Leave These add-ons are publicly visible… ticked. Click Add.
- 3
In the add-on, open Ticket Types & Options → Select additional Options for this Add-On. Tick both workshops, then click Save.
- 4
Switch on For this ticket / add-on the option selection is required.
- 5
Open Conference Pass → Add-Ons & Options. Find Workshop day and leave its mandatory switch off.
- 6
Write down how many Workshop day add-ons one order with three Conference Passes can hold.
Done when
- The Workshop day card shows "1 Ticket types".
- Each workshop option card shows "1 Add-Ons".
- Conference Pass shows "1 Add-Ons".
- The required switch is still on after the add-on is opened again.
- The answer to task 6 is written down.
Exercise 58 min
Goal
Combine an automatic quantity discount with a company voucher limited to five tickets, and predict the price.
Starting state
Your training event. This exercise creates its own ticket type.
Tasks
- 1
Choose Create new → Ticket Type. Ticket name: Team Pass. Pricing type: Paid ticket. Regular price without tax: 180. Ticket for the following attendee types: Participant. Total numbers of available tickets of this type: 50. Maximum per order: 10. Sales start date: yesterday. Click Add.
- 2
Open Pricing → Quantity Discounts → Add quantity discount. Minimum number of tickets: 5. Discount: 10. Untick Can be combined with vouchers. Click Save.
- 3
Open Vouchers → Create a new voucher. Voucher: TEAM-ACME. Description: ACME group booking. Maximum uses: 5. Start date: yesterday. Switch on Use for discounts, then click Save. Click Create a new discount, choose Percentage, select Team Pass, enter Amount 15 and click Save.
- 4
Write down the net price per Team Pass for:
- (a) five tickets without a code;
- (b) five tickets with TEAM-ACME;
- (c) five tickets with TEAM-ACME, after Can be combined with vouchers is switched on.
Then write down how many Team Passes one order with TEAM-ACME can hold at the discounted price.
Done when
- The quantity discount shows the minimum 5 and 10 %.
- TEAM-ACME has its discount card.
- The four answers are written down.
Exercise 64 min
Goal
Create ten single-use codes that make Conference Pass free, and predict their effect today.
Starting state
Conference Pass with the early bird from exercise 2.
Tasks
- 1
Open Vouchers → Create multiple vouchers. Choose Random voucher naming, Amount of vouchers 10, Voucher Length 8, Maximum uses 1, start date yesterday, Percentage, Conference Pass and Discount 100. Click Save.
- 2
Write down what a speaker pays for Conference Pass today with one of these codes, and what happens to the code.
Done when
- The message reports ten vouchers created.
- The count in the list footer has grown by ten.
- Both answers are written down.
Check questions
- A voucher has Reveal or hide tickets on, and only the hidden ticket type Student is toggled on. The event also sells a public Conference Pass. What does a buyer see after applying the code?
- Conference Pass costs 200 net. An early-bird period at 150 net runs today with Allow Vouchers off. VAT is 19 %. A buyer applies a 20 % voucher on Conference Pass. What is the gross price? What would it be if the period allowed vouchers?
- The add-on Gala dinner has Maximum per order: 2. A buyer puts three Conference Passes in the cart. How many dinners can the order hold?
- A voucher has Maximum uses 10 and discounts both Conference Pass and Gala dinner. One buyer orders four discounted tickets and two discounted dinners, then cancels one ticket. How many uses remain?
- To pause a campaign, an organizer switches Use for discounts off, saves, and switches it on again a week later. What does the voucher do now, and what should the organizer have done?
- A Speaker pass with the attendee type Speaker is publicly visible. Can an ordinary visitor buy it, and how would you restrict it?
Common mistakes
Add or Save does nothing. Maximum per order: is empty, or Minimum per order: is 0. The first field has no required marker. The message for the second field is attached to another field, so the field only turns red. Fill in Maximum per order: with a whole number of 1 or more; leave Minimum per order: empty or set it to 1 or more.
"Maximum purchase amount should be integer!" for a capacity of 0. The capacity must be 1 or more; the message is misleading.
A new ticket type shows Deactivated. Its sales start lies in the future, or it was set to "now" on a European event and the list compares with UTC. Set the start to yesterday.
An add-on is never offered. It is linked to no ticket type, it was duplicated (a duplicate loses the links), or it is not publicly visible. Fill in Add-on for following ticket types: and keep the add-on's visibility checkbox ticked.
A voucher is accepted, but nothing changes. There are three causes:
- Neither switch is on.
- Use for discounts is on, but the voucher has no discount.
- The discount is blocked, because the ticket type's voucher checkbox is off or the running price period has Allow Vouchers off.
The checkout shows the code as applied, without a struck-through price. A voucher with Reveal or hide tickets on never leaves the list unchanged (mistake 16).
Public tickets or add-ons vanish for code holders. Reveal or hide tickets is on, and only the hidden ticket type is toggled. Toggle every ticket type and add-on that code holders should see or be offered.
A discount does not unhide a hidden ticket. Only a toggle in Reveals does that.
Quantity discounts disappear during the early bird. A price period with Allow Vouchers off also stops quantity discounts.
"Dates can not be overlapping." Two price periods touch. Start the next period one minute later.
Discounts or reveals are lost. The voucher was saved with its switch off. Deleting a ticket type also silently removes it from every voucher.
Price periods and tax rules are lost. An existing paid ticket type was switched to Free ticket and back.
All holders must personalize their tickets again. The personalization or the work-information checkbox was newly ticked on a ticket type with issued tickets. This also invalidates print-at-home badges. Decide both checkboxes before the first sale.
Enter does nothing at the checkout, and a mistyped code fails later. Click the check icon.
- An unknown or expired code clears the field without a message, but the checkout keeps it as the active code.
- If the buyer continues, Place Order fails with "We are sorry, but the voucher is not valid anymore, and it has not been applied.", and the checkout returns to the first step.
- Apply the correct code, or clear it with the cancel icon next to the field or by reloading the page.
A test order is missing from the lists. Tickets opens on issued tickets only, and Attendees needs an assigned ticket.
Deleting fails after test orders. Deactivate instead of deleting.
- An option that was chosen in an order cannot be deleted.
- A ticket type whose tickets are all cancelled shows the delete icon, because nothing counts as sold, but the deletion fails.
- A ticket type with a quantity discount or linked badge designs can fail to delete with a general error message.
The ticket list is empty, or a public ticket disappears, after a code is applied. The voucher has Reveal or hide tickets on without toggles, or both switches were switched on for a discount voucher.
- Such a voucher shows only the toggled ticket types and add-ons, plus the public ticket types it discounts while vouchers are allowed.
- During an early bird with Allow Vouchers off, even the discounted ticket type disappears.
- Toggle what code holders should see, or save the voucher with the reveal switch off.
A code is used up although the buyers paid full price. Every ticket and add-on of a type the voucher discounts or reveals spends a use, even when no discount applied, for example during a price period with Allow Vouchers off. Do not hand out counted codes for use during such a period.